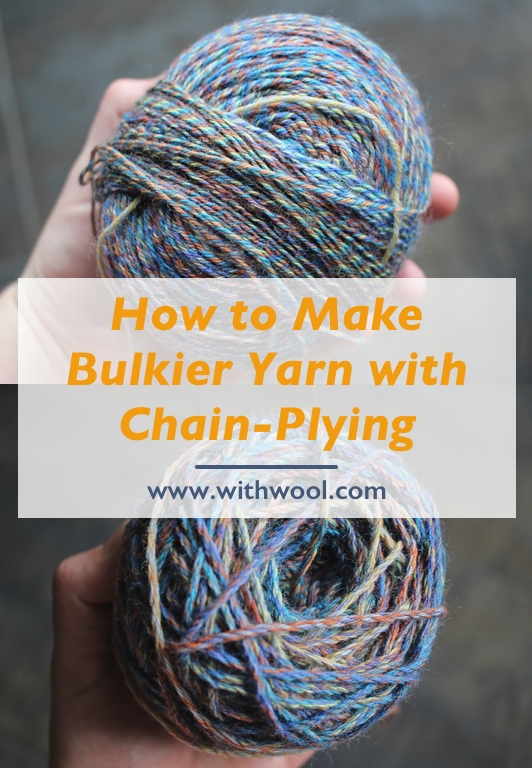
How to Make Bulkier Yarn with Chain-Plying

Yarn thinner than you like? Learn how to chain-ply commercial yarn into the thicker, bulkier yarn you want!  #spinning #knitting | withwool.com

Way back when, at least on the internet time-scale, I wrote a tutorial about how to chain-ply commercial yarn to manipulate color which you can read here. The variegated yarn I used flashed and pooled no matter how I knit with it, and chain-plying it created a beautiful marled yarn. Then I used that yarn for an easy (and free) hat pattern. Now I’m chain-plying another commercial yarn because I wanted to make it bulkier. So consider this part 2.

Yarn thinner than you like? Learn how to chain-ply commercial yarn into the thicker, bulkier yarn you want!  #spinning #knitting | withwool.com

I’ve had the Opal Sock Yarn Bunny by Susan B. Anderson pattern in my Ravelry queue for months. It’s so cute, but I have had the hardest time picking out the right yarn. I wanted something durable and hard-wearing because I like to imagine that this would become THE favorite toy; however, I also wanted the colors to be something whimsical and fun. Turns out durable and whimsical is a hard combination to find.  I eventually found a ball of sock yarn hiding in the deep stash. Seriously, I bought this ball of Zitron Trekking XXL 9 years ago on vacation. I almost turned it into a pair of socks, but didn’t want to knit socks on size 0 needles.

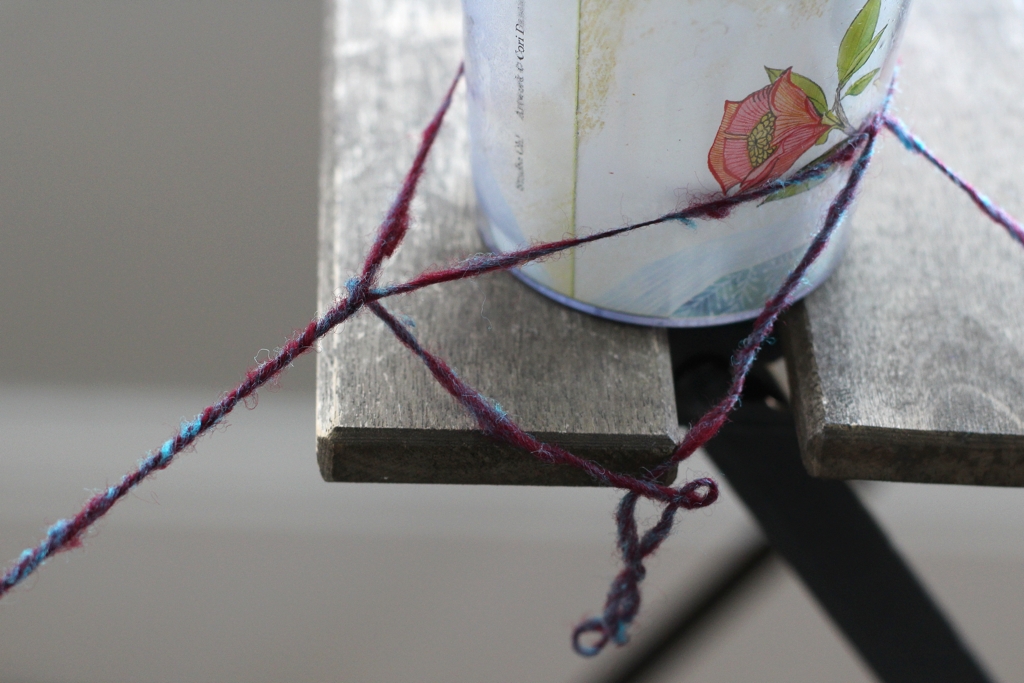
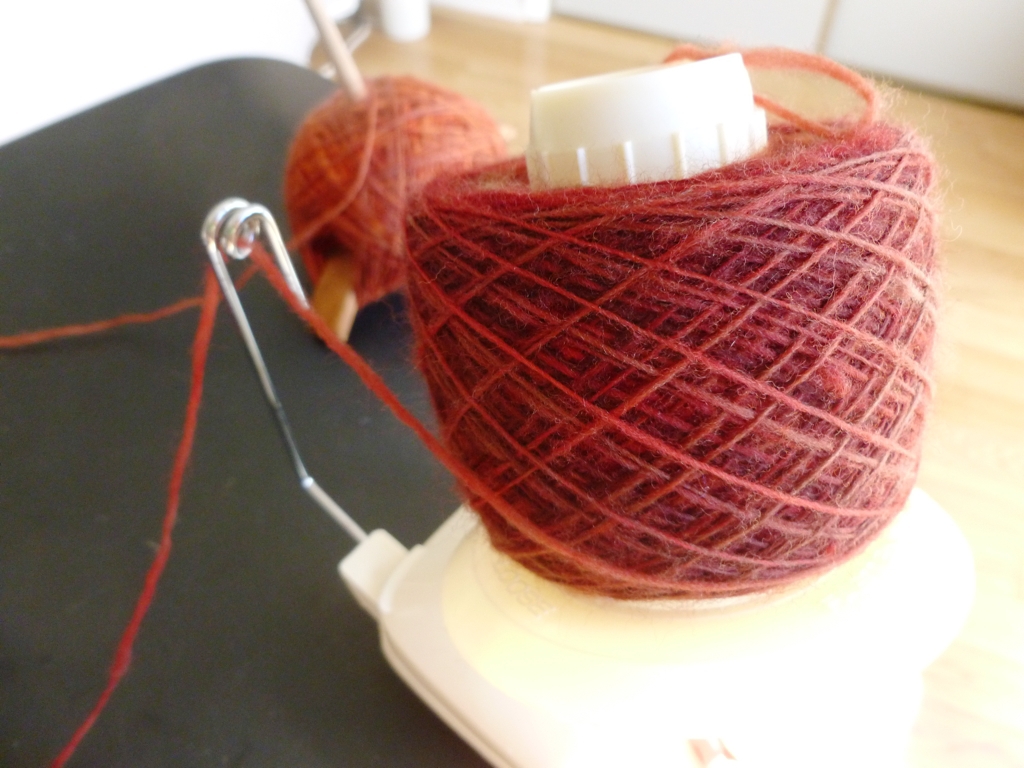
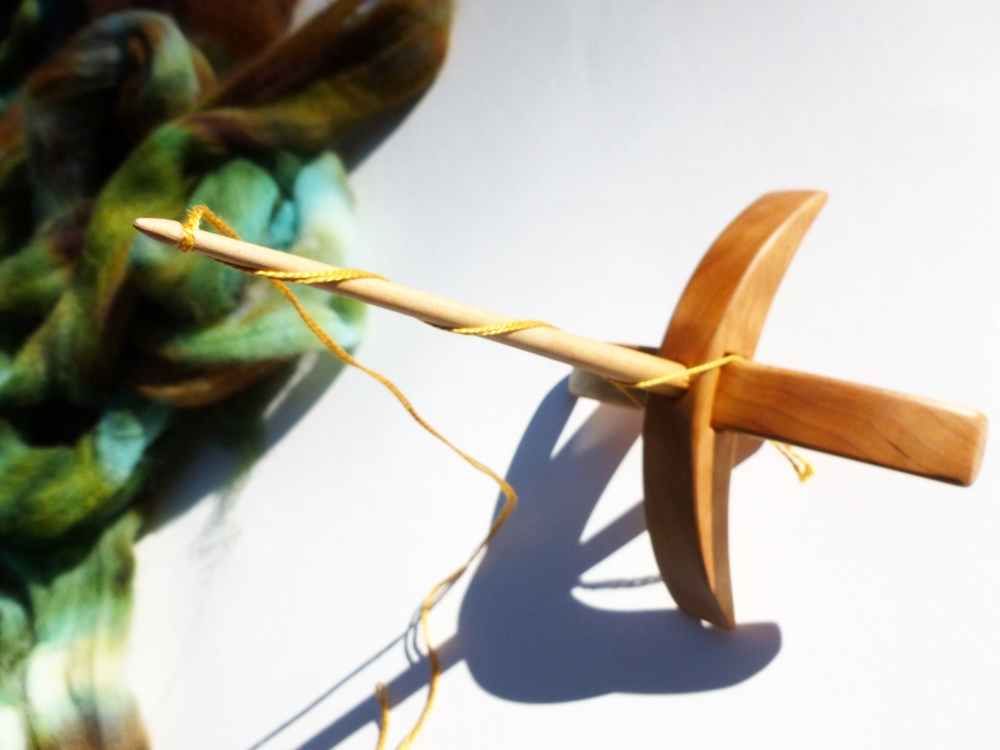
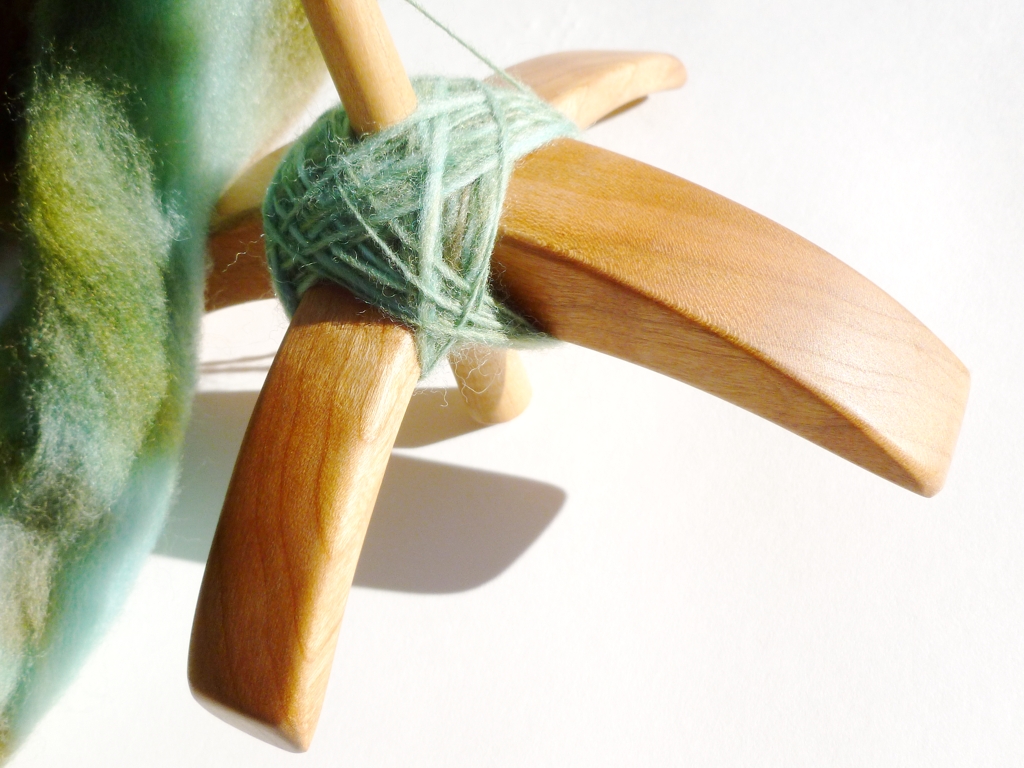
I don’t want to knit this totally adorable bunny on size 0 needles either. Plus, I’d like the bunny to be a little bigger than the 6.5” height stated in the pattern. Chain-plying to the rescue. The first and most important step to chain-plying any commercial yarn is to figure out how the yarn is plied. Commercial yarn is generally plied to the left, AKA with S twist, so you’ll need to chain-ply to the right, AKA with Z twist. If you’re plying a single ply yarn, you’ll probably be plying to the left. You can find the full tutorial for how to chain-ply commercial yarn here.

Yarn thinner than you like? Learn how to chain-ply commercial yarn into the thicker, bulkier yarn you want!  #spinning #knitting | withwool.com

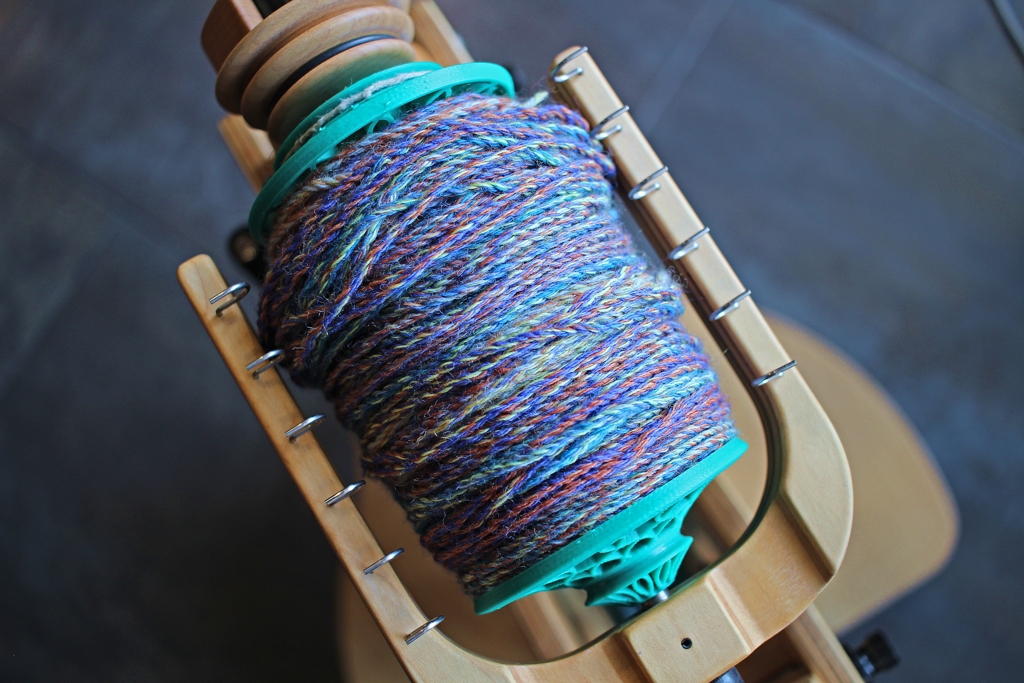
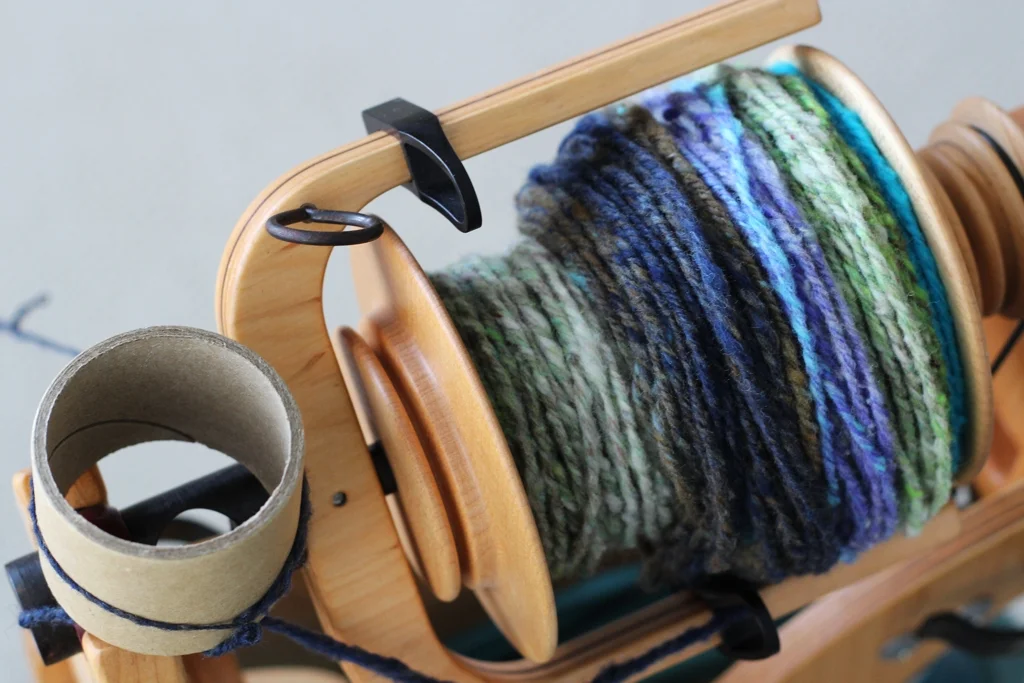
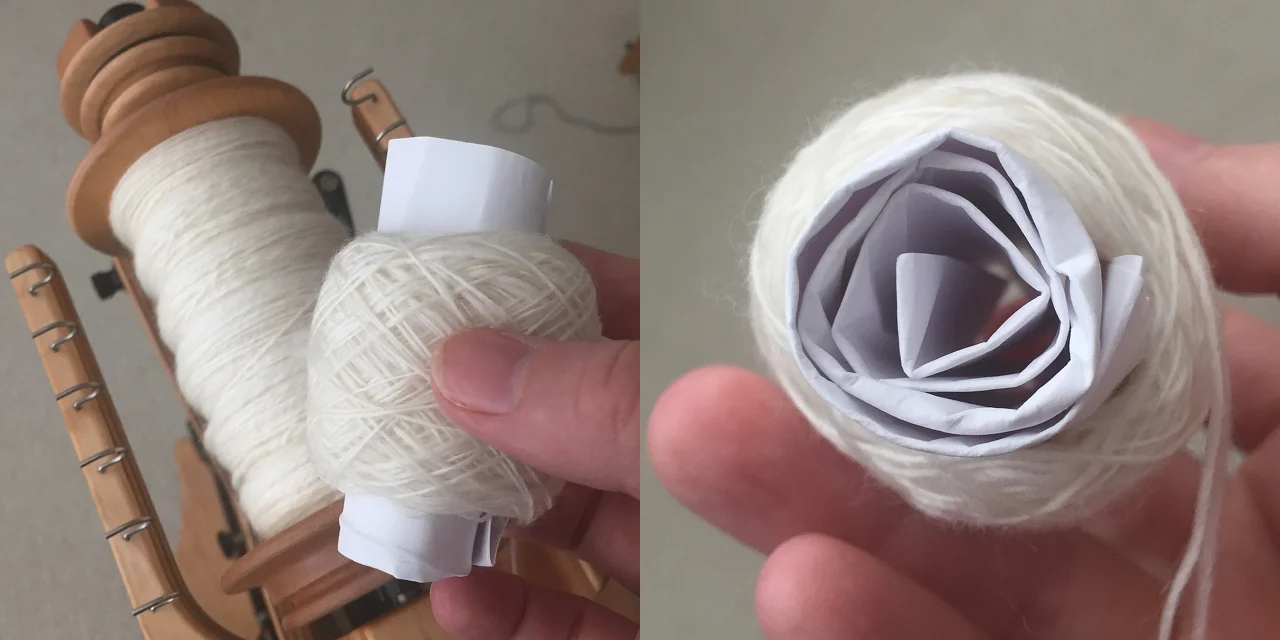
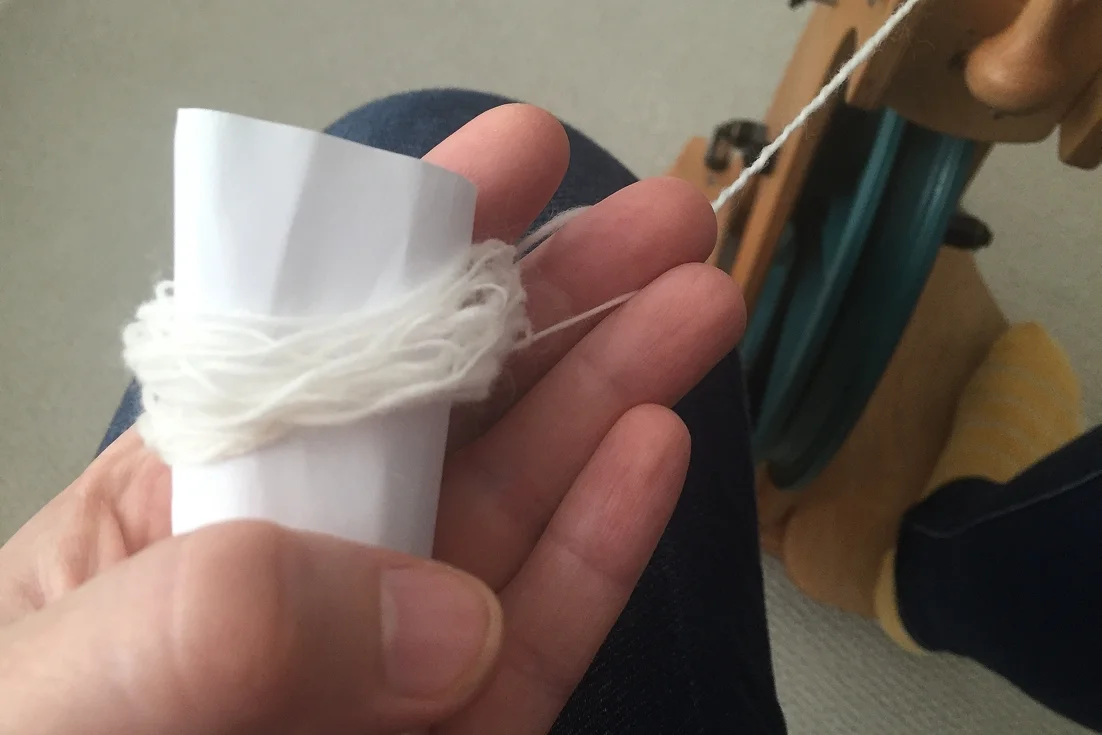
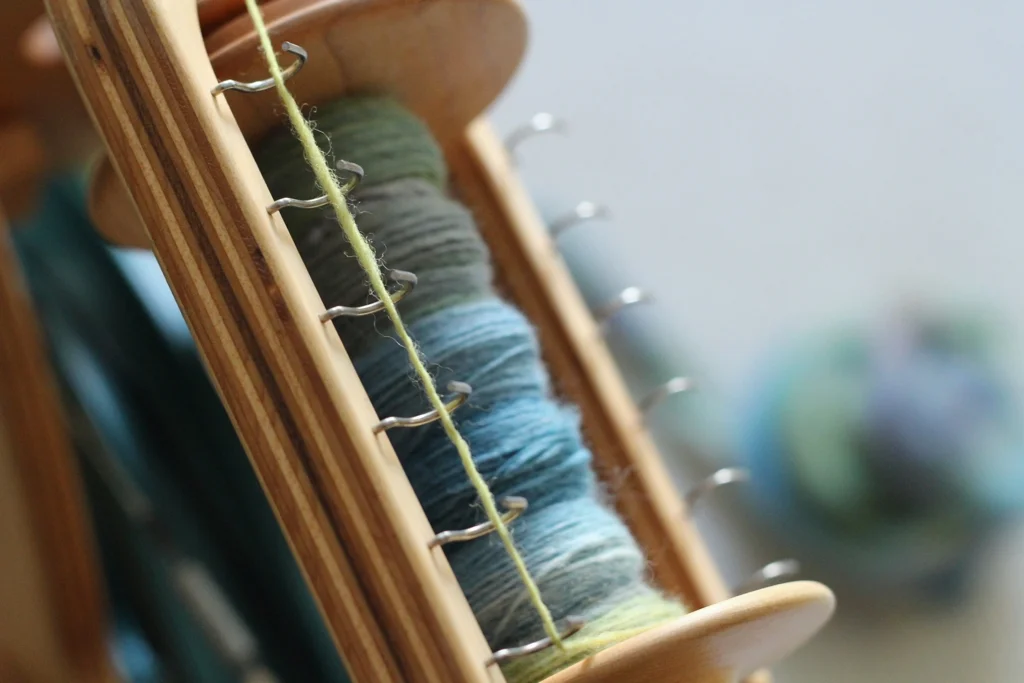
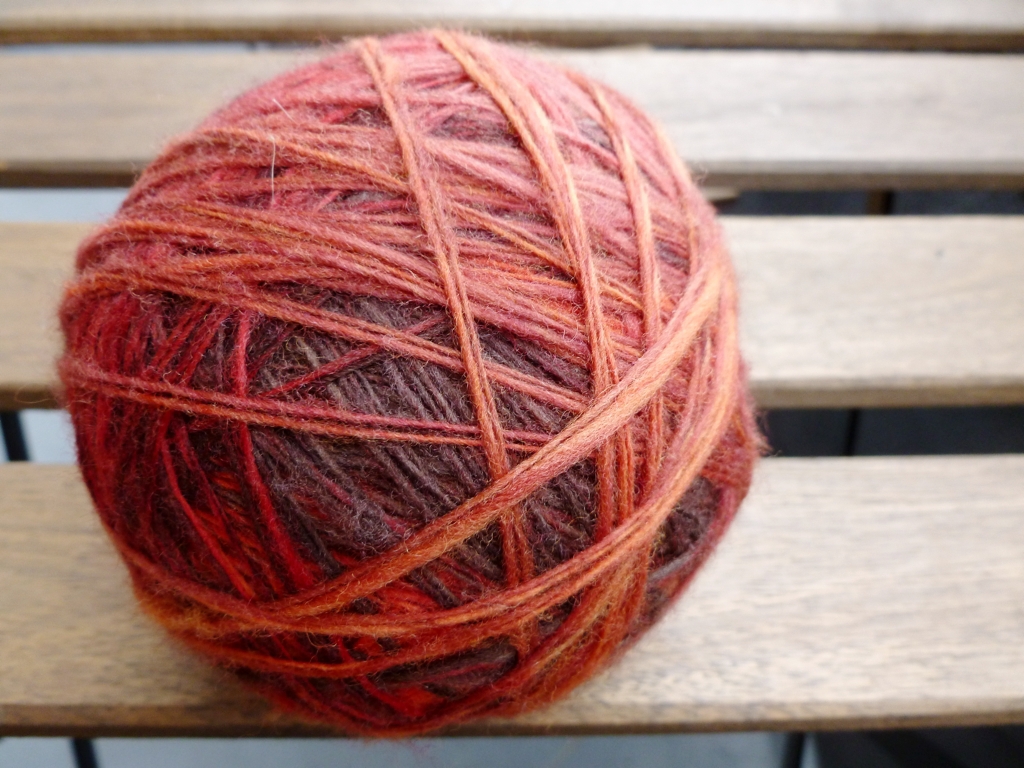
And a helpful tip: If you’re working on a wheel, and have the option, use a jumbo bobbin. The plied yarn will take up more space than you expect. I plied 459 yards of fingering weight yarn and just barely got it all on to a single regular bobbin.

Yarn thinner than you like? Learn how to chain-ply commercial yarn into the thicker, bulkier yarn you want!  #spinning #knitting | withwool.com

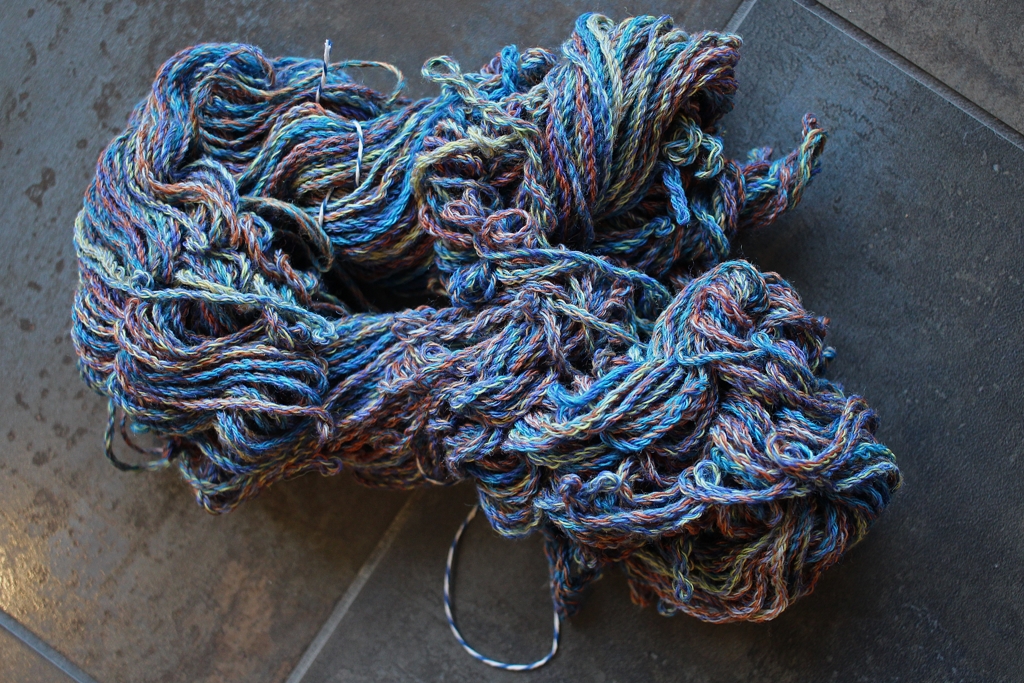
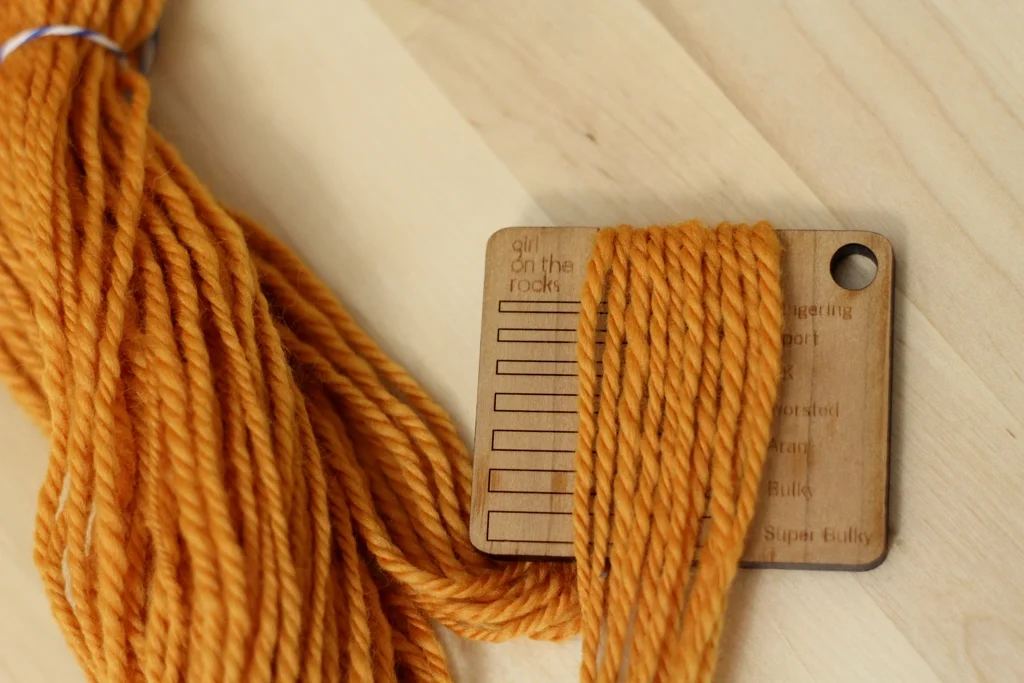
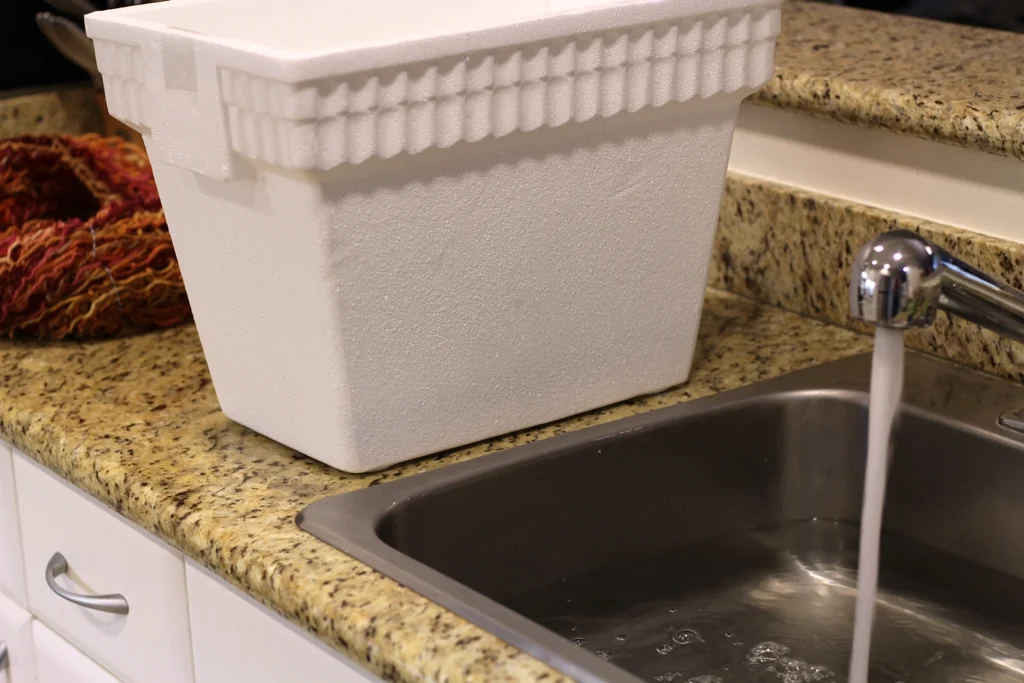
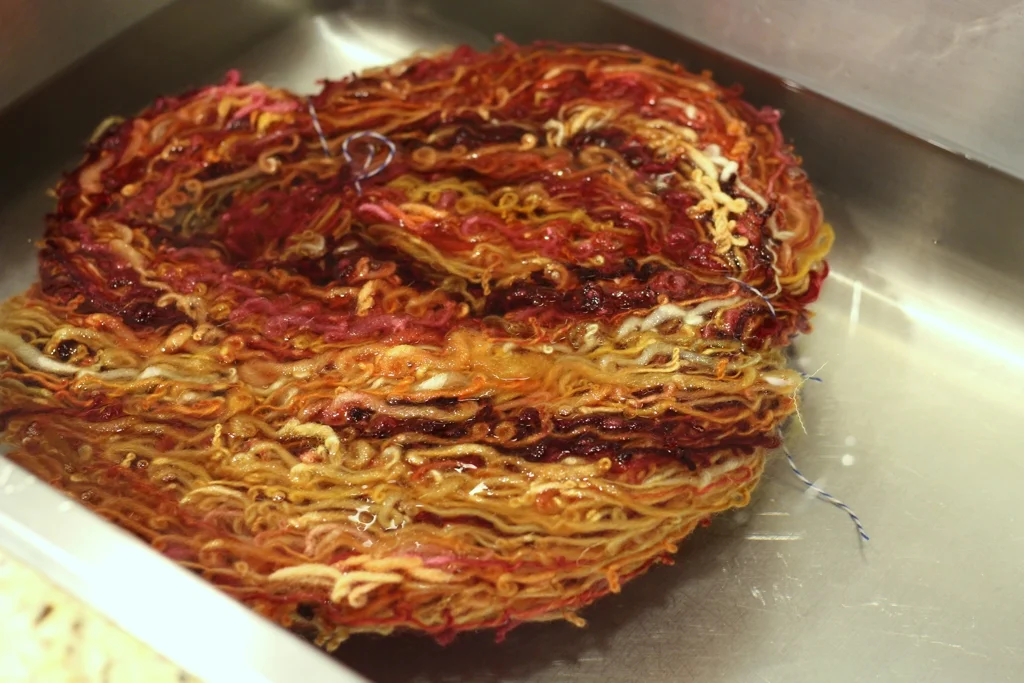
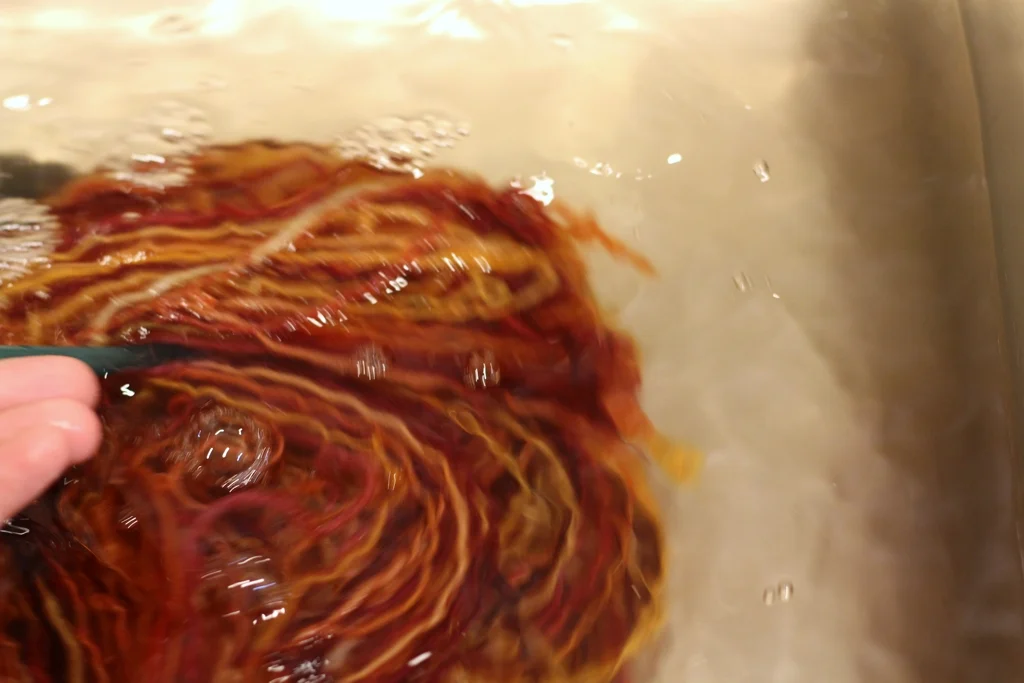
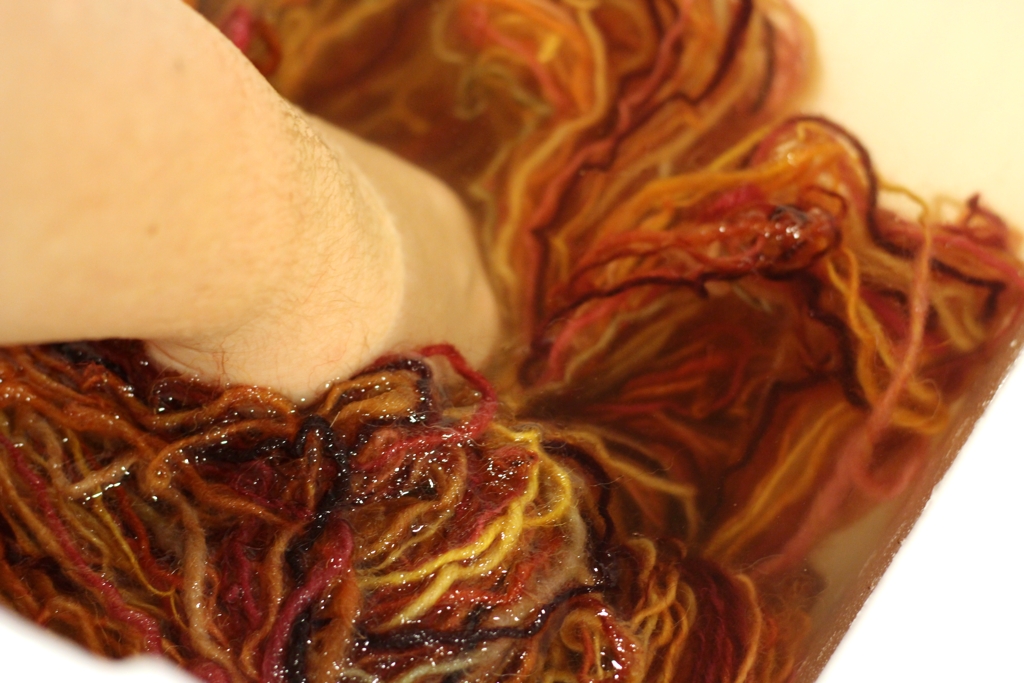
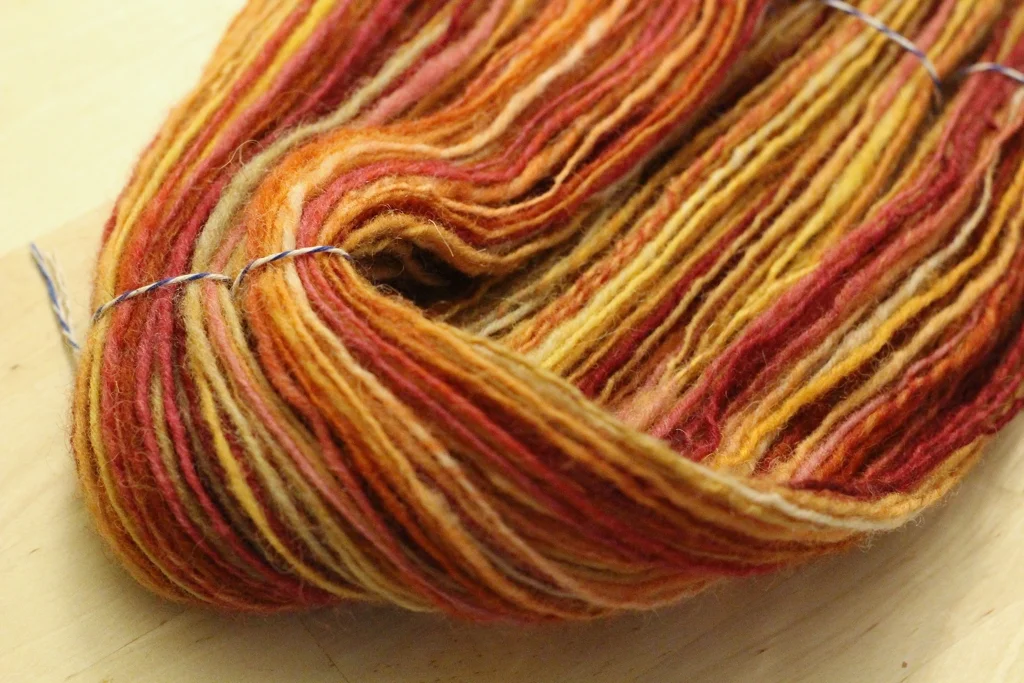
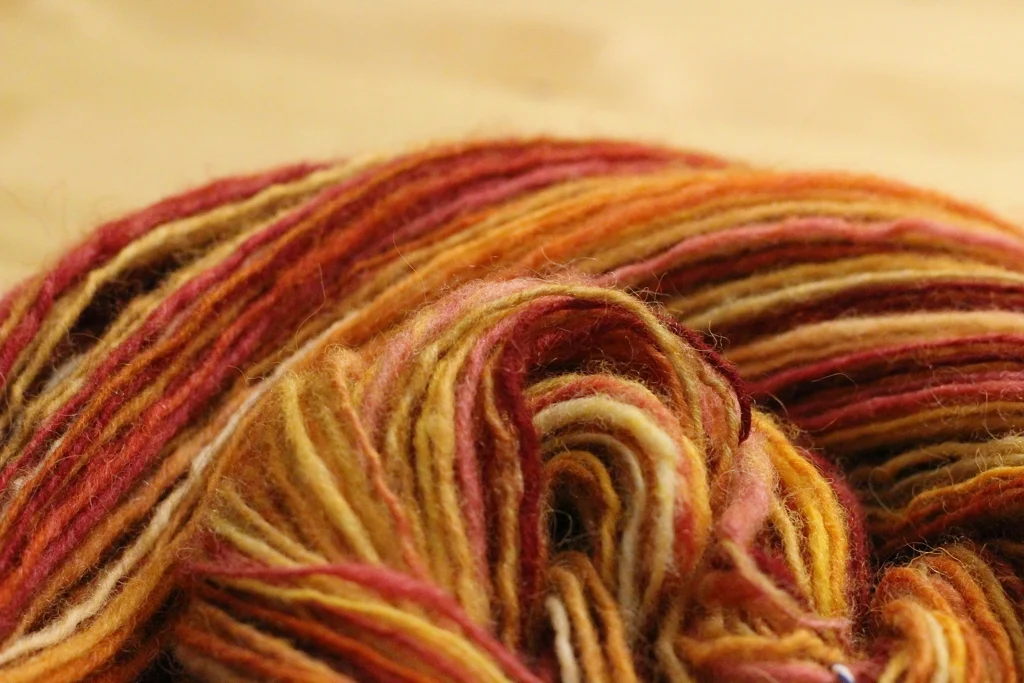
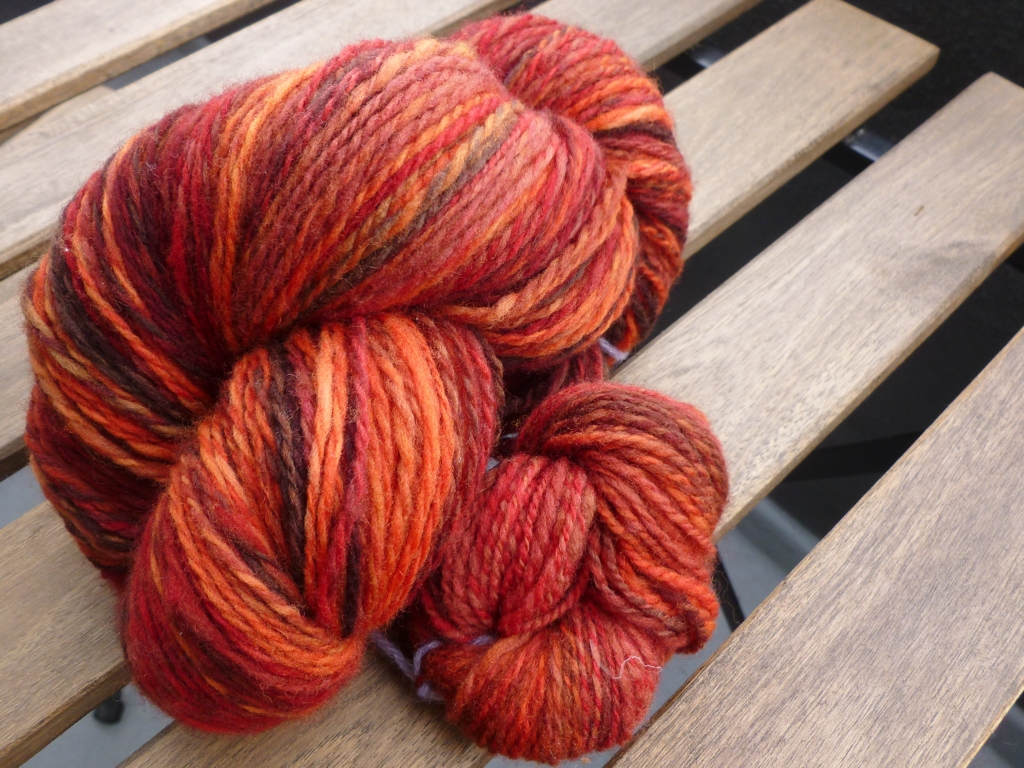
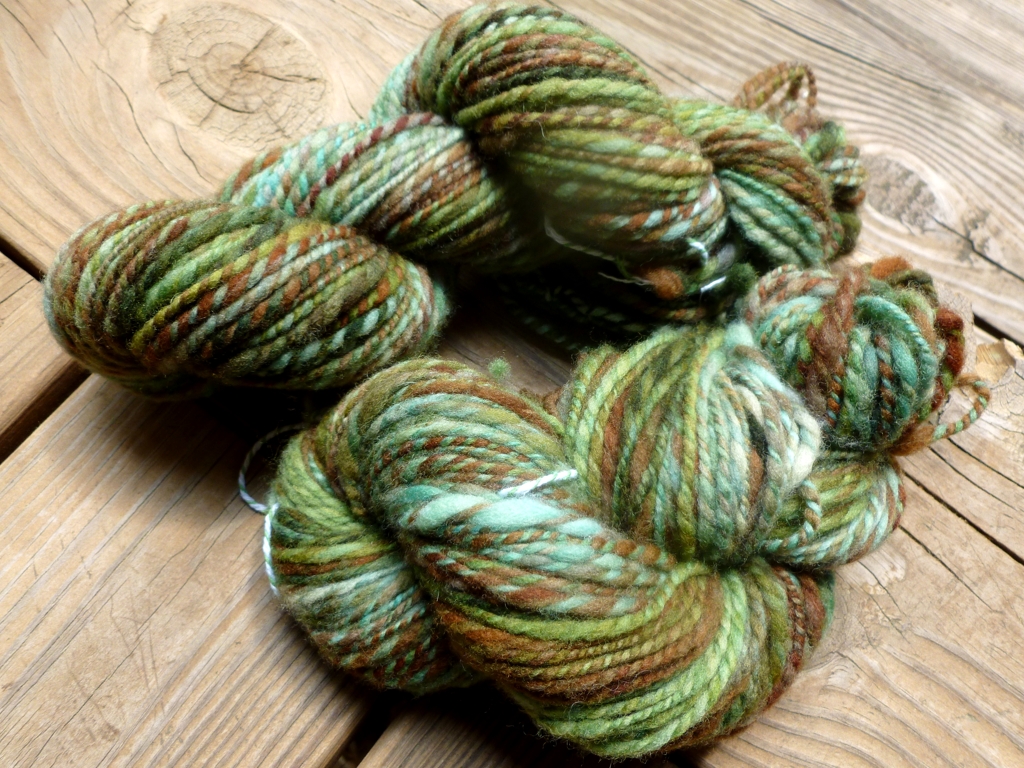
I finished the newly-plied yarn just like any other handspun yarn because you still have to set the twist. I skeined it and measured the results before dunking it in a bath. I had about 137 yards of worsted weight yarn. Then I soaked it in cool soapy water for 20 minutes, rolled it in a towel to squeeze out extra water, and snapped it out my arms to even out the twist one last time. Then I let it dry over night.

Yarn thinner than you like? Learn how to chain-ply commercial yarn into the thicker, bulkier yarn you want!  #spinning #knitting | withwool.com

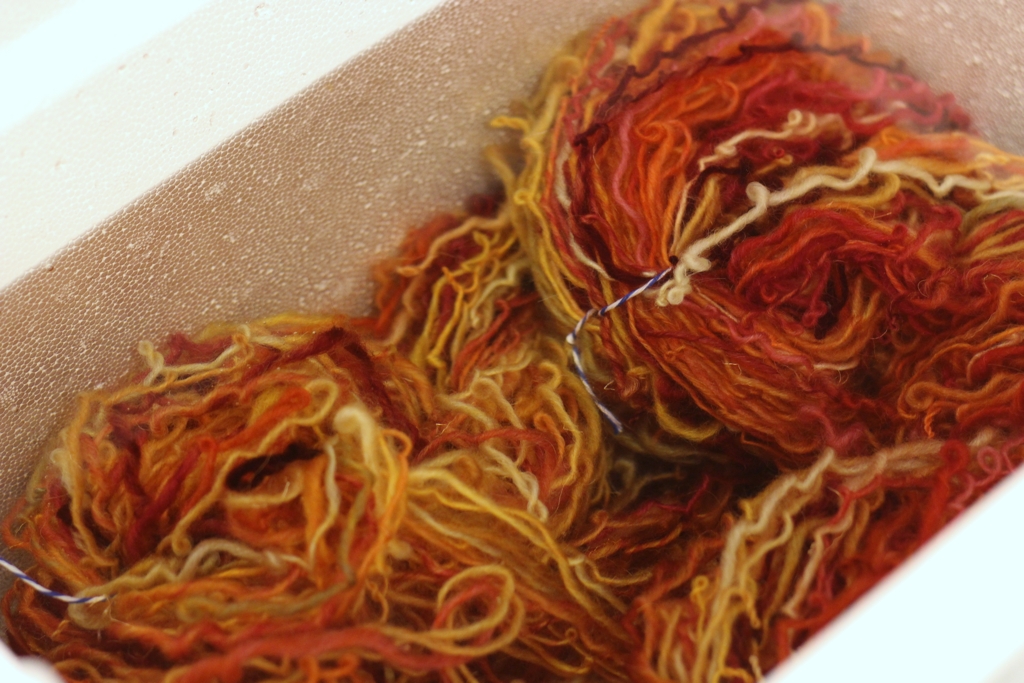
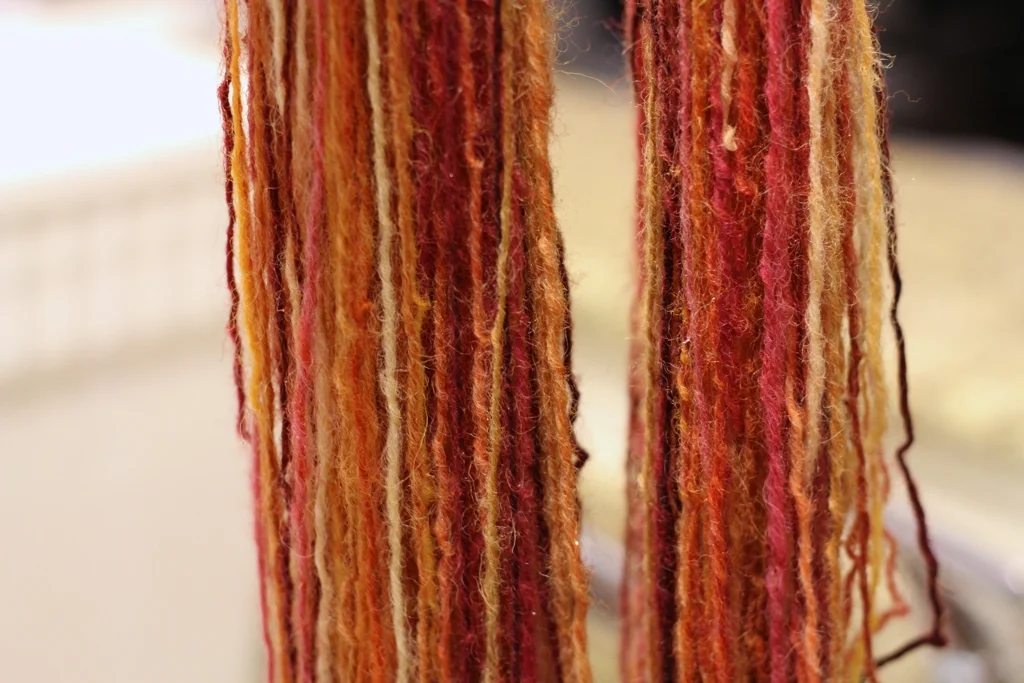
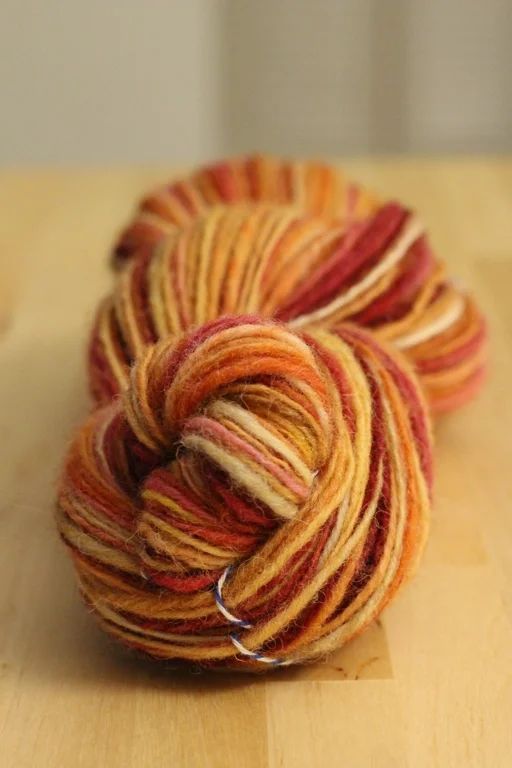
The twist really really relaxed and evened out. There are still a few over twisted and kinked spots, but most of the yarn is well behaved and smooth. I measured the skein again to see if setting the twist changed anything. The yarn was still a worsted weight, but I did “lose” 23 yards to the yarn plumping up. So I’m down to 114 yds, and really hoping I have enough yarn because I love it even more now.

Yarn thinner than you like? Learn how to chain-ply commercial yarn into the thicker, bulkier yarn you want!  #spinning #knitting | withwool.com

Before you go, here’s a few things to keep in mind before chain plying for bulkier yarn.

  • Even though chain-plying a fingering weight yarn will make a worsted weight yarn, the “new” yarn won’t have the same feel as a commercial or handspun worsted weight skein. Why? It’s much heavier and denser than either.
  • Because of how chain-plying works, expect to reduce your yardage to at most a third of it’s original number. My original 459 yds turned into 114 yds.

  • Sample a small piece of yarn first to see if you like the weight, drape, and density of the chain-plied version. It’d be really frustrating to do all that work and turn out with something you don’t like or wish you could undo. Take it from me, undoing a chain-plied yarn is not quick or easy.

3 Tips for Easier Plying from a Center Pull Ball

Use these 3 tips to make plying yarn from a center pull ball easier and tangle free. #tutorial | withwool.com

Knowing how to ply from a center pull ball is a handy trick to know. It’s great for plying those leftover singles on a bobbin or spindle. It’s great for when you don’t want to have any leftover singles/plies at all. You could even ply yarn from 2 separate center pull balls, not just the ends of one ball.

All that said, you have to use the technique carefully because if can affect the original drafting twist of your plies. This post from Jillian Moreno shows why. Still, there might be cases where you want to affect the twist. Maybe your plies have been sitting for months and the original twist isn’t as active. Or you want to add more twist because there wasn’t enough during drafting.

Personally, I haven’t noticed a huge difference in yarns that I’ve plied from a center pull ball vs. yarns that I’ve plied from bobbins. But I’m not spinning lace weight. In fact, some of my favorite yarns that I’ve ever spun have been plied from center pull balls. So here are my favorite tips and tricks for plying from center pull balls that I’ve learned over the years.

Use something as a center support for the ball.

Use these 3 tips to make plying yarn from a center pull ball easier and tangle free. #tutorial | withwool.com

As you work, the ply that formed the center core of the ball is being pulled out and moving onto the bobbin or the spindle. When enough of the center is gone, the ball will collapse on itself which means tangles and knots and aggravation. Putting something into the middle of the ball when it comes off the winder gives the ball a core of support which prevents those frustrating tangles.

Use these 3 tips to make plying yarn from a center pull ball easier and tangle free. #tutorial | withwool.com

And even if the ball does collapse on itself, like mine did in the photo above, the core will keep the ball open enough to work from and help prevent knots. I was able to ply the rest of this yarn instead of calling the whole thing a loss.

The center core doesn’t have to be anything fancy. Just make sure that what you use is long enough to stick out from both ends of the ball.

  • Rolled up pieces of paper, like shown in this tutorial, work just fine. They’re also a good option if you’re taking a class or don’t have anything else close at hand.
  • A simple nostepinne is a great option for larger center pull balls and I'm using one in this example. They even come with a handle which makes holding onto them even easier.
  • And don’t forget about chopsticks, long handled spoons, or straight knitting needles. Whatever you’re using as a core doesn’t have to be big around, just smooth so it won’t snag.

Keep your hands farther back from the orifice.

How close you keep you’re hands to the orifice during plying seems to come down to personal preference; however, working farther back makes things a little easier. Keep your front hand about 8 - 12”, or 20 - 30 cm, from the orifice.  The extra space gives you more room to properly tension the plies and sort out tangles before there’s a problem.

Working farther back from the orifice also means that you can add twist at a slower rate since the twist will build up over the distance from the orifice to your hands. Then you’ll have a little more time and wiggle room to correct any issues.

One hand controls the plying twist, the other hand tensions the plies.

A post shared by April Klich (@aprilklich) on

I’m using my left hand, aka the front hand, to control when the twist enters the plies, and my right hand, aka the back hand, is holding the center pull ball on the nostepinne. Use which ever hand you prefer for each task.

The front hand only has 2 jobs: control when twist moves into the plies and to feed the yarn onto the bobbin.

The back hand holds the center pull ball and does all the work of keeping the plies evenly tensioned. You mainly want to hold the core support and just keep a thumb and a finger or two on the ball to hold it in place. The outer strand will be able to move more freely than if you’re holding it without the center core. Using this hold, I can angle and move my hand back and forth to evenly tension the plies. Think of it a dance you’re doing with the yarn.

The ball can sit farther back on the core so that the center ply wraps and feeds out slower. If the ball is closer to the tip, the center ply feeds out faster. One position isn’t better than the other. So experiment to see which spot works better for you and the yarn.

How to Clean Stubborn Fiber Out of a Drum Carder

Chunks of fiber stuck in your drum carder? Get a pair of forceps to get those pesky fibers! | withwool.com

My drum carder has been sitting unused and unloved for the past few months. Why? All this green fiber stuck in the tines. I bought 4 ounces of Corriedale wool locks, AKA the green fiber, to practice making batts and figure out the carder’s quirks. Making the batts turned out to be a struggle because the locks were matted, but I didn’t realize how matted until it was time to feed them into the carder. I had to crank the drum while pulling back on the fiber to get them to open and pull apart instead of just feeding onto the main drum in one big clump. I made 2 batts before calling it quits because the all the  fiber stuck on the main drum. To make things even more aggravating, the stuck fiber only seemed to trap more fiber down there with it. The bent paper clip I attempted to pick the fibers out with didn’t do that great job and none of my other tools did a thing. So the carder went back on the shelf until I could figure out how to clean it.

The answer to my problem turned out to be in a blog post from 2009 (!) that listed the basic tools to use with your drum carder. Definitely worth a read if you’re thinking about getting your hands on a carder. Anyway, one of the recommended tools was a pair of long thin forceps, extra long tweezers, because they’re thin enough to get between the tines without damaging the carding cloth. So I picked up a pair at the hardware store.

This is what my carder looked like before:

Chunks of fiber stuck in your drum carder? Get a pair of forceps to get those pesky fibers! | withwool.com

And this is what the carder looked like after the 23 minutes I spent picking at with the forceps:

Chunks of fiber stuck in your drum carder? Get a pair of forceps to get those pesky fibers! | withwool.com

I didn’t pull off every bit of green since I’m going to try carding the rest of the fiber (it’s a point of pride and stubbornness now), but the difference is night and day. The forceps were great for picking up both small and large bits of fiber. Even better I was able to work them under the larger sections and push the fiber up so I could grab it.

Chunks of fiber stuck in your drum carder? Get a pair of forceps to get those pesky fibers! | withwool.com

Cleaning the the carder wasn’t quick, but the forceps did a great job. They grabbed every stuck strand big or small. Plus, I didn’t scrape or poke my fingers on the tines. Glad I’ve got the forceps as part of permanent drum carder cleaning kit. They’re cheap, work well, and don’t take up a lot of space. Get a pair.

Chunks of fiber stuck in your drum carder? Get a pair of forceps to get those pesky fibers! | withwool.com

Handspun Experiments: Opposing 3-ply Sock Yarn

Is handspun 3-ply opposing sock yarn more durable than a traditional 3-ply construction? | withwool.com

The end goal for this yarn was always going to be a pair of socks. So I followed the internet’s advice which recommended spinning a high-twist opposing 3-ply construction. What makes this construction special is that one ply is spun in the opposite direction which is supposed to add elasticity and increased durability. I started with 8 oz of Louet Northern Lights Top, color Blue Spruce, which is space-dyed and a blend of similar wool types. It’s not as soft as Merino, but seemed much more durable. 

A post shared by April Klich (@aprilklich) on

I split the top lengthwise into 3 more or less equal sections for each of the 2 skeins. I spun each ply with a fairly firm twist to stand up to the extra wear and tear of socks. 2 of the plies had Z-twist, and 1 had S-twist. Plying a balanced yarn was a trial since the S-twist skein took in even more twist and would kink up when given half a chance. Next time, I’ll experiment with putting less twist on the opposing ply and make up for it during plying. You can read more about how I spun the yarn here.

Is handspun 3-ply opposing sock yarn more durable than a traditional 3-ply construction? | withwool.com

I didn’t photograph the pair (find all the knitty details here) when I finished them, and the socks got about a month of regular daily wear before camera time. While spinning the yarn, I was worried about holes. Now I’m pretty sure the socks will felt before a hole even thinks about opening up. The stitches on the bottom of the sole have already started felting together and loosing some of their stretch. The stitches on the side and top are still distinct and flexible though. Any eventual repairs I have to make will probably be more difficult because of the felting, but at least I’ll notice the holes before they get too big. 

Is handspun 3-ply opposing sock yarn more durable than a traditional 3-ply construction? | withwool.com

The jury is still out on whether or not the opposing ply yarn construction is more durable than a traditional 3-ply. I will keep you updated though as things develop. And when I spin a traditional 3-ply as sock yarn.

There’s one other skein of opposing 3-ply sock yarn stashed away for me. This skein is my first attempt at an opposing ply sock yarn. It’s a true fingering weight spun from Falkland top. Once I’m ready to whip up another pair of vanilla socks, I’ll give this yarn a try. I can’t be the only one without handspun socks in this house after all.

My Favorite Chain-Plying Trick

Mugs, cups, and cardboard tubes make it so easy to take a break when you’re in the middle of chain-plying handspun. | My Favorite Chain-Plying Trick - withwool.com

I love chain-plied yarn. I love how plump it is compared to 2-ply yarn. I love how it keeps the clear distinct color of the single and fiber. I love how I can take one single from one bobbin and ply it into something that looks like it came off of three. 

What I don’t love is stopping in the middle of chain-plying, and not because it breaks the rhythm. If you’ve never chain-plied yarn before, the process is a lot like making a crochet chain. Make a big loop from a single piece of yarn, use your fingers to pull another loop through the first, then add twist. Repeat until every single yard is plied. Making a new loop and pulling it though the old one allows you to work with 3 strands at a time instead of 1. The result is a plump, cushy yarn. Nifty, right?

The problem comes when you need to take a break and let go of the open loop. All the twist comes along and closes the loop which needs to be open so you can pull another loop through and keep plying. I always hated untangling that twisted mess, so I waited to chain-ply until I had long stretches of uninterrupted time. Sometimes the single had to sit on the bobbin for awhile until that Netflix marathon came along. Thankfully, I figured out a way around that on my last chain-ply project.

I couldn’t fit all 4 oz of fiber on one regular bobbin and had to finish drafting the single on a second. There was no way I could hold the loop open, get up, reach over to the lazy kate, find the end of the single on the next bobbin, sit back down, and join the two ends together. I don’t have enough hands for that. I needed something to hold the loop open for me and my favorite cup came to the rescue.

Mugs, cups, and cardboard tubes make it so easy to take a break when you’re in the middle of chain-plying handspun. | My Favorite Chain-Plying Trick - withwool.com

I slipped the loop over the bottom of the cup and put it on the table. Voila! The working loop stayed open and the next loop in the chain hung out of the way. Plus, that next loop could still be adjusted for length. Wish I thought of this earlier. Now I can ply for smaller chunks of time, take more breaks, and give my arms a rest.

If you’re getting to up to grab something to drink or calling it a night, a toilet paper tube or any lightweight tube works just as well. I’m keeping a cardboard tube in my spinning kit from now on for this exact purpose.

Happy spinning!

Mugs, cups, and cardboard tubes make it so easy to take a break when you’re in the middle of chain-plying handspun. | My Favorite Chain-Plying Trick - withwool.com

Easier Plying From A Center Pull Ball

A rolled up piece of paper makes it so much easier to to ply yarn from a center pull ball. No tangles! 

I always forget how long it takes to ply a skein of fingering weight yarn until I’m halfway through. Silly me thought I could ply a skein over the course of 2 days. Took a bit longer than that. When I was almost finished, there was still a good chunk of yardage on the second bobbin. There’s no sense in letting cashmere singles wallow on the bobbin especially when I need to mail the finished skeins by the end of the week. Plying the leftovers from a center pull ball seemed like the best and quickest option.

A rolled up piece of paper makes it so much easier to to ply yarn from a center pull ball. No tangles! 

Thankfully, the single held together during winding. I was about to pull the ball off the winder when I remembered a tip: slide the center pull call unto a toilet paper tube to keep it from collapsing on itself and tangling. I’ve lost plenty of yardage to tangled center pull balls and really didn’t want to lose a single yard of cashmere. The problem was that I was fresh out of toilet paper tubes. Instead, I folded a piece of regular printer paper into a strip and loosely rolled it up. Then I slipped the ball onto the paper directly from the winder.

A rolled up piece of paper makes it so much easier to to ply yarn from a center pull ball. No tangles! 

The rolled up paper worked so much better than I expected. As I pulled out more and more yarn, the roll expanded to fill the center hole and kept the ball from falling apart. There were absolutely zero tangles, and I was able to ply every bit of the single. The only thing I’d do differently next time - and I will be using this trick every time I ply from a center pull ball - is to make sure there’s an even edge on the outside of the roll to keep the single from snagging.

How To Measure Wraps Per Inch

Got a fresh skein of handspun yarn off the bobbins or spindle? Heres a different way to measure wraps per inch. | withwool.com

The usual method for measuring a yarn’s wraps per inch, commonly abbreviated as WPI, is taking the yarn and wrapping it around a WPI gauge or a ruler. Count the number of times the yarn wraps around the gauge and that’s the WPI, which is used to determine a yarn thickness*. The problem with wrapping yarn around a gauge is that it’s easy to stretch the yarn and get a skewed number. Jillian Moreno recommends rolling and moving the gauge instead of wrapping the finished yarn. I like to do something different.

Got a fresh skein of handspun yarn off the bobbins or spindle? Heres a different way to measure wraps per inch. | withwool.com

My handspun isn’t always as consistent as I would like it to be. So, instead of measuring a short 6-12” segment of yarn which might be wildly different from another 6-12”, I measure WPI after the yarn is in a skein. I pull away a few strands from the rest and fit them into the gap on my gauge. If there’s space, I add a few more. If it’s crowded, I take a few out. The yarn isn’t stretched at all. Plus, the WPI is a more accurate average of the entire skein, and it’s a lot to harder to fudge the numbers. 

I got my gauge from Girl on the Rocks a few years ago and it’s been a great tool. 

One more thing. There’s not a lot of agreement on a standard WPI for yarn weights, much less an industry standard. Some sources match up and some don’t. This post from Ask The Bellwether offers a good explanation of the situation and includes tips for matching handspun to commercial yarn. Even though there's no agreed upon standard, I like measuring the WPI of my yarn since it makes it easier for me recreate or match a yarn later. 

How Setting The Twist Can Change The Yardage of Handspun Yarn

Every yard of handspun yarn is a wonderful thing, but you might not have as much as you think. Finishing and setting the twist of handspun can drastically reduce your yardage. How Setting The Twist Can Change The Yardage of Handspun Yarn | withwool.…

I’ve been trying to knit more with my handspun as skeins move from being a finished project in their own right to knit-able yarn. The length of time for this transformation varies. For the skein that became Dotted Rays that was about a year and a half.  Recently plied and freshly skeined, I had about 512 yards to work with. That’s about 200 less than the 700 required for a small Dotted Rays Shawl. I plowed on anyway with the thought that I could bind off at any time; the pattern is fairly forgiving that way. After blocking, the shawl was absolutely beautiful but it seemed small. Did the skein really measure 512 yards? 

Had I stretched the yarn when I was winding it?

Did the yarn plump in the bath when I set the twist, gaining in diameter but losing length?

Did plying twist affect the yarn differently after I set the twist in a bath?

Had I just miscounted the wraps?

There’s no way to know for sure now, but I have other skeins to put to the test. The guinea skeins you see before you were spun during Spinzilla 2014 which makes them perfect candidates. Since the challenge of Spinzilla is to spin as much yarn as possible in a week, I was meticulous in measuring the yardage of these 4 skeins. The kicker, the yardage was measured before I set the twist in a cool water bath and snapped between my hands. The plied skeins also got a few good thwacks on the shower wall.  None of the skeins were felted or weighted during washing or drying.  

Here are the steps I followed to remeasure their yardage:

  1. Check to see if the skeins still fit around the swift. 3 of the 4 skeins were wound to have a circumference of 72”. The fourth, the hot pink single, was wound to a 60” circumference. I used the same windmill-style swift that they were all wound on to remeasure. 
  2. If a skein did’t fit over the swift, I loosely rewound it to its original circumference. If I stretched the yarn, I wouldn’t be able to get an accurate number.
  3. Count the number of wraps and do the math to get the new yardage. 

Fiber: Mountain Colors Targhee - Gold Rush

Initial Yardage: 286 yds

Drafting Method: long-draw

Construction: 2-ply

Did it fit on the swift? Nope.

Yardage After Setting The Twist: 238 yds

Yardage Difference: 48 yds or 16.8%

Notes: This skein wasn’t even close to fitting on the swift at 72”. Of the 4 skeins I measured, this one had the most drastic and unexpected before and after. 

Fiber: Mixed Blue Faced Leicester

Initial Yardage: 184

Drafting Method: long-draw

Construction: 2-ply

Did it fit on the swift? Nope

Yardage After Setting The Twist: 168yds

Yardage Difference: 16 yds or 8.9%


Notes: Rewinding this skein was a trying process because I had to spend an hour untangling it. While sorting the strands, I thought it might not have fit because I didn’t put it on the swift correctly. After measuring and finding a 16 yd difference I know it wouldn’t have mattered how I put in on the swift.

Fiber: Abstract Fiber Targhee - Laurelhurst

Initial Yardage: 330

Drafting Method: long-draw

Construction: 2-ply

Did it fit on the swift? Nope

Yardage After Setting The Twist: 316 yds

Yardage Difference: 14 yds or 4.24%

Notes: I can’t really pinpoint the exact reason this skein of Targhee didn’t lose the same amount of yardage as the first skein. It could be how the fiber was prepped and dyed, the length of my long-draw, or plying twist. 

Fiber: Spun Right Round Polworth - Color Bot

Initial Yardage: 133 yds

Drafting Method: short forward draw 

Construction: Single

Did it still fit on the swift? Almost.

Yardage After Setting The Twist: 128 yds

Yardage Difference: 5 yds or 3.6%

Notes: Compared to the plied skeins, the single lost very little yardage which I’m chalking up to how it was drafted and the fact that is was’t plied. The single was spun with a short forward draw from combed top which resulted in a smooth and dense worsted style yarn. Had the single been spun long-draw, my guess is that the lighter and airier yarn would have more potential to lose yardage while setting the twist.

The lack of plying twist is probably the main reason the single only lost 5 yds. Plying compresses the singles as it wraps them together because now they’re positioned at an angle instead of a straight line.  


The numbers of my test are all over the place with one skein losing just 3.6% of its yardage and another losing 16.8%. What’s the same across the board though is that all 4 of the skeins “shrunk”. The skeins that lost the most yardage were plied which points to plying twist as the main force behind the change. Another possibility is that I simply wound the skeins too tightly around the swift and they relaxed to a much smaller circumference. There’s no way my yardage counts would have been correct if that’s the case. 

Realistically, it’s probably a bit of both. I haven’t done the best job of always loosely winding my skeins. Some I couldn’t put them back on the swift if I tried. I’m not saying this to discount how setting the twist changes the plying. Finishing a yarn affects its surface, diameter, final twist, workability, and, yes, even yardage.

I wish I could just give you a formula to estimate how much a skein will “shrink” after setting the twist. That’s just not possible. I spun all 4 of those skeins in a week, 3 with similar methods, and none of them lost a consistent amount compared to another. Calculating how yardage changes after setting the twist is something that has to be done on a skein by skein basis. But is it worth doing every time? Probably not. 

So, what’s a spinner to do? 

Wind skeins loosely. Plied yarns with high twist are going to be stretchier than skeins with less twist. You’ll get a better estimate of yardage this way.

Don’t take the measured yardage before setting the twist as a definite number. It’s a high estimate. 

Spin a sample. I’ll admit that I don’t do this but I’m usually not spinning for than 4 oz at a time or for a particular project. Sampling before before spinning a large quantity or because you want to make a specific kind of yarn lets you test your methods and figure out how much you need to spin. 

Spin more than you think you need. You might need those extra yards. 

When you’ve finally work with that one precious skein of handspun, pick a pattern that calls for less yardage than you have. This is assuming that you haven’t measured the yardage after setting the twist. Plus, there’s less chance you’ll run out of yarn 6” before binding off the last stitch. 

If you’re working with a lot of yardage, it might be worth using a McMorran Balance or a scale instead of counting wraps. Either device would let you calculate yardage by weight instead of relying solely on wraps and skein circumference. 

Spinning Yarn With Sweaty Hands

There’s no way to say this without relying on a host of cliches, so I’m just going to come out and say it. My hands sweat. Sometimes a lot which makes it hard to do things without messing them up. Half the time I’m writing with a napkin under my hand to keep my notebook from turning into a soggy mess. Damp hands make knitting almost impossible without a fan. Spinning yarn, especially drafting singles, isn’t much easier, but I have stumbled upon a helpful trick to keep the working end of roving/top from turning into a mangled clump. 

Instead of holding the roving in my hand, I drape it across my fingers and palm. The tail of the roving is held between the bottom edge of my hand and my thigh. Since the bottom of my fiber supply hand is securing the fiber, those fingers don’t have to do anything. When I do have to use my thumb, it is inches away from the tip. Only the hand I’m using to draft touches the working end of the roving which keeps the fibers aligned in one direction. Holding the fiber this way still gives me plenty of to work with and keeps me from unconsciously putting a death grip on my roving.

Since the fiber supply hand doesn’t move at all, this tip won’t help if drafting backwards or long-draw. So, stick with drafting styles that favor the forward hand. Also don’t forget the fan and a cold drink. 

How To Make and Spin Fauxlags

How to Make and Spin Fauxlags | withwool.com

What are rolags and what are fauxlags? The answer to both of these questions is happy little burritos of fiber. They look the same, spin the same, and create the same kind of yarn - an airy woolen handspun. These preps also have added benefit of being quick to spin since the speedy long-draw or a variant is a must to easily draft them. Plus, they’re fun to to make and spin.

The giant difference between the two is how they’re made. Traditionally, rolags are made on hand cards or blending boards and rolled off into a tube. Or they can come straight off a drum carder. Fauxlags are generally made from pre-made batts, carded roving, or top. The only tool you need to make a fauxlag is a long smooth stick-like object such as a dowel, a knitting needle, or a chopstick. Fauxlags are easier to make than rolags because you don’t have to learn how to use hand cards. Plus, a simple dowel is much cheaper than a drum carder (I still want one though), a blending board, or hand cards. Making fauxlags is also an inexpensive way to see if you like working with this prep before investing in dedicated tools for rolags. 

Let’s get rolling!

To make fauxlags, you’ll need fiber - roving, top, or a batt all work - and something long and smooth to wrap it around. Dowels, knitting needles, and chopsticks all work. 

I’m using an 8” dowel and a Fantasy Batt from GwenErin Natural Fibers.

How to Make and Spin Fauxlags | withwool.com

Before we get down to tearing and rolling, we’ll need to prep the fiber. If you’re working with a dense, thick batt, loosen up the fiber by pulling on the sides. We’re not trying to tear it into strips yet (unless you want to change up the colors or textures), just thin out the batt so it’s easier to work with. Fluffing up the fibers helps with roving/top too if it’s compacted or slightly felted. 

How to Make and Spin Fauxlags | withwool.com

Before we start striping the batt, pull out a few strands to measure staple length. If the fiber is 3” long, you’ll want to space your hands at least that far apart. Any closer and the batt/roving won’t separate because you’re holding both ends of the staple.

How to Make and Spin Fauxlags | withwool.com

Batts can be difficult to tear evenly and the dowel lets you hold the batt evenly across it’s width for a neater edge. Hold down the dowel with one hand and pull the batt into strips with the other. It’s totally okay if the strips don’t have a clean edge or come away in clumps. Before you roll, you can stretch and pull them into a uniform piece.

If you’re working with roving, you can skip the dowel for this step. Just grab the fiber between your hands and start pulling it into chunks.

How to Make and Spin Fauxlags | withwool.com

This is the same piece that was torn off in the above photo. I tugged and pulled it out to even the edges and make it easier to roll. When you’re happy with the shape and distribution, put the dowel on the bottom edge. Wrap the edge around the dowel and start rolling. If you're having a hard time holding the bottom edge, you can use a second smaller dowel to hold it in place. 

How to Make and Spin Fauxlags | withwool.com

After the fiber is all wrapped up, I like to roll it a few more times with a little extra pressure. Those last few rolls secure the outside edge of the strip and create a firmer fauxlag. I’m not trying to create a super dense prep - that would be hard to draft. The right amount of pressure keeps the fauxlag squishy yet firm which stops it from collapsing during spinning.

How to Make and Spin Fauxlags | withwool.com

The last step is slipping the rolag off the dowel. Now repeat these steps to your heart’s content.

How to Make and Spin Fauxlags | withwool.com

Here’s my finished batch. I got 9 fauxlags from this 1.1 ounce batt. The first two I made are a little thicker because I didn’t roll them as tightly - didn’t make any difference when I spun them up. 

Time to spin!

Pick an end and slowly pull it out to pre-draft the fauxlag like so. I draft just enough to join a piece to the leader or the previous fauxlag. Since the fibers are all rolled up together, long-draw is the best way to draft these beauties. 

How to Make and Spin Fauxlags | withwool.com

Thanks to the magic of tripods, cameras, and video editing software, I was able to put together a video of the spinning process. I hope this helps answer any questions about how to spin fauxlags and rolags. It’s my first video tutorial so let me know what you think!

Notes On Felting Handspun

In the weeks before I packed up and moved, I had the urge to finish up a few lingering projects. One such project was finishing a Texel single that had been hanging around the place since January. The Texel was a special skein since it was the first I’d spun of that breed (Click to read the full breed review). Because it was a first, I wanted to get the most out of the 4 oz and preserve the color which meant spinning a single. An added bonus was that I get to try an idea I got from Hedgehog Fibers, intentionally felting handspun. Why felting? Singles aren’t the strongest of yarns and felting would make the yarn more durable and pill resistant. My less technical reason was that I’d never done it before and wanted to experiment.

First thing to do was set up. I filled the sink with the hottest water I could get out of the tap, 131º F. The cooler on the left was filled with cold. Both had enough water to fully submerge and swish the yarn around. Both also had a generous helping of soap. I used unscented Eucalan because that’s what I had and didn’t want to over felt the yarn washing out dish soap. A few guides I’ve read also recommend shampoo which is probably easier to rinse out than dish soap as well.

Prep done, the skein went into the hot water bath to soak before I went to work on it.

Once I was happy with the yarn’s level of sogginess, it got a vigorous stirring. I used a straw to spare my hands and somehow managed to stay dry during the process. My kitchen started to smell like lanolin too. 

After 20-30 seconds of agitation, I plopped the skein in the cold water. Lots more squishing and swirling was had.

The yarn got another hot and cold water dunk with plenty of swirling and smooshing. After the third trip through the hot water, I decided to see how the felting was coming along. I pulled out the skein and squeezed out some of the water. The skein hung straight with few curls and looked firmer - I know, an exact description. Individual strands were sticking together but weren’t difficult to pull apart. What really convinced me to stop though was the complete lack of stretch when I snapped the skein between my hands. Before going into the water, the skein had stretch and give, but, now, there was none at all. 

The yarn got one last dunk and swirl in the cold water before I wrapped it up in a towel to squeeze out excess water. After snapping the yarn a few times more between my hands, it got several good thwacks against the kitchen floor before being hung up to dry. 

The left photo is what the yarn looked like before the snapping and thwacking. The photo on the right is after. Big difference.

One interesting thing I noticed before draining the water was the color of the two baths. The hot water in the sink barely changed color at all, but the cold water turned reddish-yellow. I’m not really sure why the different temperatures affected the dye differently. 

3 baths was just enough to lightly felt the yarn which was exactly what I wanted to happen. The thwacking did roughen up the finish a little but I like the finished texture. It’s hairy, but not too hairy, and I can pick out the kemp, AKA guard, hairs if I want too. If Texel had luster like Merino, thwacking would probably have dulled the skein but that wasn’t an issue here. 

Part of the reason I lightly felted the yarn was because I didn’t want to massively reduce its diameter. Before felting, the skein was ~12 WPI which makes it sport weight. After felting, I was surprised that the yarn was still ~12 WPI. What did change though was the yardage. The skein started with 304 yards and ended with 286. Had I kept felting, both the WPI and yardage would both have changed drastically.

I’m calling this little felting experiment a success. The process was easy and relatively fast. Felting singles is something I’m definitely going to do on a regular basis. Plus, I love everything about the finished yarn. It’s not often that I have a plan for my skeins as soon as they’re dry but this one is different. It’s going to be a pillow once I decide on a pattern. Maybe something with short rows a-la Lizard Ridge

How To Keep A Handspun Yarn Journal

Write down ratios, twist direction, yardage, and more so you'll always know how you spun your favorite handspun. How To Keep A Handspun Yarn Journal | withwool.com

When I first decided to teach myself to spin, keeping notes seemed like a good idea. As soon as there was actual yarn coming off the spindle, which took longer than expected, I made a little notebook from index cards bound together with a rubber band and a paper clip. After each little skein was finished, it got a page in the notebook that included the fiber, color, yardage, and weight. There were plenty of exclamation points whenever I hit a new yardage record, say spinning 70 yards when the most I’d spun before was 54. Eventually, I got lazy. I wanted to spin more I wanted to jot things down. I spun and told myself I’d update my notes later. Yeah, that never happened. I don’t know where that notebook is but I’m sure it’ll turn up. 

Now that I’ve got an awesome spinning wheel, I’ve come round to taking notes again. The ‘Favorite Things’ post from the Sweet Georgia blog was a perfect reminder why I should. When I spun on spindles, I had a hard time producing consistent yarn over multiple skeins. Why bother with notes? With my wheel I can set ratios, tension, and count treadles which makes it easier to spin multiple consistent skeins. Keeping notes is suddenly much more important because spinning for large projects actually seems possible. Handspun with a consistent weight and gauge is crucial when the end goal is to knit it into a sweater.

I’ve started using Ravelry to track some of the information I need. The ability to stash fiber and handspun is a great feature and I’m glad to have it but I don’t always update it like I should. Plus, I don’t have to worry about single strength or finding wifi with a notebook. 

The first step in keeping a handspun journal is finding the right notebook. I went with the Moleskine Cahier because I like the size and the 3-pack is a good price. Also, grids forever.

Write down ratios, twist direction, yardage, and more so you'll always know how you spun your favorite handspun. How To Keep A Handspun Yarn Journal | withwool.com

Here’s a sample of what my notes look like. At the top, the date starts with when the fiber was first prepped and ends when the twist is set. Then a project name. Next up is the info on the fiber: dyer, type, color, and amount. Info for the finished skeins includes yardage, weight, and WPI before and after setting the twist. The remainder of the notes are all about the spinning process. Where the singles spun S or Z? How were they plied? What was the tension and ratio? How did I split the fiber? How did I handle the color - barber pole, fractal, or chain-ply? What is the final yarn going to become? Is it a gift? Am I trying to recreate a previous yarn? Just spinning for the joy of it? It’s all there.

Write down ratios, twist direction, yardage, and more so you'll always know how you spun your favorite handspun. How To Keep A Handspun Yarn Journal | withwool.com

At the very bottom of the page is one last thing, a page number. What good is keeping a notebook if you can’t find anything in it? Having page numbers means that the first page of the book can be an index. When it’s time to document a new project, the title and the page number go here. No more flipping pages to find info about that skein spun months ago. Even better, the index makes it easy to record more than just finished yarn. Write down your spinning bucket list. Plan for Tour de Fleece or Spinzilla. Catalog stash acquisitions or make a spinning shopping list. 

Write down ratios, twist direction, yardage, and more so you'll always know how you spun your favorite handspun. How To Keep A Handspun Yarn Journal | withwool.com

The ‘Favorite Things’ post reminded me of something else I’ve been meaning to do - labeling handspun. After all the important details go in the notebook, the info is copied onto a mail tag and then tied to the skein with baker’s twine. When I pick out handspun from the stash, the yardage and weight are right at my fingertips which makes deciding what to make slightly easier. 

Create Marled Yarn with Chain Plying

How To Chain Ply Variegated Yarn To Create Marled Yarn | withwool.com

Ever fallen hard for a skein of variegated yarn? Yarn that’s beautiful in the skein, but, when knit, turns into a pooling and flashing mess. There are several ways to combat pooling yarn. You can stripe with another yarn or knit from alternate ends every 2 rows. You can change the gauge or slip stitches or do all manner of finicky things. What happens when none of that works and you’re ready to stuff into the very back of the closet?

How To Chain Ply Variegated Yarn To Create Marled Yarn | withwool.com

I had about reached that point with a beautiful skein of orange and blue fingering weight yarn. The reason it didn’t end up forgotten in a closet was because my closet isn’t that big. Besides, my yarn stash is a bit too small to intentionally lose yarn. I tried tons of different tricks to get the colors not to pool but nothing really worked. I was about to move along to another project and a solid yarn when I came across Amy Christoffer’s Moxie Pullover. The sweater is knit with two different colors of yarn held together to create a lovely marled fabric. Why not ply that stubborn skein to create a marl? 

How To Chain Ply Variegated Yarn To Create Marled Yarn | withwool.com

After starting a movie, I sat at my wheel and decided to chain-ply the yarn instead making a 2-ply. Didn’t want to risk the color repeats matching up in a 2-ply and creating a thicker yarn with the exact same pooling problems. Less than an hour later, I had a wonderful marled yarn that I wanted to knit with instead of intentionally misplacing. 

Short and Sweet Directions for Chain-Plying Marled Yarn

How To Chain Ply Variegated Yarn To Create Marled Yarn | withwool.com

1. Figure out which way the yarn is plied. Commercial yarn is usually plied to the left, S twist, so you’ll need to chain ply to the right, Z twist. If you’re plying a single, spin to the left.

2. Wind the yarn into a center-pull ball.

3. Chain-ply. Use a wheel or a spindle, both work just fine. 

4. Once your finished plying, let the yarn rest for a day so the twist can settle into the yarn.

How To Chain Ply Variegated Yarn To Create Marled Yarn | withwool.com

5. Wind the yarn into a skein.  Never mind the crazy tendrils.

6. Soak the skein in a cool water bath with wool wash or gentle soap. Rinse carefully if the yarn isn’t superwash.

7. Hang to dry.

How To Chain Ply Variegated Yarn To Create Marled Yarn | withwool.com

Now the yarn is ready to be wound and knit up into marled goodness. FYI, chain plying will reduce the yardage by a third. This fingering yarn’s original 400 yards turned into about 133 yards of aran weight. So, instead of socks or a shawl, there’s enough yardage to knit a slouchy hat or a small cowl or fingerless mitts. Could even squeak out a small pair of slippers.  Bring on the marl!

How To Chain Ply Variegated Yarn To Create Marled Yarn | withwool.com

How to Un-Ply Yarn

Plying can be magical, but it doesn’t always turn out the way you expect. Here’s how you can your un-ply your handspun to get the results you want. How To Un-Ply Yarn | withwool.com

Plying is magic. You can combine 2 or more strands or even just one and turn them into something beautiful and balanced. So, why would you ever want to un-ply yarn? Well, plying doesn’t always turn out the way you think it will. Maybe after plying 2 singles together, you realize that they would look much better chain-plied. Or, the colors barber pole instead of matching up. If you’re working with a commercial yarn, you could split the plies to use for sewing seams, attaching buttons, or embroidery.  I un-plied a skein of handspun because I’m stubborn and and wanted to the colors to match up. 

In order to make un-plying a less tedious process, you’ll need:

  • the yarn to un-ply - a few yards or a few hundred
  •     a spinning wheel or spindle
  •     a lazy kate or a small cardboard box and knitting needle combo to act as a lazy kate
  •     something to wrap freed singles around - small balls or origami stars or a ball winder
Plying can be magical, but it doesn’t always turn out the way you expect. Here’s how you can your un-ply your handspun to get the results you want. How To Un-Ply Yarn | withwool.com

1. With the spinning wheel or a spindle, remove twist by spinning the yarn in the opposite direction of the plying. For commercial yarn which is generally plied to the left, spin to the right. Remove as much of the ply twist as possible without adding any extra twist to the singles.

Plying can be magical, but it doesn’t always turn out the way you expect. Here’s how you can your un-ply your handspun to get the results you want. How To Un-Ply Yarn | withwool.com

2. Set up the bobbin or cop on the kate. If you’re using a lazy kate, separate the plies and pull them to opposite sides of a bobbin rod. If you’re using a box, cut slits in the cardboard for each single and pull them all through. In this tutorial, I’m splitting 2 plies but you can also take apart 3 or more plies with the same method.

Plying can be magical, but it doesn’t always turn out the way you expect. Here’s how you can your un-ply your handspun to get the results you want. How To Un-Ply Yarn | withwool.com

3. Evenly pull on the singles to prevent tangles and start wrapping. One single went to the ball winder the other was wrapped around a turkish single. 

When you’re finished, you’ll have at least 2 tangle free singles to work with. Sew on some buttons, embroider, or ply them together all over again. These singles went under the scissors to match up the colors before a second attempt at plying. Definitely worth the effort and the time. 

Plying can be magical, but it doesn’t always turn out the way you expect. Here’s how you can your un-ply your handspun to get the results you want. How To Un-Ply Yarn | withwool.com

How to Wash Excess Dye Out of Yarn

...or, I’m really tired of my hands turning blue.

A few months ago, I was spinning some bright blue roving into yarn. The roving, besides from being easy to draft, was pretty and soft but turned my hands and spindle blue. Drafting the singles, blue hands. Plying the singles, blue hands. Skeining the yarn, oh look, blue hands. Thankfully, a bath to set the twist was a perfect time to get rid of all that extra dye. But first, research. To the internet!

SpinningPencilRoving5.jpg

My first thought was to try a vinegar bath since I’ve repeatedly heard that adding a little vinegar to the water will set the dye. Numerous blog posts and message boards later, I came to the conclusion that just soaking the yarn in vinegar wouldn’t do a thing. There also has to be heat for the vinegar to do it’s job since the vinegar acts as mordant which lets the dye set on the fiber. I wasn’t willing to cook my yarn which meant the only way to fix the blue problem was to wash the dye away. 

If, like me, you don’t put your yarn on the stove, you’ll need a sink, cool water, and good soap to wash the dye away. Wool wash is the best choice but dish detergent works too. I used a combination of Dawn Ultra and Eucalan.  

Washing-Excess-Dye-From-Yarn.jpg
1: Fill the sink with enough cool water to let the yarn soak and float. Add soap after the sink is full to prevent suds that you’ll just have to rinse away later.

2: Dunk the yarn in the water. Let it soak for a few minutes and gently swish it around. If the water dramatically changed color, immediately skip to step 3.

During the yarn’s first dunk, the bath turned so blue that I couldn’t see the bottom of the sink through 4” of water.


Washing-Yarn-Dye-Bath.jpg

3: Drain the water and rinse the yarn with as little agitation as possible. Repeat as necessary. 

I had to put my yarn through 5 separate baths and it was still dripping blue water when I hung it up to dry.

Felted-Handspun.jpg

Pro Tip: Even if you’re using a soap that doesn’t need to be rinsed, agitate the yarn as little as possible. Wool and other animal fibers can still felt in cool water. All the rinsing and agitation can add up over multiple baths. If the yarn does start to felt but you catch it soon enough, the yarn will still be salvageable and knit-able. 

I accidentally felted my blue handspun but stopped washing the yarn when I noticed the felting. I hung it up even though it was still dripping blue water. When it was dry, I had to pull the skein apart one strand at a time. I lost some yardage to shrinkage but I didn’t have to cut anything. Surprisingly, I like the yarn better felted.

Pro Tip #2:

Be aware that the yarn might lose some of it's color during the repeated baths. Mine went from gym short blue to sky blue. 

Blue-Handspun-Yarn.jpg
Felted-Handspun-Spread.jpg

Easily Measure the Yardage of Handspun Yarn

Keep losing count when you're trying to tally the yardage of handspun yarn? Here's how stitch markers can help out! | Easily Measure The Yardage Of Handspun Yarn withwool.com

Whether you're spinning for Tour de Fleece, Spinzilla, or for a particular project, you'll have to figure out how much yardage you have eventually. This locking stitch marker trick will help you keep count no matter how much you've spun. 

Keep losing count when you're trying to tally the yardage of handspun yarn? Here's how stitch markers can help out! | Easily Measure The Yardage Of Handspun Yarn withwool.com

Once the singles are plied and the yarn off the bobbins or spindle, skein up all that precious yardage. Instead of counting every wrap in one go, grab some locking stitch markers and let them keep keep track of the yarn. Just count 20 wraps, or whatever number you like best, and bundle them together with the stitch marker. Repeat till every strand is corralled. Count the markers and you’ll know exactly how many wraps you have without losing count somewhere in the triple digits. No need to wonder if you’ve counted every wrap or double-counted by mistake. The stitch markers are doing all the work.

Now all the need to go is a little math. Multiply the number of wraps by the circumference of the skein and you’ll have your yardage. If you want the yardage of all the individual singles, multiple the final yardage by the number of plies.

Keep losing count when you're trying to tally the yardage of handspun yarn? Here's how stitch markers can help out! | Easily Measure The Yardage Of Handspun Yarn withwool.com

How to Clean Dye Off Spindles

SpindleCleaning1.jpg

Dye bleeds. It’ll cover your hands, your clothes, and perfectly innocent yarn. Not even spindles are immune. The pencil roving I started spinning last week has been great to spin except for the fact that it’s been turning my hands and favorite spindle blue. Once the first single was finished, I finally had the chance to take my spindle apart and see how drastic the color change had been.

SpindleCleaning2.jpg

Blue, very blue. My blue “Smurf” fingers clued me in that the change would be severe but it was still disappointing to see the difference. It’s pretty, I’ll admit that, but the shaft is not the amazing amber color that it was when I first received the spindle as a gift a year ago. I’d rather have the amber back and, if fiber has turned your spindle an unwelcome color, you probably want it looking like its original self too. Plus, I want to get rid of any dye that might rub off on future projects. Here’s how I removed the extra dye.

SpindleCleaning3.jpg

Dr. Bronner’s Castille Soap to the rescue. I keep Dr. Bronner’s around because it’s a gentle, mild soap that can still get the job done. Plus, you can use it for cleaning just about anything.

SpindleCleaning4.jpg

Wet a paper towel and squeeze out the excess water. Add a few drops of soap and start rubbing the stains. If the dying was recent, you should see a difference right away. Switch to a clean, damp cloth or paper towel to remove the soap. Pat dry.

SpindleCleaning5.jpg

 The shaft still has a blue tint along with a few blue spots where the dye got into the grain but the spindle is much closer to its original color. Now I just need to find a way to keep the roving from turning the wood blue again. 

How to Skein Handspun Yarn with a Swift

Skeining-Yarn-On-An-Umbrella-Swift.jpg
SkeiningYarnHowTo.jpg

Ah, the niddy-noddy. Why does such as simple tool have such a strange name? In all the research I did before taking the plunge and finally learning to spin, I never found the origin of its name. Only that I needed one to make skeins. A niddy-noddy is basically a bar with an offset handle at each end. So, I bought one before I started spinning to pad out a yarn order. I did finally use my niddy-noddy and it was fine for small skeins; however, as I started producing more yardage, using the noddy became cumbersome and took a good chunk of time. Time I would rather have spent spinning.

I also had a swift but never thought to use it to skein handspun because all I saw people using were niddy-noddys. You want to know what makes an umbrella swift perfect for skeining yarn? A loop of string and a clothespin. That’s it. With a swift you can make large skeins and small skeins, know the exact yardage, and spend less time doing it. Using a swift instead of niddy-noddy is also easier on your arms and shoulders too.

CordMaterials.jpg

To make the loop, you’ll need:

  • a button
  • string that won’t stretch (I used baker’s twine)
  • scissors
  • marker
  • tape measure
  • tapestry needle

SkeiningYarn1.jpg
SkeiningYarn2.jpg

You can make any size loop you want as long as it will fit on your swift. I made mine really long so I could double and triple it for smaller skeins without having to make another loop. 

Tie a loop large enough to fit around the button at one end of the string. From the end of the loop, measure the string to the length you want and mark that spot. I wanted a cord 72” long so I measured to 36” twice. Cut the string plus a few extra inches. Thread the string through the button holes till the mark is between them and tie a double knot. A button with a shank works well too. Optionally, you can dap some glue on the knot to help keep it together. All that’s left is to write the length of the loop on the button.

SkeiningYarn4.jpg

Now you’re almost ready to skein your handspun! Set up your swift and slip the buttoned loop around the arms just like a skein of yarn. Here’s where the clothespin comes in. Use the clothespin to clip one end of the yarn to an arm. The pin will hold the end in place and make it easy to find when it’s time to tie up the yarn. Now, just spin the swift and get all that wonderful handspun off the spindle or the bobbin. You don’t need to put tension on the yarn just don’t give it any slack. When you’re finished, tie up the skein at the ends. If you tie up the loop with the skein like I do half the time, just unbutton the loop and pull it out

SkeiningYarn6.jpg

Knowing the size of the finished skein makes it easy to determine how many yards you’ve spun. Just count how many times the yarn went around the swift and multiply by the length of your loop. You’ll also need to divide by 36” if your measurement is in inches so you’ll get the total in yards.

For example, my loop is 72” (2 yards) long and the handspun went around the swift 59 times.

(72” x 59)/36” = 118 yards

Now that I know that skein has 118 yards, it’ll be much easier to find just the pattern to show it off.

SpinningTarghee10.jpg

Simple DIY Wrist Distaff

WristDistaff1.jpg

It was Saturday and I was following my usual springtime routine of staying inside to avoid as much foul pollen as possible while also enjoying the internet. My routine may be simple but it works for me. During one of the many internet enjoyment portions of the day, I was catching up on Twitter when someone linked to a blog post about basic spinning vocabulary from Clean Cup, Move Down. Reading through the post, which is solid and worth reading if you’re new to spinning or need a refresher, inspired me to pull out a neglected spinning project

I had no problem with the single, the spindle, or the wool except that I put them away and promptly forgot about them. The spinning was wonderful and kept me inside and away from the pollen which is always a bonus. Also, I like to pace while I’m spinning and the roving was still long enough that I had to be careful not to step on it. I know I could torn off a chunk but I don’t want to join any more than I have too. It was at this point that I remembered such a thing called a distaff exists and I went back to the internet to figure out how to make one work for me. Distaffs, at least in relation to spinning, are cleft staffs which hold large quantities of wool or flax ready for spinning with a spindle. Not quite what I needed. Turns out that what I was looking for was a variation, called the wrist distaff, which is worn on the arm opposite the drafting hand. Most wrist distaffs hold just a few grams of fiber though and I wanted to have room for much more. The solution was simple.

WristDistaff2.jpg

All you need for a simple wrist distaff is a drawstring bag with ties long enough to fit around your arm. The bag should be large enough to hold a few ounces of fiber and the spindle. I’m using a Pretty Cheep project bag but any drawstring bag will work. Just put the roving or top into the bag so that it can easily feed out a little at a time. When it’s time to spin, take the fiber and spindle out of the bag, hang said bag from your arm, and get spinning.

Now you can pace to your heart’s content or go spinning in public. Plus, when you’re finished spinning, just put the spindle in the bag are you’re good to go. 

WristDistaff3.jpg

How To Tie A Turkish Spindle Leader

MooseMoss.jpg

In the last installment of my spinning misadventures, I was trying to decide what to spin from a lovely bump of Targhee wool. Since this is my first time working with Targhee, I decided to keep things simple and go with a solid 2-ply yarn. The fiber gets to lead the rest of the way and do its wooly thing. The spindle of choice - a 33g Jenkins Swan which I haven’t used anywhere near enough. Time to fix that.

Turkish spindles can be tricky to start without a hook to help the process and leaders knotted to the spindle can be finicky when there’s a few yards of new handspun wrapped around your hand. I came across a solution quite by accident after I had the used the same leader, a piece of yarn or thread that helps add twist to fiber at the very beginning of spinning, to start several different singles. 

TurkishLeader2.jpg

Tying the leader is simple. I used craft thread because I had it at hand but you can use yarn, twine, or any string in your junk drawer. Take a piece of string at least 18” long - length can vary based on the size of your spindle - and put the ends together. Tie an overhand knot near the end and a second knot about 2” from the first. That‘s it.

TurkishLeader3.jpg

When you’re ready to start spinning, slip the larger spindle arm through the space between the knots. Insert the smaller spindle arm through the notch and the open loop at the same time. 

TurkishLeader4.jpg

Once the shaft is in place, the loop will be secure around the arms of the spindle. Wrap the leader around the shaft and tie a slip knot at the top. To add fiber, draft out a few inches from your top or roving  and put it through the loop hanging off the spindle. Fold the roving back on itself and start spinning. It’s the same process as starting without a leader when the spindle has a hook which you can check out in this tutorial.

TurkishLeader5.jpg

When it’s time to wind the single on to the arms, just wrap 2 over, 1 under as usual. No special treatment required. Nothing special to do when taking the single off the arms either. Just slide everything apart since the single isn’t tied, just wrapped, around spindle. 

TurkishLeader6.jpg

The Targhee and I are getting along well so far. I’m still learning a lot from spinning it though and looking forward to the rest of the process. Hey, I alway look forward to new yarn.