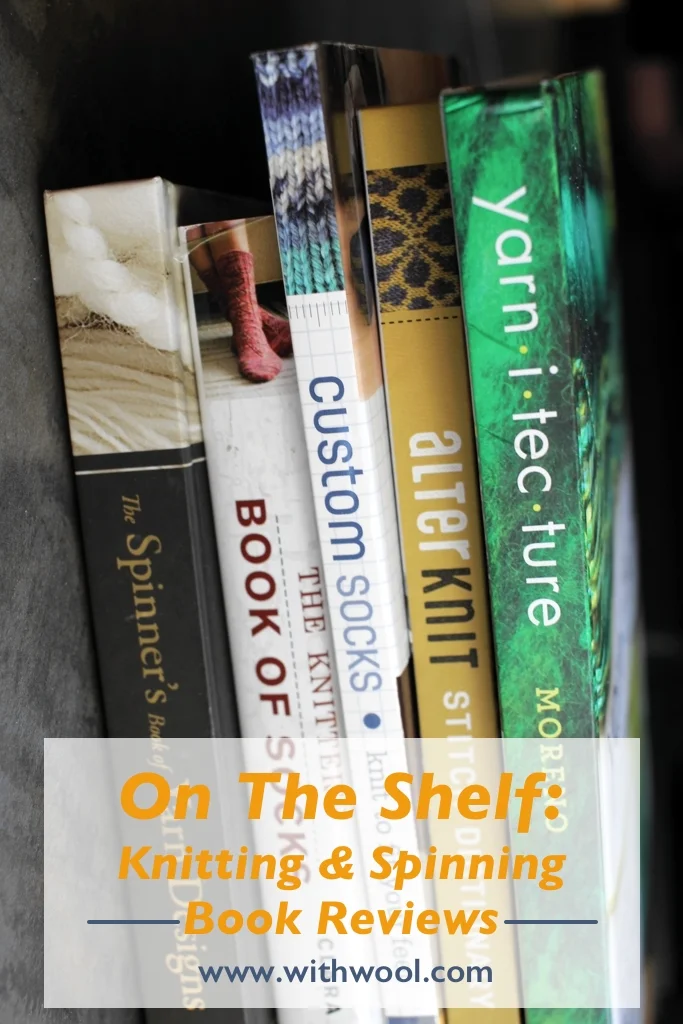
Review: Yarnitecture by Jillian Moreno

Yarnitecture is a valuable book and great reference for both the new and experienced spinner. #ontheshelfreviews #handspunyarn #knitting | withwool.com

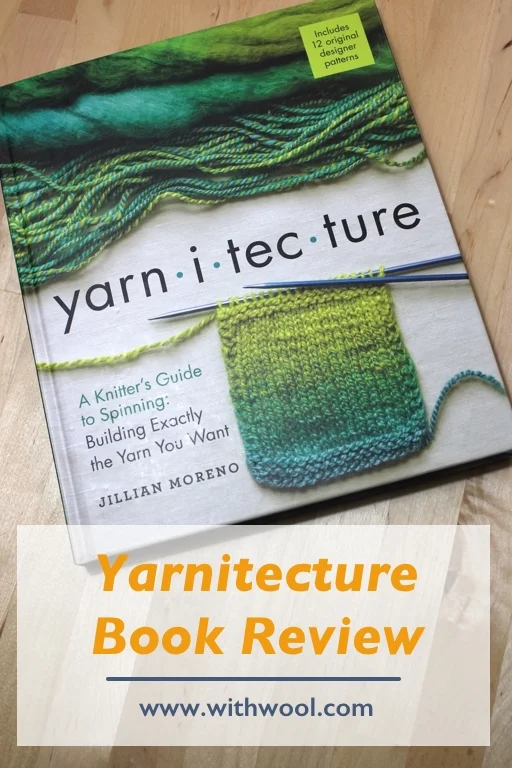
Yarnitecture is one of the more recent additions to my spinning library. It had been on my radar for a while and I finally bought it after flipping through it at the bookstore. My first impression was that it was a beautiful book with striking photos and a clear layout. The paper felt nice under my fingers, and the book had a nice weight. It felt like an expensive reference book that was pretty enough to hang out on the coffee table.  

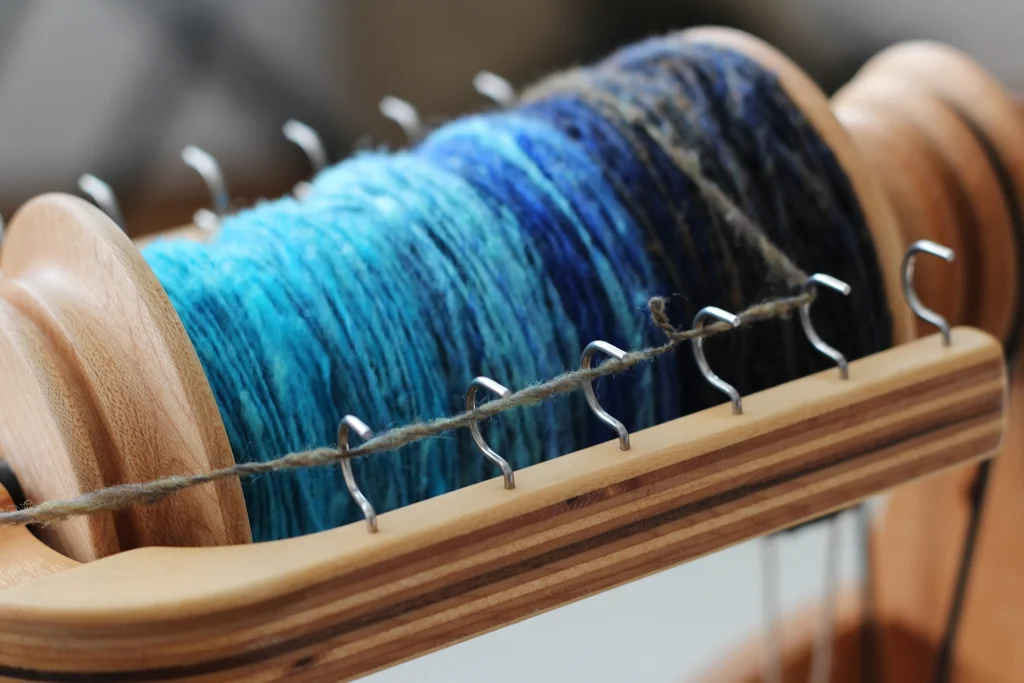
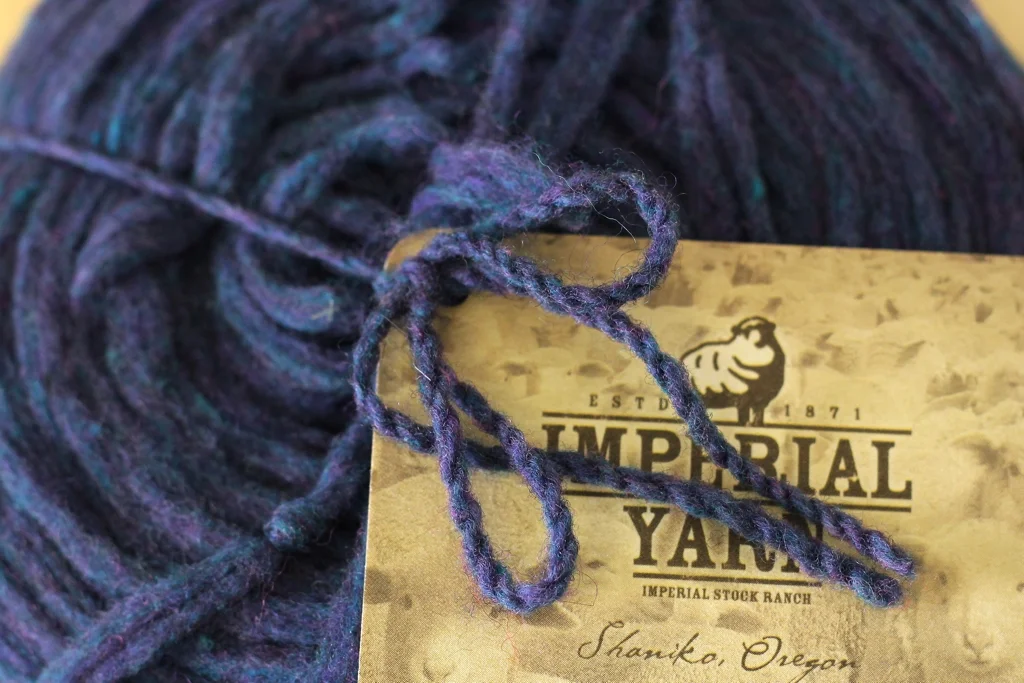
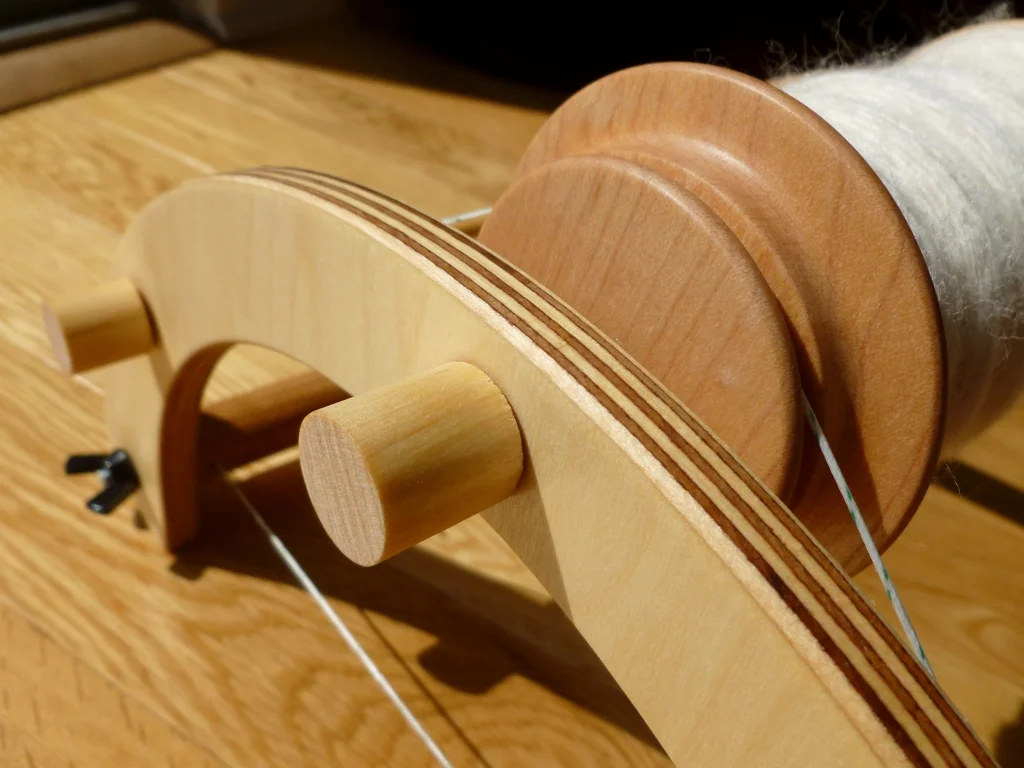
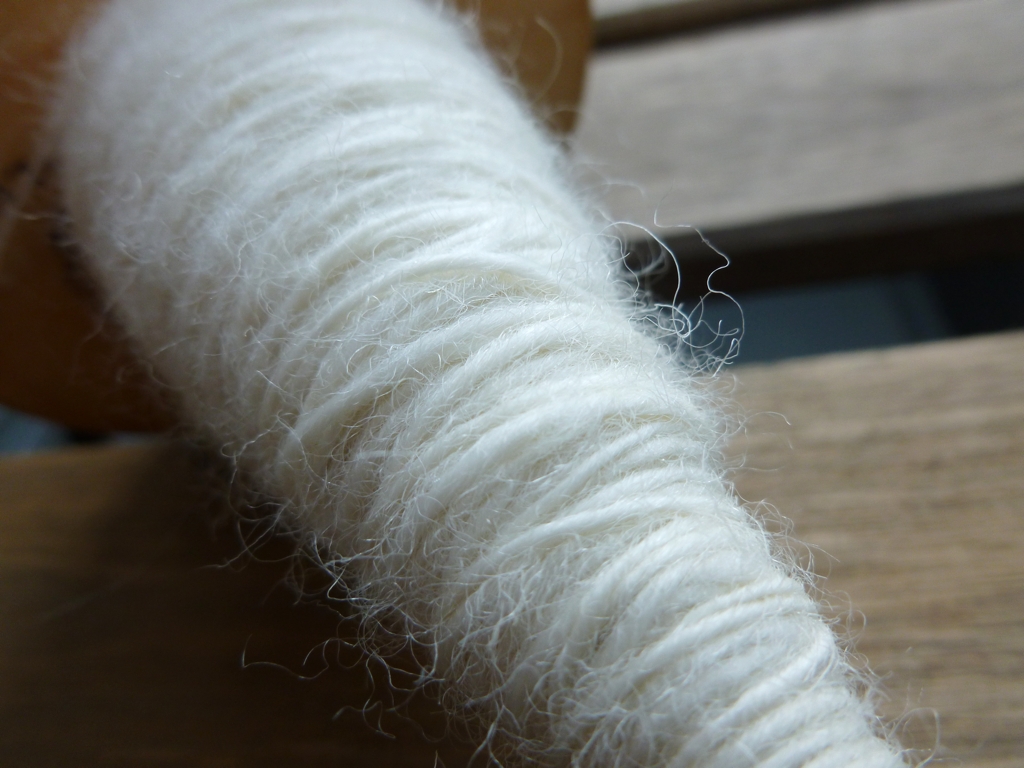
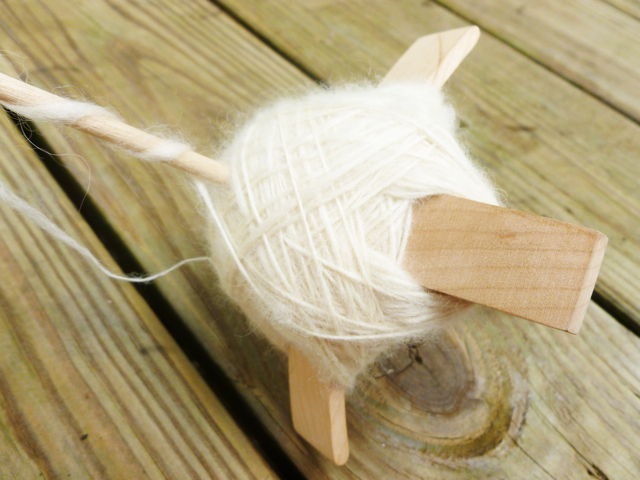
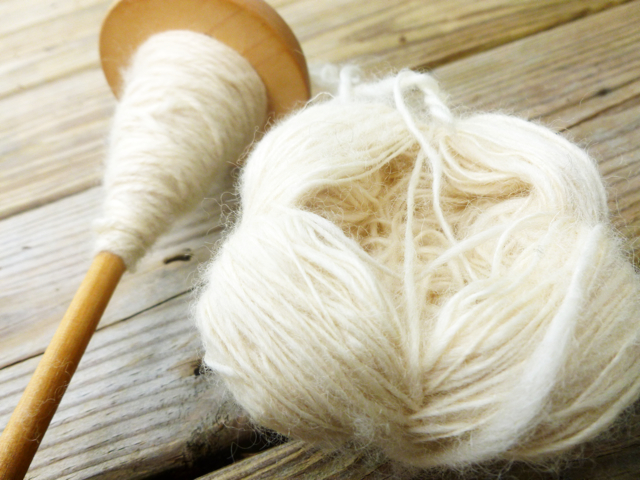
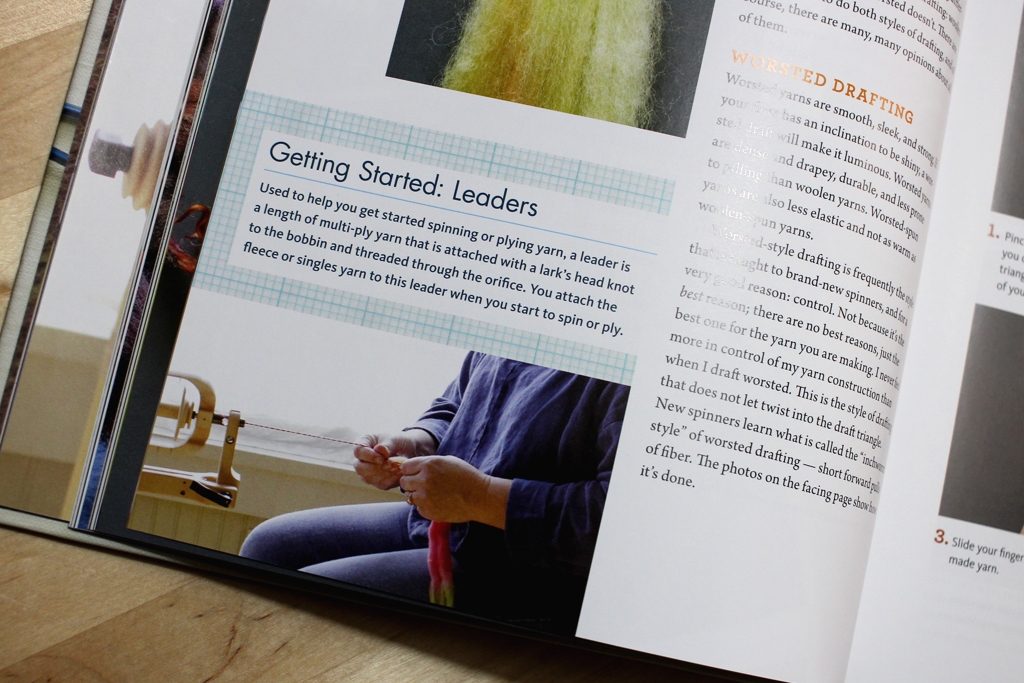
When I got beyond that initial skim, Jillian Moreno's Yarnitecture proved to be jam packed with spinning information and help. I would have loved to have this book when I was learning to spin. There’s a chapter about different fibers. It talks about the different kinds of drafting methods with photos and instructions. There’s info about plying, details about spinning balanced yarns, tips for sampling, and so much more. And sprinkled throughout this treasure trove are little side notes to back up the main text. For example, there was a note about leaders, those helpful pieces of yarn that feed your yarn onto the bobbin at the beginning of a project. I learned to spin on a spindle and knew what a leader was and it’s name. But when I got my wheel and sat down to spin, I didn’t know how to correctly get the yarn through the orifice and onto the bobbin. I didn’t know if the “leader” for a wheel was still called a “leader”. How do I look something up online or in a book, if I don’t know what it’s called? A few clumsy google searches told me a leader is a leader and I was able to set up my wheel.

Yarnitecture is a valuable book and great reference for both the new and experienced spinner. #ontheshelfreviews #handspunyarn #knitting | withwool.com

This story brings me to my next point. Yarnitecture is a great reference with photos and step-by-step instructions that covers a lot of the questions and problems a spinner might face. While it’s not the end-all-be-all of spinning references, it gives spinners the knowledge and correct words to ask questions, whether online or in person, and continue learning about their craft.

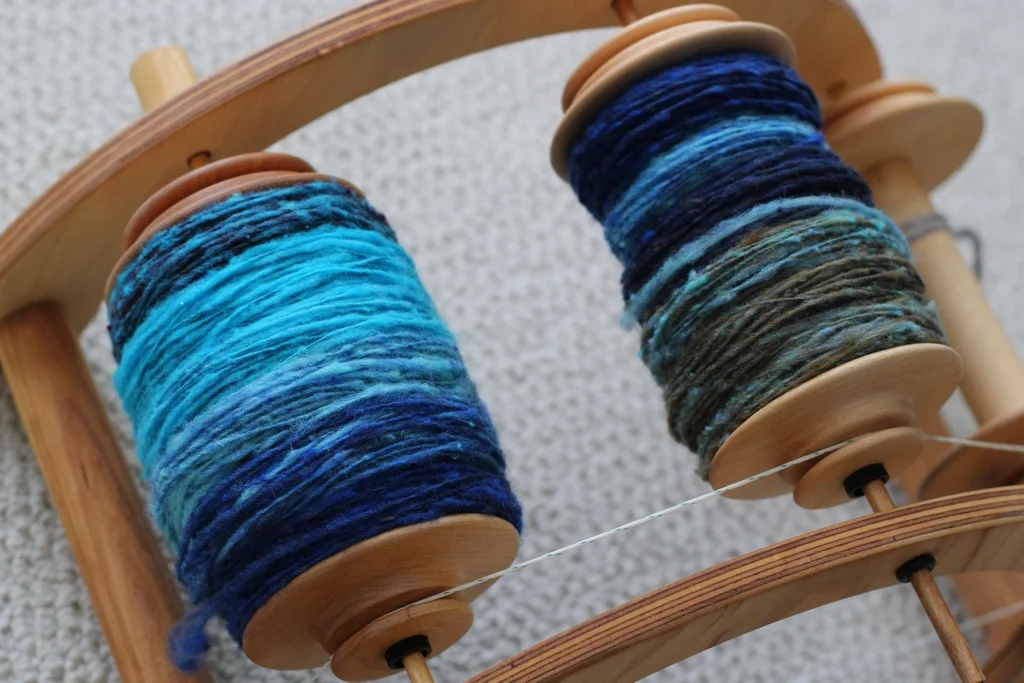
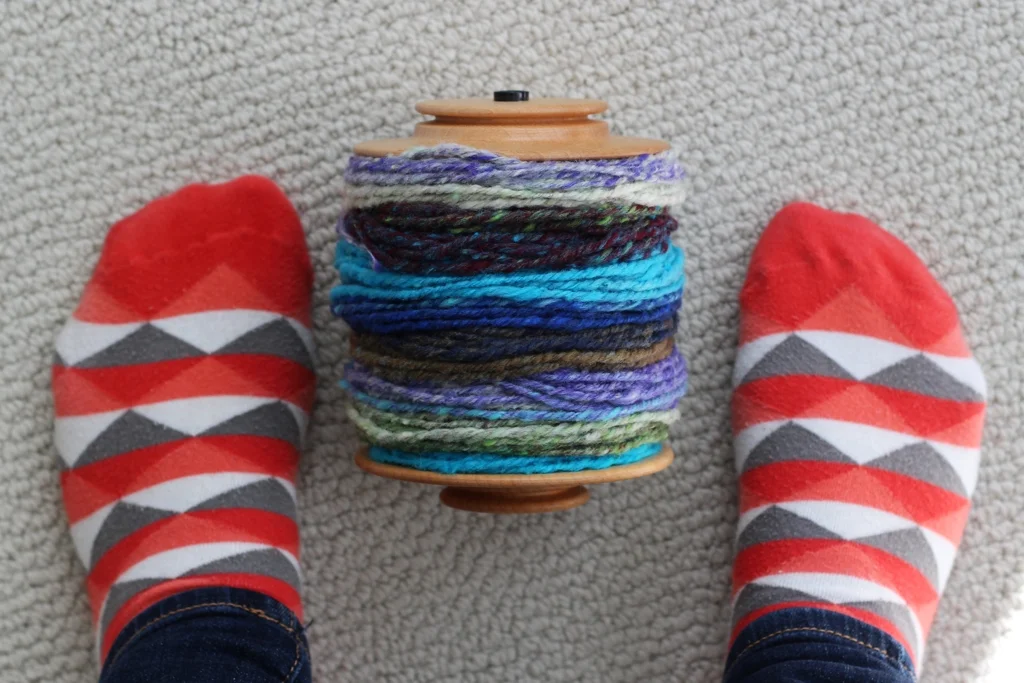
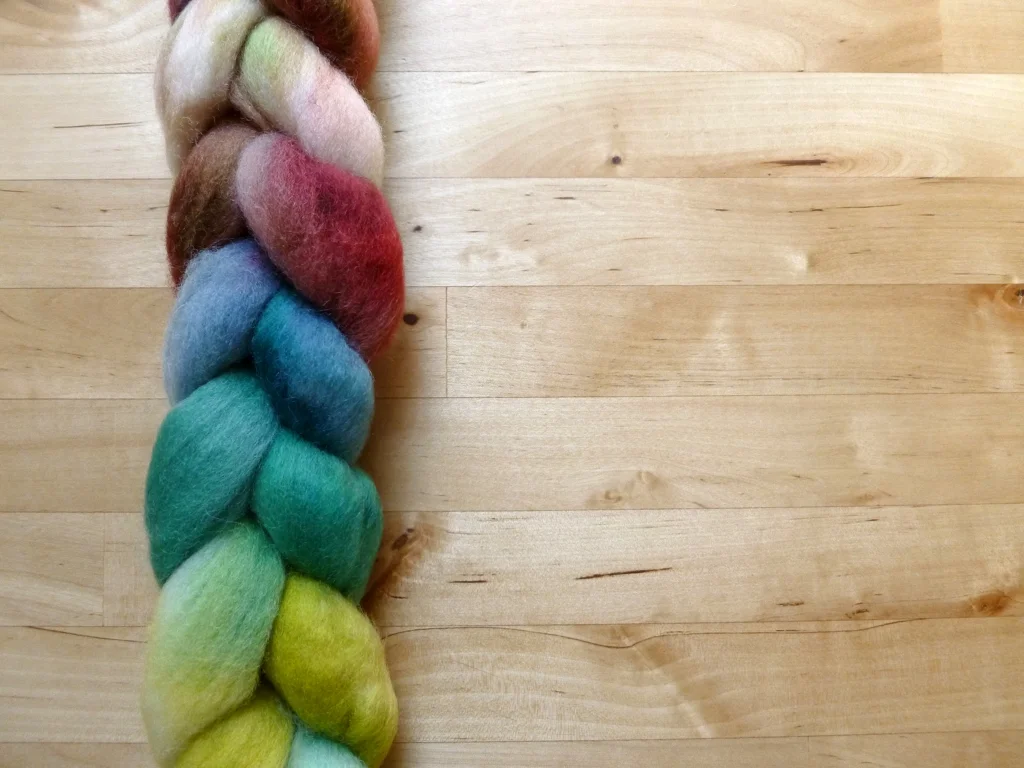
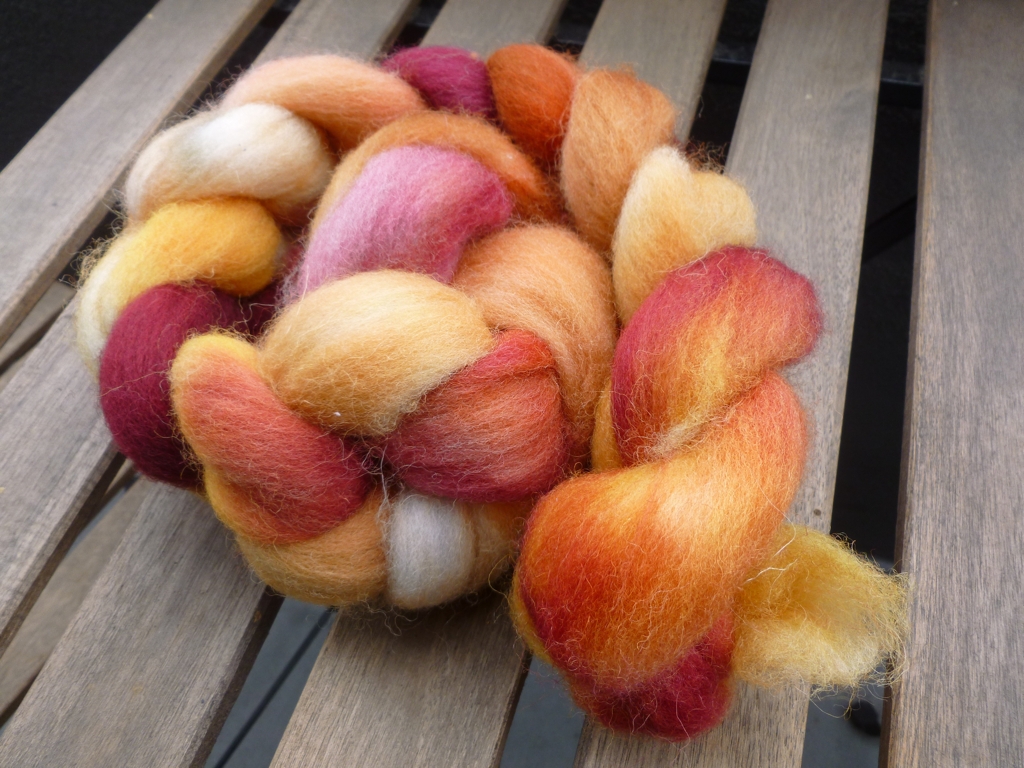
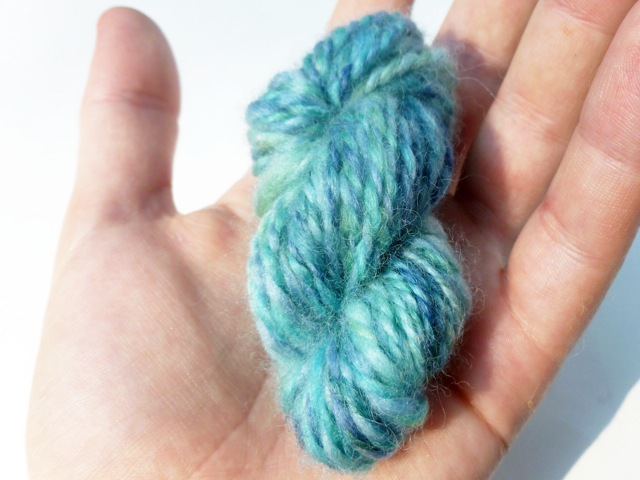
Earlier I said that I would have loved to have this book when I was learning to spin. What about now that I spun miles of yarn on spindles and a wheel over several years? What if I’ve spun yarn thats reasonably consistent, made from several different constructions, and suited for different purposes? What if you’ve done the same? Yarnitecture still has value to an intermediate spinner because the book’s main goal focuses on spinning yarn for a purpose. Maybe that purpose is making yarn for a particular pattern or spinning enough yardage to make something bigger than a hat. Yarnitecture provides a method and thought process to think about spinning yarn beyond the lone skein. Now I love spinning just for the fun of it as much as the next spinner, but I want to use my handspun too. There’s far too many beautiful skeins just waiting for me to find that one perfect pattern. If I’d put a little more thought into the process at the beginning, I could be wearing and enjoying my handspun instead of keeping it in a bin because I don’t know what to do with it.

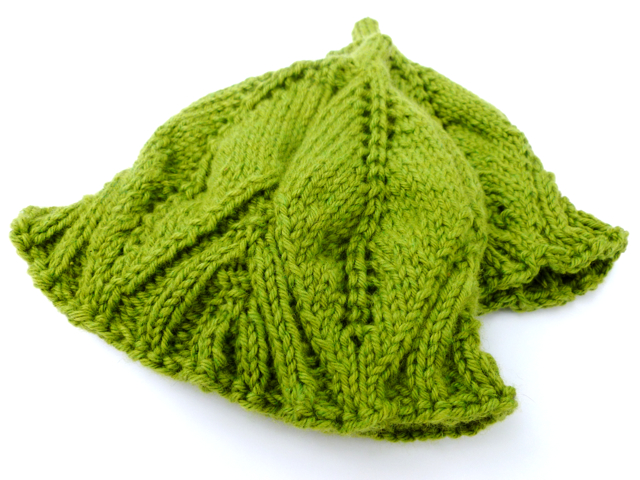
And making a sweater’s worth of yarn for myself (and the Bearded One too) is on my spinning bucket list. I’ve never spun that much yarn for one project, but I feel like Yarnitecture has given me a blueprint that I can use to tackle that goal. 

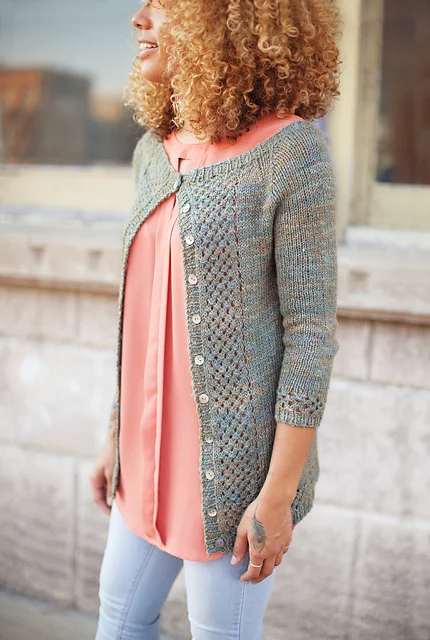
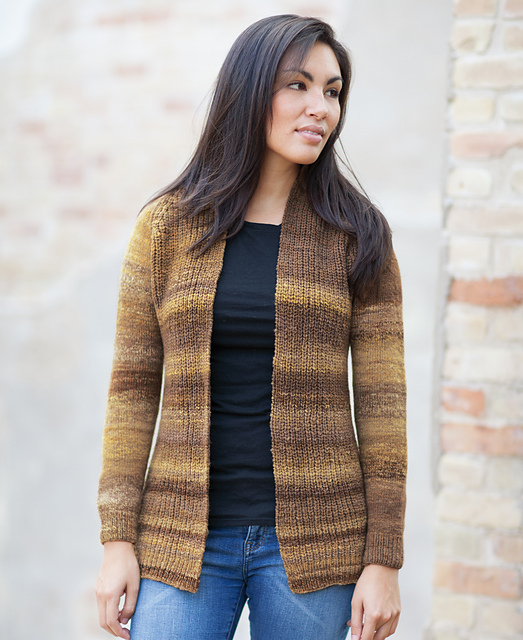
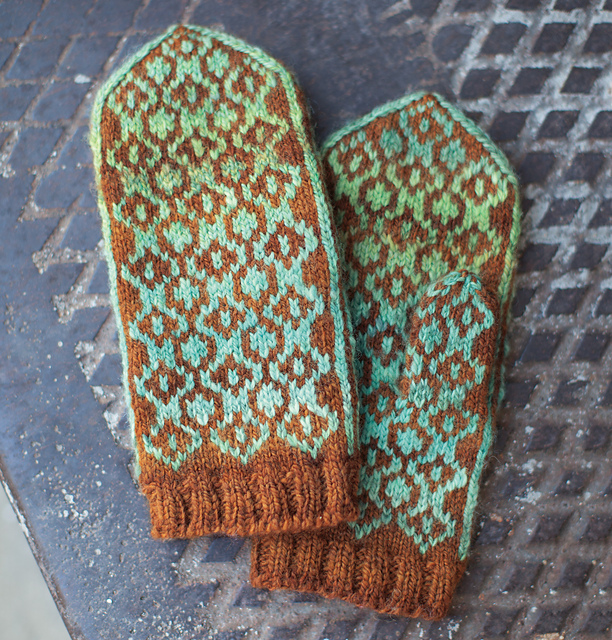
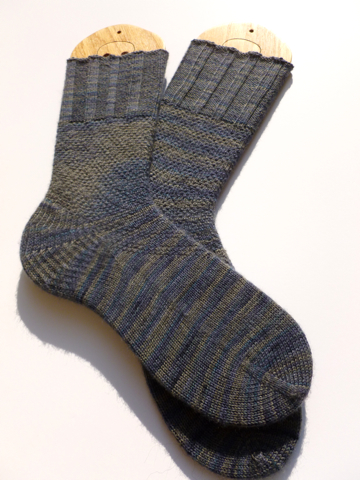
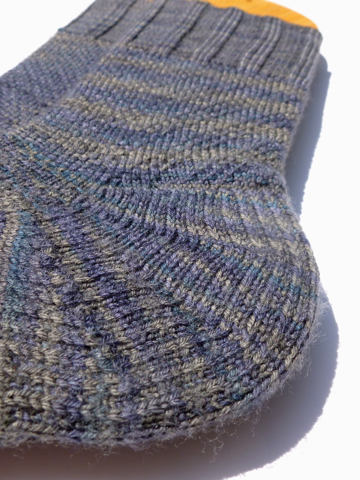
In this vein of making yarn with an end project in mind, Yarnitecture includes 12 patterns for handspun yarn by well-known knitting designers. There are shawls of course, but also a variety of sweaters and accessories. Every pattern includes the usual knitting pattern preamble notes as well as detailed information about how the handspun was spun so you can recreate the yarn. And you’ll actually want too because the patterns are beautiful. I’m very tempted to spin and cast on for the Maya Cardigan by Kirsten Kapor, the Hive Mind mitts by Adrian Bizilla, and the Rigby Cardigan by Bristol Ivy.

Let’s sum up. Yarnitecture (<<— affiliate link!*) is a great book for new spinners just getting into the art of making yarn, and intermediate spinners who are interested in spinning for larger projects. It has clear photos, detailed step-by-step instructions, and lots of helpful information. Definitely give it a look and consider adding it to your spinning library.

*This review contains an affiliate link which means, if you decide to buy through that link, I’ll get a small commission. My opinions of this book are unbiased and totally my own. I wouldn’t recommend this book if I didn't think it had value. Thanks!

On The Shelf: Knitting and Spinning Book Reviews

I’m on a quest to read all my knitting and spinning books, and I’m sharing the reviews with you! #knitting #spinningyarn #bookreviews | withwool.com

I have shelves of fiber arts books. There’s a section dedicated to knitting techniques, sock construction, and patterns. There’s another section filled with spinning references and magazines. Some I couldn’t wait to get my hands on. Some were gifts. And some I picked up from the clearance table. But you know what the dirty little secret is uniting all of them? I’ve only read a handful of them cover to cover. They’re definitely not bad books. I found lots of great info and help inside of them when I skimmed through them the first time. And that’s the problem. I’ve only skimmed through them, not settled down to read one with a notebook and a cup of something warm for company. 

That misstep is going to fixed though. Part of my love for knitting, spinning, and fiber arts in general is that there is always something new to learn and try. For me, part of that learning comes from books and reading. There’s inspiration and help and ideas tucked away in those pages that I don’t want to miss. So I’m making it a goal to read through those books. No page will be unturned. No magazine shall continue collecting dust. 

To keep myself accountable and share the really good stuff with you, I’m going to be posting my progress and reviews. First up, is Yarnitecture: A Knitter’s Guide to Spinning: Building Exactly the Yarn You Want by Jillian Moreno. Then I’m branching out and having fun with the AlterKnit stitch dictionary. After that, I’m not sure. Maybe I’ll dive deep into the technical details of sock knitting or new yarn constructions. 

And since I’m always on the look out for great fiber arts books, what are your favorites?

Review: Stranded Magazine #1: Warm Weather Issue 2016

Stranded’s first issue, Warm Weather 2016, was released in April and it’s a wonderful new knitting e-mag. Check it out!&nbsp; Review: Stranded Magazine: Warm Weather 2016 | withwool.com

I first heard about Stranded Magazine back in March when I was reading Andi Satterlund’s blog Untangling Knots. I’ve enjoyed reading Untangling Knots for years and I’m always interested in knitting magazines, so I signed up for the Stranded mailing list. When the first issue was released I went through the look book. The photos were beautiful and the styling hooked me since it reminded me of my own recent cross-country trek through the Southwest desert. There was a good variety of patterns ranging from shawls to tops to mitts. A few clicks later and it was downloading.

On The Pages

Stranded opens with all the usual magazine content and then gets down to business with an interview with Cirilia Rose about designing commercial yarn. There’s a tutorial about cabling without a cable needle, an essay about the perils of packing the right knitting for trips, and a 101 about how to start English Paper Piecing. The photos for the tutorials are clear and large enough that I can zoom in to get all the un-pixelated details. There are also ads but there only 6 in the entire issue.

The bulk of the magazine is all about patterns. It is very clear, even just skimming through, that the 6 patterns are part of a collection. There is a unified color palette of warm oranges, yellows, and blues that definitely evoke a summery vibe. They’re also geared toward’s being road trip knitting. There are small and large projects, simple and complicated projects. That said, the patterns appeal to both warm and cold weather knitters. 

Stranded’s first issue, Warm Weather 2016, was released in April and it’s a wonderful new knitting e-mag. Check it out!&nbsp; Review: Stranded Magazine: Warm Weather 2016 | withwool.com

The Rabbitbrush - a cropped, short-sleeved cardigan - is exactly what I picture when I hear Andi Satterlund’s name. It’s perfectly styled as an extra layer over a dress. Satturlund has one other pattern in the collection, Median, which looks plain from the front but has a lace panel running down the back. 

Stranded’s first issue, Warm Weather 2016, was released in April and it’s a wonderful new knitting e-mag. Check it out!&nbsp; Review: Stranded Magazine: Warm Weather 2016 | withwool.com

The Route 99 - a turban-inspired hat that uses slipped stitches - couldn’t be from anyone except Lee Meredith. It’s a bold and graphic take on a simple technique that’s been pushed to a new level by an interesting construction. 

Stranded’s first issue, Warm Weather 2016, was released in April and it’s a wonderful new knitting e-mag. Check it out!&nbsp; Review: Stranded Magazine: Warm Weather 2016 | withwool.com

I’m usually drawn to triangular and crescent-shaped shawls, but Bottle Cap by Erin Birnel has gotten my attention. The lacy stripes seem like the perfect showcase for a variegated yarn or one with a long gradient. Pit Stop, a pair of fingerless mitts also by Birnel, have grown on every time I’ve flipped through the mag. The pattern uses less than 100 yards and I can’t help but think I’d like a pair for when my hands get cold at the keyboard. Plus, I can think of a few people that would like a pair.  

Stranded’s first issue, Warm Weather 2016, was released in April and it’s a wonderful new knitting e-mag. Check it out!&nbsp; Review: Stranded Magazine: Warm Weather 2016 | withwool.com

The Interchange Socks by Ariel Altaras was the first pattern to catch my eye in this issue. I am firmly in the toe-up sock knitting camp and the socks are cuff-down but the pattern seems easy enough to flip around if you’re so inclined.

Every single one of the patterns includes a clear schematic in metric and imperial as well as several “lifestyle” and close-up detail photos. It’s nice to see that all the pieces actually seem to fit the model too. There’s no weird bunching or sagging where there shouldn’t be. The patterns are written in a mix of line-by-line instructions and charts as needed. Thankfully, the more complex charts take up an entire page so they’re easy to read. If you hate working from charts, fear not, they’re all written out line-by-line too. With the exception of the mitts and shawl, all the patterns include a number of sizes. Both tops are written in 7 sizes from XS to 3X and the Route 99 hat is easily customizable for both circumference and depth. I would have liked to see a third size on the Interchange socks though. 

When you want to print the patterns and stuff them in your project bag, all the ink eating, extraneous stuff - photos, schematics, descriptions, and supplies - is kept to the first few pages so you can print just the instructions. There’s even a handy note in the table of contents so you can print what you want without scrolling through the entire magazine - that’s a small detail that I really like. 

Screen Time

So, since this is a digital magazine, how does this all look on the screen? Initially, I set it up to view as a 2-page spread on my 13” laptop and full-screened it so I could get the magazine experience. The photos were beautiful, but the text seemed small and occasionally cramped. I had to zoom in to comfortably read the articles, then zoom out to see the full-page photos which killed the typical magazine experience for me. However, reading the magazine on a tablet or phone as the 1 page spread was a much better experience. The photos were beautiful and easy to read. On a tablet, the text was much easier to read and I’m used to zooming in to read text on my phone anyway. 

Final Thoughts

There were two reasons that I bought this issue. The most obvious is that I liked the patterns and wanted to make a few of them. Good, relatable styling helped too. The second is that I wanted to support a magazine with a model that I would like to see flourish more often in the knitting industry. When you buy a copy of Stranded, you get every article, tutorial, and pattern included in it’s pages for $16. Getting 6 patterns for $16 is a pretty good deal with you do the math. What’s more, is that every designer get’s a portion of that $16 from every magazine sold in addition to their flat payment for creating the pattern. Yes, it’s a more expensive than the usual knitting magazine but both the knitters and the pattern designers win.

I’m looking forward to the second issue, Mild Weather 2016, and to see how Stranded evolves in the future. Definitely take a look whether you like to knit for warm or cold temps.


Title: Stranded Magazine: The Warm Weather Issue 2016

Released: April 2016

Schedule: Published 3 times a year

Format: Available only as a PDF download - no print option - and only through April 2017

Price: $16

Where to Buy: Directly from their website, strandedmag.com, or through Ravelry (no account required)

*All photos copyright Andi Satterlund. 

Spinning Noro Rainbow Roll Part 2

The Noro Rainbow Roll is spun, chain-plied, and finished! It became a beautiful handspun yarn, but what's my final verdict?&nbsp;| Spinning Noro Rainbow Roll Part 2

This is part 3 in a series reviewing Noro Rainbow Roll and Imperial Yarns Bulky 2-Strand Pencil Roving. Here’s Part 1 and Part 2

The Noro Rainbow Roll is spun, chain-plied, and finished! It became a beautiful handspun yarn, but what's my final verdict?&nbsp;| Spinning Noro Rainbow Roll Part 2

When last we left our intrepid handspun, it was still on the bobbin and plotting it’s escape… I’m pretty sure the grand plan was to look really pretty so that I’d have to skein it up. Well, it worked because I couldn’t resist anymore. I used a swift to wind the skein and popped it off to get a better look at the yarn. The neps and clumps of wool, which has been the determining factor for how the yarn was spun , were still visible but didn’t stick out like a sore thumb. In fact, the neps along with some uneven tension they created during plying gave the handspun a bit of rustic charm. The chain-plied single was both distinct and rather plump. Plus, It didn’t look all that different from a yarn drafted with a more conventional method.

The Noro Rainbow Roll is spun, chain-plied, and finished! It became a beautiful handspun yarn, but what's my final verdict?&nbsp;| Spinning Noro Rainbow Roll Part 2

I quickly measured the wraps per inch, and dunked it into a cool bath with Eucalan for about 20 minutes. The water had a slight blue tinge, but the yarn didn’t leave any dye on the white towel I used to squish out extra water. Then I snapped the yarn across my arms a few times to even out the twist. Those steps are all part of my usual yarn finishing routine. On a lark, I decided to also give the yarn a few good thwacks against the shower wall with the thought that it would make the neps less visible. Then I hung the yarn to dry overnight. 

The Noro Rainbow Roll is spun, chain-plied, and finished! It became a beautiful handspun yarn, but what's my final verdict?&nbsp;| Spinning Noro Rainbow Roll Part 2

There’s a reason I only sometimes “thwack” handspun, and this yarn is a perfect example why. Thwacking definitely made the neps less visible but it also changed the yarn’s surface. The distinct “plies” relaxed which means that a lot of the finer details were lost. The bloom also gave the yarn a bit of a halo - great for hiding neps but at the cost of making the yarn a little prickly. I’m not particularly sensitive to prickle, so I could still wear this yarn next my neck, but it wouldn’t be my first choice for a cowl. The yarn, and the roving it used to be, was definitely softer before it got a good thwacking. If you like the character neps can add to a yarn, just snap the yarn to even out the twist and hang it up to dry. 

There was one other change to the yarn after finishing, wraps per inch. Before getting a bath, the WPI averaged 7-8 which put into into the aran-bulky range. After washing, the yarn was definitely a bulky weight at 7 WPI. Pre-bath measurements also told me that I had about 158 yards but I’m sure there’s less now that the yarn has plumped up. If I’m doing my math correctly, that would mean I turned 294 yards of pencil roving into a 474 yard single.

The Noro Rainbow Roll is spun, chain-plied, and finished! It became a beautiful handspun yarn, but what's my final verdict?&nbsp;| Spinning Noro Rainbow Roll Part 2

Since we’re talking about a chain-plied yarn, here’s where two of the chains linked together. This bulky change is actually an exception in the skein because I was able to find it. In spite of the thick and thin nature of the single, the joins between links are generally invisible. It probably helps that I made fairly large chains, usually 18” or longer.

The other good thing about making long chains while chain-plying a single with a distinct stripe pattern is that it helps colors shift from one to the next without muddying them. While most roving is one long length that’s been dyed, Rainbow Roll is a combination of pre-dyed wool carded in stripes. Check out these photos of Noro’s yarn being made to see what I mean. Sometimes the color is solid and other times a heather where colors overlap. Chain-plying helped blend those two different kinds of color.

I got so caught up in how to deal with neps, that I forgot to mention vegetable matter earlier. There was some VM, but not much and it was easy enough to pick out. I also noticed a small amount in the bottom of the sink when I took the yarn out of the bath. The roving definitely didn’t feel dirty while I was spinning it. 

The Noro Rainbow Roll is spun, chain-plied, and finished! It became a beautiful handspun yarn, but what's my final verdict?&nbsp;| Spinning Noro Rainbow Roll Part 2

Now that I’ve got a fresh skein of handspun in the stash, what’s my verdict? Sometimes being stubborn is a good thing. Figuring out how turn a nep-filled roving into yarn without hating every second of spinning it became a puzzle I had to solve. I’m absolutely thrilled with the yarn Rainbow Roll became, but I know the process required to get there isn’t everyone’s cup of tea. It was frustrating before I found a solution and afterward the spinning never did go to autopilot. Nor was this the kind of project where I could do anything I wanted. The fiber called the shots 100% and completely changed my original plan. If you want autopilot spinning where you’re in control, pick something else and save the Rainbow Roll for knitting or weaving. Just don’t tug too hard. If you're up for some focused spinning, Rainbow Roll will certainly fit the bill.

Spinning Noro Rainbow Roll Part 1

Rainbow Roll and I had a frustrating start, but we still created some beautiful handspun yarn.&nbsp;| Spinning Noro Rainbow Roll Part 1 - withwool.com

This is Part 2 in a series reviewing Noro Rainbow Roll and Imperial Yarns Bulky 2-Strand Pencil Roving. Here’s Part 1. 

Today I plied, but I’ve been spinning the Noro Rainbow Roll every day since February 23. It’s been an experience. 

Rainbow Roll and I had a frustrating start, but we still created some beautiful handspun yarn. | Spinning Noro Rainbow Roll Part 1 - withwool.com

I gave the fiber one last look before sitting down at the wheel, and noticed neps, small clusters of fibers that have tangled into knots, on the outer rim of the roving. At the time I wasn’t sure if the neps were localized in one spot due to handling or were present in the entire batch. The only way to find out was to get spinning. 

My original plan for this fiber - it was what I had in mind when I bought the Rainbow Roll - was to spin a fingering weight single to preserve the color repeat and then full it to improve durability. I found the end on the outer edge and started drafting from the outside in. Once I was a few feet into the roving, I could tell that I was going to need a new plan. The neps weren’t localized to one spot. They weren’t caused by rough handling or improper storage. These neps were created when the roving was carded. At first I thought it might just be in a particular color, but the neps were consistent and constant throughout the entire 3.5 ounces. Picking them out, a fairly common thing to do with neps, wasn’t an option for several reasons. One, the neps were very close together and often several to an inch. Two, when there weren’t neps there were clumps of wool and picking them out would mean pulling the roving apart. 

Rainbow Roll and I had a frustrating start, but we still created some beautiful handspun yarn. | Spinning Noro Rainbow Roll Part 1 - withwool.com

If you’re weaving or knitting or felting with the roving, neps aren’t a big deal. They can add texture and interest. If you’re trying to spin fiber filled with neps, it’s just a giant pain in the ass. Wether you’re aiming for a smooth worsted style yarn or an airy woolen style, neps muck up drafting. The first 2 colors I spun from the roll are an annoying combination of weak blobs of wool and tightly spun thread. Definitely not the fine single I had in mind. My frustration was growing which meant I had just two options - quit or completely change gears. 

A video posted by April Klich (@aprilklich) on

The blue and purple is what the single looked like when using the first drafting method. The green and white used the second drafting method.&nbsp;| Spinning Noro Rainbow Roll Part 1 - withwool.com

So, I changed gears and decided to modify how I drafted. My initial drafting method was to draft fiber from the roving and then let twist enter said fiber. On a complete lark I decided to reverse this process. I let the twist into 6 or so inches of pencil roving, and then pulled on the roving to even out the single. It actually worked. The single was more consistent, and the neps seemed more like an intentional texture than a hinderance. Don’t misunderstand, the single was still on the wild side. I’d just found a method to work with the roving that didn’t make me want to quit. Good thing there’s lots of different ways to make yarn, huh?

Rainbow Roll and I had a frustrating start, but we still created some beautiful handspun yarn.&nbsp;| Spinning Noro Rainbow Roll Part 1 - withwool.com

I finished drafting the yarn on Friday and let it rest over night before plying. What drew me to Rainbow Roll in the first place was the color and I wanted to maintain that clarity as much as possible. The best way I know to keep distinct color is chain-plying. So I set up the bulky bobbin and flyer and got to work. Once I found my rhythm, plying went very quickly - less than two hours and I was done. Well, done with the more consistent part of the single. The bobbin was literally full at the same time I started into the weak early section. Seemed like the perfect time to call it quits.

I haven’t skeined the yarn yet or given it a bath to set the twist, but I’m very happy with what ended up on the bobbin. It’s colorful, soft, bulky, and has a certain rustic charm. I want to knit it and wear it which is a far cry from the frustration of when I first started spinning it.  

Rainbow Roll and I had a frustrating start, but we still created some beautiful handspun yarn.&nbsp;| Spinning Noro Rainbow Roll Part 1 - withwool.com

Review: Comparing Noro Rainbow Roll and Imperial Yarn Bulky 2-Strand Pencil Roving

Pencil roving can be spun, knit, or woven into beautiful things. This review gives a head to head comparison of 2 different pencil rovings, Noro Rainbow Roll and Imperial Bulky 2-Strand. | Review: Comparing Noro Rainbow Roll and Imperial Yarn Bulky …

Pencil roving makes up just a fraction of my fiber stash, but it’s something that fascinates my spinning brain. Maybe it’s the color. Maybe it’s all the possibilities of what can be done with it as soon as it’s in your hands. Spinning of course, but also knitting and weaving. Maybe it’s that I can go into autopilot when I work with it since it’s generally an easy spin. Pencil roving isn’t the easiest thing to find since regular roving and top are much more prevalent. So, I always keep an eye out which is how I’ve come to have stashed two different but intriguing pencil rovings - Imperial Yarns Bulky 2-Strand and Noro Rainbow Roll. In the interest of spinning, let’s do a little head-to-head comparison. 

I went to Atelier Yarns for the first time a few weeks ago. The shop was well stocked and the Bulky 2-Strand was right up front, though I would have found it if it were in the back too. There was a mix of colors - naturals, solid colors, and a selection of heathers. I fell hard for the indigo heather, a mix of purple, navy blue and teal green. The roving was pleasantly soft, but what made me buy the roving was the yarn that tied up the bundle. The 2-ply was made from the same roving and had a deliciously rustic look. I wanted to spin that same cushy yarn.

Pencil roving can be spun, knit, or woven into beautiful things. This review gives a head to head comparison of 2 different pencil rovings, Noro Rainbow Roll and Imperial Bulky 2-Strand. | Review: Comparing Noro Rainbow Roll and Imperial Yarn Bulky …

The Noro Rainbow Roll came into my stash thanks to the internet. I saw it online while I was browsing Eat.Sleep.Knit for gift yarn. My first thought was, “I can get Noro’s gorgeous, long color repeats without fear of interrupting knots, and spin it into a fingering weight single that won’t come apart if I pull too hard? Gimme.” That’s pretty much how it ended up in a box at my door.

Pencil roving can be spun, knit, or woven into beautiful things. This review gives a head to head comparison of 2 different pencil rovings, Noro Rainbow Roll and Imperial Bulky 2-Strand. | Review: Comparing Noro Rainbow Roll and Imperial Yarn Bulky …

The Rainbow Roll and Imperial Bulky are packaged differently. The aptly named Rainbow Roll came wrapped around a cardboard tube in a wide roll which shows off the different colors and their repeat. Imperial Bulky comes wound as a cake like you’d get off a winder. 

The rovings handle color very differently. Rainbow Roll, this is color 1009, is uniformly dyed into colors that follow a repeating sequence. Some colors, like the bright blue, appear to be a solid, while other colors, like the light blue and green, have a heathered appearance. The Imperial Bulky, Indigo Heather, is evenly heathered throughout its length. Note: Imperial Bulky also comes in solid colors. 

Pencil roving can be spun, knit, or woven into beautiful things. This review gives a head to head comparison of 2 different pencil rovings, Noro Rainbow Roll and Imperial Bulky 2-Strand. | Review: Comparing Noro Rainbow Roll and Imperial Yarn Bulky …

One more note about the color. On the whole, the Rainbow Roll appears to have more vivid, vibrant colors than the Imperial Bulky. 

What about vegetable matter, AKA VM? Both have some VM, but not much and it all appears to be in small pieces. From looking only at the outer layers, there appears to be more VM in the The Imperial Bulky, but I won’t know for sure until I actually get into the cake. 

Now, let’s touch ‘em. Both pencil rovings are made from 100% wool (neither specifies a breed on the label). I find the Imperial Bulky to be the softer the two, but only barely. I would wear both of them around my neck. How soft they are as yarn, will come down to how they’re spun.

The yardage and put-up of these bundles is where the two rovings start getting very different. The Imperial Bulky is 4 oz/113g and 200 yds/183m. However, as the name implies, The Imperial Bulky 2-strand, is 2 strands of pencil roving that are intended to be knit together to form a bulky yarn. The recommended gauge on the label is 12 sts and 16 rows = 4 inches on US 13 (9mm) needles. What one could do, is separate the two strands - easy since the two aren’t twisted together at all - and get double the yardage with a smaller gauge. 

Pencil roving can be spun, knit, or woven into beautiful things. This review gives a head to head comparison of 2 different pencil rovings, Noro Rainbow Roll and Imperial Bulky 2-Strand. | Review: Comparing Noro Rainbow Roll and Imperial Yarn Bulky …

When the individual strands of both rovings are held next to each other, they appear to be the same thickness.

Rainbow Roll is 3.53oz/100 g and has 294yds/270m of roving. The Rainbow Roll label has no suggested gauge or needle. What the label does say, in part, is this, “This product is not a yarn and is not twisted…” The Rainbow Roll Ravelry Page does categorize the roving as bulky. A quick skim through project pages on Ravelry shows that most people used needles ranging from the US 7 to 13. 

It is only one strand, which isn’t big deal if knitting or weaving, but makes it harder to get the colors match when spinning 2-ply yarn. You could definitely break the roving into separate repeats of color. You could spin a single and chain ply it. Or you could just spin it and let the colors fall where they may.

Pencil roving can be spun, knit, or woven into beautiful things. This review gives a head to head comparison of 2 different pencil rovings, Noro Rainbow Roll and Imperial Bulky 2-Strand. | Review: Comparing Noro Rainbow Roll and Imperial Yarn Bulky …

As long as we’re talking numbers, what about the price? I paid $20 for the Rainbow Roll and $18.95 for the Bulky 2-Strand. Seems pretty similar at first glance. However, Rainbow Roll comes to $0.068 a yard and Imperial Bulky is $0.094. Still reasonable; however, if you’re working with one strand of Imperial Bulky instead of 2 at a time, the price goes to $0.047 because there’s now 400 yards instead of 200.        

Part 2 of the comparison focuses on spinning the roving. I might love spinning them. I might hate spinning them. But spin them I will…for science! The Rainbow Roll is going on the bobbins first, and I’ll be sharing the details as I go.

P.S. The next few weeks are going to be all over the place (literally) for me, so the posting schedule is going to be a bit different. Instead of long, detailed posts, I'm going to be posting short snippets a few times a week. Thanks for sticking with me!

Review: Knit Picks Hawthorne

The Yarn: Hawthorne Fingering Multi 

Company: Knit Picks

Price: $10.99 US


TL;DR: One pair of washed socks later, I’m impressed and will definitely buy Hawthorne again. 

Yarn Weight: Fingering

Knitting Gauge: 7 - 8 sts = 1" on #1 - 3 needles (2.25mm-3.25mm)

Crochet Gauge: 21 – 32 sc = 4'' on B - E hooks (2.25mm-3.5mm)

Yardage/Weight: 357 yds/ 100 g

Suggested Care: Machine Wash Gentle/Tumble Dry Low

A good friend of mine has knit me several comfy pairs of socks and I wanted to knit a pair for her. Even if they have small feet, sock knitters appreciate all the work that goes into a good pair of hand knit socks. I didn’t have anything in my stash that I thought she’d love so I went shopping for a nice skein of sock yarn. I was looking for yarns for other projects on the Knit Picks site and decided look over their sock yarn. One Hawthorne’s colorways, Vancouver, seemed like the perfect choice and, after checking how it knit up on Ravelry, it went in the cart. 

My first impression after carefully cutting open the box was good. The colors were as saturated and true as they appeared on my screen. As for the yarn, it was soft but still seemed strong enough to be made into a pair of socks. The good impression continued when I wound the hank into a ball/cake. I didn’t have to untangle any of the strands and didn’t find any knots or weak spots. The only thing left to do was knit. I cast on for a modified version of the Smokestack socks which you can check out here.

At 357 yards per hank the yardage is on the low side when compared to other put-ups; however, the 2-ply yarn is on the thicker side of fingering weight which is a major bonus for me. Hawthorne is spun to high twist suitable for a sock yarn and held up well to repeated ripping. I couldn’t see or feel any difference between the yarn that I worked with several times and the yarn I’d only knit once. The other bonus of the twist was that it created strong stitch definition. Cables popped and garter ridges stood out. Even with this twist, the yarn isn’t wiry and it didn’t hurt my hands while I was knitting it.

Hawthorne is hand painted and the Vancouver colorway is a combination dark earth tones - green, purple, brown, burgundy - and a bright sky blue. Looking at it directly, the majority of the colors are muted but saturate the yarn. There are no white spots nor muddying between colors. The full color repeat is several feet long while the length of individual colors varies. Thanks to the blended nylon and the smooth tight twist, Hawthorne has a slight luster which really shows up on camera.

Knit Pick’s care instructions say that the yarn can be machine washed on gentle and tumbled dried low. I didn’t machine wash the pair since I didn’t need to do laundry and wanted to save my $3.25 in quarters for another day. The socks got a 30 minute soak in cool water with a bit of unscented Eucalan. I dried them by squishing them, rolling them up in a towel, and stomping on them to get out the last of the excess water. Then I hung them up to dry.  The socks stayed the same size and the colors didn’t bleed at all. 

Since my friend has small feet, I had ~150 yards leftover. I loved working with this yarn so much that I’m going to pair it with a skein of the kettle dyed Hawthorne to make socks for me. The Broken Seed Socks seem like the right pattern. 

Spun Right Round in May

Beware! There are spoilers ahead for May 2014 shipment of the Spun Right Round Fiber Club. Scroll on at your own risk.


Last week I remembered that it was almost time for the latest club shipment to show up in my mailbox. April’s package, Olivia, was still hanging out on the wheel and I thought there’d be just enough time to finish. Didn’t happen. When the package arrived, there was still yard after yard of single to spin but May’s colors were the perfect kick in the butt to finish. The sooner Olivia is off the wheel, the sooner I can start spinning up Potted.

Potted’s greens, blues, reds, creams, and even browns are right up my color alley. Might even be my new favorite color way from Spun Right Round and I have a lot of favorites. A little note said that the inspiration for this color was “potted plants, foliage, and hanging baskets”. Pretty sure she nailed it since the colors remind me more and more of my Mom’s plant covered porch. The fiber, Falkland, is one of my favorites to spin and I’m already planning what to do with this bump. Shawl? Fingerless Mitts? Mystery pattern?  

Also included in the package were two adorable little BFL punis. I’ve seen punis before but never handled them. This pair is small, just 4 grams, but are surprisingly plump and firm. Can’t wait to spin them up to see what cute little mini skeins they become.

Unfortunately, my 3 months in the Spun Right Round Fiber club are up. I can honestly say that I have throughly enjoyed it and would recommend it. The colors are beautiful even if they are out of my usual green and grey spectrum. The base fibers are lovely and soft. The one bump that I’ve started spinning has been a pleasure to work with. Plus, how awesome is it to get pretty fiber in the mail every month? I’m incredibly tempted to sign up for another month or another 3 months; however, I’m also tempted to sign up to a different fiber club with a completely different color palate. 3 months and 12 oz of fiber is a good sample of a dyer’s wares. I know for certain that Spun Right Round’s fiber is exemplary and I’m sure I’ll buy it again. In the meantime, there are so many other amazing dyers that make amazing art as well. I’d be remiss to not try them out as well. 

Who are your favorite dyers? Or do you dye yarn and fiber yourself? I’d love to know.

Review: The Field Guide to Fleece

When I bought The Field Guide to Fleece last week, I thought it would be helpful when I eventually went to a random fiber festival. Or when I was looking up wool and fleeces from indie dyers and farms. I definitely didn’t expect to use it 2 days later at the spinning guild meeting.

Southern-Cross-Fibers-Tequila-Sunrise.jpg

At every meeting, the guild holds a raffle for fiber or books or yarn. I spent $3 and split my 6 tickets between some roving and a washed fleece. Didn’t win the fleece but I did get the roving. There was no label, only a few notes on the bag. It was just enough info to find out the roving was the January 2012 shipment of the Australia-based Southern Cross Fiber Club. The colorway, Tequila Sunrise, is beautiful and on a completely new to me wool, Texel.

On a lark, I looked at The Field Guide first instead of searching though a few pages of search results. On page 204, was an entry for the Texel which is originally from the Netherlands and bred mainly for meat. It has a staple length of 3-6” and, while lacking in luster, spins up to make a lofty, air-filled yarn. The fiber is nowhere near soft but good for hardy blankets, pillows, and mats.

Field-Guide-To-Fleece.jpg

The Field Guide to Fleece by Deborah Robson and Carol Ekarius is a steal at $14.95. It alphabetically details 100 different sheep breeds with photos and clear, detailed information. Everything from breed history and characteristics - staple length, micron count, and fleece weight - as well as how the wool takes dye, its best uses, and how readily the fiber felts. Every entry has a photo of the sheep and a close-up of an individual lock next to a ruler. The book is a wonderful pocket-sized resource that’s worth buying both for new and experienced spinners who need a good, quick resource. 

Heavenly Handspinning Herbal Wheel Wax

Spinning-Wheel-Cleaning-Start.jpg

Thursday afternoon, I put a silly horror movie, they do exist, on in the background and sat down to clean my wheel. The process wasn’t as difficult or time consuming as I had imagined it to be. Just detailed. First, I dusted every surface, crevice, and joint I could reach. Happy with the lack of dust, on went the wood wax.

Heavenly-Handspinning-Wheel-Wax .jpg

Thanks to a demo at a fiber guild meeting last year, I was able to buy some Heavenly Handspinning Herbal Wheel Wax from The Yarn Marm. The hardest part of whole process was getting the tin open. Somehow, I managed to not spill half the liquid contents prying of the lid. The wax had a pleasant smell and was easy to apply. I let it sit of 5 minutes before rubbing it off with a soft cloth. Now the wood has a wonderful luster and a layer of protection against dry, salty air. 

Oiling was a breeze since since only the footmen cranks and the bobbin ends on the flyer needed attention. 

Spinning-Wheel-Cleaning-Time.jpg

From start to finish the entire process only took about 50 minutes. The wheel looked beautiful and ready for a test spin. It spun effortlessly and quietly too. I’m looking forward to spinning a lot of yarn this year so I’m not going to wait months to clean it again. Gotta take care of my Sidekick after all. 

Review: Schacht’s Industrious Collapsable Lazy Kate

Schacht-Lazy-Kate-and-Bobbins.jpg

Once I started filling up the bobbins from my new spinning wheel, it became abundantly clear that I needed a lazy kate. Or at least something to act as a lazy kate. A chopstick stabbed into a piece of styrofoam was the first thing shoved into service. It mostly worked. My second homemade lazy kate was a slightly too big box with holes poked in the side and, you guessed it, chopsticks holding the bobbins. It worked pretty well except for when the chopsticks fell out of the holes, which was often. Many an innocent single was broken in that foul contraption. I was all too happy to replace it with an actual lazy kate, Schacht’s Industrious Collapsible Lazy Kate.  

Before I clicked the “Buy” button, I thought about what I’d need from a lazy kate to benefit my spinning and fit into my available space. The kate would need to hold at least 3 bobbins, have adjustable tension, and pack small for travel. It also needed to sturdy and reasonably priced. After combing through Etsy and various spinning shops, Schacht’s lazy kate met all of my requirements for $60. Done.

Disassembled-Schacht-Lazy-Kate.jpg

The kate arrived at my door in lightning speed in a very flat envelope. Things were looking good already. After a few glamour shots, I put the kate together without tools and quickly put it to use. Schacht’s lazy kate is a vast improvement over my box and chopstick combo. Bobbins no longer went flying and they spun easily. Tensioning is easy too thanks to a spring and the two center dowels. Just loosen the wing nuts, twist a dowel, and tighten up the nuts. I’ve even managed to adjust the tension while my hands were full with chain-plying singles. 

Assembled-Schacht-Lazy-Kate.jpg

The Industrious Collapsable Lazy Kate is well built and of great quality. I’m not worried about breaking any of the pieces or repeatedly assembling and disassembling it. Assembled, the kate feels very durable in my hands. The size is nice too since it can easily fit 3 standard Schacht bobbins or 3 bulky bobbins. Even with as much as the kate can hold, it still packs flat and would be very easy to travel with. Just be careful not to lose any of the small pieces like the wing nuts or the rubber rings that secure the bobbin rods. Honestly, the small removable pieces are the only downside to this design. You could get away without the rubber rings but it’d be harder to compensate for missing wing nuts.

Schacht-Lazy-Kate-with-Bobbin.jpg

As far as looks go, the wood and finishing match Schacht’s Sidekick and Ladybug spinning wheels. Same minimalist style too. It feels like I have a matching set when I use the my Sidekick and kate together.

At just $60, I’m glad I picked Schacht’s Kate over both more expensive kates and those at the same price point. I’m sure I’ll be using it for years to come.

Sampling Perendale Wool

Perendale1.jpg

The planets aligned a few weeks ago and I won something through a Twitter giveaway. I never expect to win anything through online contests. Usually, I’ll leave a comment or retreat and promptly forget about the whole thing. So, on the rare occasion I actually win, it’s a nice surprise. The something I won this time was a half pound of Perendale wool fiber from Louet in celebration of their new website. 

The fluffy bundle arrived last week and I pulled off a little bit to sample since I’ve never spun Perendale. The top is think, fluffy, and definitely smells of sheep. The scent isn’t overwhelming but noticeable compared to a more processed fiber. There’s a few bits of vegetable matter but, on the whole, the top is very clean. While the Perendale isn’t Merino soft, it isn’t scratchy either. It’d make a good pair of mitts or a hat.

Perendale2.jpg

On a folded up piece of paper was information about the farm and location where the lovely sheep who grew the wool live. It’s a nice touch and I’m glad to know a bit more about where the wool came from. Info about the staple length, color, and style was included as well. 

Knowing the staple length, 3-5”, made it much easier start spinning up a sample single. Drafting was a lot easier too once I reminded myself to keep my hands further apart. Overall, Perendale is pretty easy to spin and I’m looking forward to plying the single. As for the remainder of the 8 oz, well, I have a grand plan. There’s a spinning wheel in my not-too-distant future and I’m going to use the Perendale to learn how to use it.

Perendale3.jpg

Review: Ply Issue One

PlyReview1.jpg

I first heard about Ply in January 2013 when the magazine’s Kickstarter campaign was making its rounds. Edited by Jacey Boggs, the magazine’s goals were both simple and bold: inspire new spinners, teach in-depth techniques, celebrate the diversity of spinning, support handspinning around the world, and act as a record for the spinning community. Ply met its funding goal and then passed it to raise a total of $34,455. Six months later in June, Ply was released to the world. 

In July, I finally signed up for a subscription and I blame Tour de Fleece for pushing me over the edge. My main goal for this year’s Tour was to learn and practice new techniques. Subscribing to a magazine that promised to teach, inspire, and document spinning seemed like just the ticket to keep my own personal Tour de Fleece going. So, I spent the remainder of my Paypal funds, plus a little extra, and waited for the magazine to show up in my mailbox. 

 When the first issue arrived, I was pleasantly surprised since it seemed more like a book than something you’d buy from a newsstand. The cover and paper are heavier than the everyday magazine. It felt weighty and full of information. Time to read it cover to cover. 

I’m usually guilty of skipping the first few pages of a magazine and going straight for the more interesting articles or knitting patterns. Not this time. Reading through “From The Editor” and later “Behind the Curtain: Why PLY?”, I was struck by how much passion Boggs and the rest of the team have for spinning as well as creating a top notch magazine. The enthusiasm isn’t limited to just those two articles but shows on every page. It’s infectious. Half of me wanted to keep reading and the other half wanted to get spinning. Sadly, reading while spinning is not a skill I’ll probably ever master. Or even attempt. I stuck with the reading. 

Ply’s first issue follows the appropriate theme of firsts. The articles cover everything from the very first spinners to buying your first fleece to the development of spinning wheels. The various articles are enough to grab the attention of new and experienced spinners alike. They are detailed without being boring and accompanied by useful photos. “Corriedale: The Ideal First Spin” covers a number of prep and drafting methods. Each sample and its knitted swatch is clearly photographed to show the differences.

PlyReview3.jpg

Besides from the 13 articles, not counting tips and reviews, in this issue, there are 3 separate spinning tutorials. There’s a 2-ply color progression yarn, corespinning with goat locks, and a simple worsted 2-ply. The only true in-depth tutorial is for the corespun yarn which includes step by step photos and instructions. The other two tutorials assume that you know already know what you’re doing. You’re given the complete material list, the basic process, and the finished yarn’s stats. Basically, a jumping off point to do your own thing. 

Each of the three yarns is paired with a knitting pattern. A shawl, sweater, and baby sweater, respectively. I really like this idea because even if you don’t want to knit the pattern, you still get some idea of what to knit with those precious skeins of handspun which might be one of the harder parts of spinning. 

Now that I’ve had a few weeks to read the first issue cover to cover and repeatedly flip through it, Ply meets its goals. It’s inspiring and, undoubtedly, a strong reference not just for spinning but for history and community as well. Definitely forwards my Tour de Fleece goal of learning new things. These magazines will have a prominent place on my shelves and I’m looking forward to the next issue. 

In a post from September 1, Boggs wrote that Issue 1 was officially sold out. The good news is that Issue 2 will be mailed out starting September 6. Get one while you can. It’s worth the price.

PlyReview2.jpg

Visiting: Wild Fiber

I haven’t regretted moving to California. The weather is lovely, the beach is close, and my neighborhood is walkable. That’s not to say that I don’t miss my old hometown, family, friends, and favorite haunts. I also miss my favorite yarn shop. In The Making absolutely spoiled me with a large selection of wonderful yarn and fabric, great staff, and friendly knit nights. I’m not ashamed to say that one of the very first things I did once we decided to move was to look for yarn shops (and spinning guilds) in LA. Priorities, you know?

WildFibers1.jpg

I finally got to visit one of the local shops, Wild Fiber, last weekend. Once I walked through the door, I was quite smitten. They have a large selection of yarns from wool to cashmere, tons of books and patterns, needles, notions, and adorable project bags. There was also hand dyed, luxury, and by the ounce roving. Can’t forget the spindles either. It made my knitting and spinning heart happy. The staff was friendly too.

WildFibers3.jpg

 I’m looking forward to returning and browsing around for my next project and a bit of stash enhancement. Wild Fiber definitely worth a visit if you’re in town and have never been. 

Time To Replace Google Reader

Google Reader officially bites the dust on July 1st. When I first heard the news it was shutting down, I felt betrayed. The good news is that I’ve found a great replacement that I enjoy using much more than Reader. I hope you do too and keep all of your much loved RSS feeds to boot. 

There are several different options for feed readers and more appearing every week. The top 3 options right now are Bloglovin, Feedly, and Newsblur. I’ve seen multiple bloggers going for each of these services. Personally, I went with Newsblur. It’s easy to migrate your feeds from Reader, easy to add new feeds, easy to navigate on a laptop and and iPhone, and easy to organize. It’s also a stable, dependable platform. The other great thing about Newsblur is that you can train it through Intelligence to know what you like. Love every post a blogger publishes or want to know when knitting/gardening/recipes/kitties/etc show in your feeds? Tell Newsblur you like something and it’ll tag those posts with a little green box and make it easy for you to find and read them. Trust me, that one feature is worth paying $24 a year for.


The Jenkins Turkish Swan Spindle

I’m not going to lie. Once I decided that turkish drop spindles were amazing things and, having repeatedly heard good things about Jenkins Spindles, I frequented yarntools.com. Once I decided I wanted one for my birthday, I stalked that site. I compared the different models, weights, and woods. There was always a tab open in my browser. I was constantly refreshing the page whenever there was the slightest chance of an update. So, when a spindle popped up that met all my requirements, I wasted no time clicking “Buy Now”.

Check out what arrived in the mail yesterday: a Jenkins Swan Spindle made from cherry and weighing in at 33g. When I first got a look at the pieces, I could tell the spindle was something special.  It was obvious that everything was made my skilled hands. The spindle had spirit and energy and power. Sounds silly, I know, but it’s true.

I was content to wait until I crossed a few things off my to-do list and finished another spinning project before settling down try this handsome devil out; however, included in the package was a few grams of BFL and some already started yarn. Who am I to resist such an invitation? The yarn was just tied right to the shaft. Why have I never thought about tying a leader on to a turkish spindle like that? I’ve usually settled for making a big loop and setting it underneath two of the arms before making a half hitch at the top. Just tying a knot at the bottom seems so much simpler and balanced.

So, I paced back and forth across my back porch and spun up every last bit of fiber. The spindle was balanced, long spinning, and acted as a single unit instead of three. It spun like a pro.

When the fiber was yarn, I pulled out the shaft and the arms. I didn’t have to push or pull to free the single which is a massive improvement over my last turkish spindle. Then there was plying after I let the twist set and briefly got back to my to-do list.  12 yard mini skeins are insufferably cute. I’ll knit you up one day. 

I could sum up everything I’ve written and do a formal conclusion but I’m going to keep things simple. Never before have I used a tool, spindle or otherwise, that felt like it was made just for me and me alone. Looking forward to spinning lots of yarn together. 

A Turkish Spindle

Thanks in part to an enthusiasm to try out new spinning tools during Tour de Fleece* and a healthy bit of curiosity, I bought a Turkish Drop Spindle. What makes a Turkish Drop Spindle special is that the yarn is wrapped around the “arms” instead of spindle’s shaft. Once the spinning is done, the shaft and arms are removed which leaves a handy center pull ball. A few days ago, I got to try this out. 

Here we have a bit practice wool I started spinning right after Tour de Fleece.

Just the arms now.

Look, Ma! No hands!

Besides from wrapping the single around the arms, spinning on a Turkish Drop Spindle isn’t much different than spinning with a typical drop spindle. Just have to remember the “2 over, 1 under” wrapping rule and you’re good to go. 

As soon as the arms were out and I found the other end, I started chain plying the single without having to make a plying ball or any other prep work. I could really get used to that.

I only had one real difficulty using a Turkish spindle over the usual, whorled spindle. Since the turkish spindle acts as two pieces - the shaft and the crossed arms -   the spindle didn’t always start spinning all at once. As I would set the spindle spinning, I could feel the arms slipping around the shaft and unbalance the spin. Since the wobble got really annoying after the nth time, I would wrap the singles tighter and closer to the center. I’m not sure that did anything other than making the arms harder to remove. Since I’ve only tried this one turkish spindle, I’m not sure how widespread the phenomenon is. Guess I’ll just have to try out a few more spindles to check.

*This is the last time I’m going to start off a post by mentioning Tour de Fleece. For now.

The Sweet Tomato Heel

I could wax poetic about how I started these socks last December when it was cold and when I needed purse knitting. I could write about how much I wanted to knit this pattern and have a new pair of socks. I could write about how fun it was to knit them despite having to slog through the cuffs. I could write all of those things but the main reason I knit these socks was to knit another set of Cat Bordhi’s Sweet Tomato Heels.

Pattern: modified Willamette Socks by Sara Morris

Yarn: Cascade Heritage Paints - 9872

Needle: US 2.25 mm

December 14, 2011 - May 16, 2012

@Ravelry

Cat Bordhi, I like the way you think. 

The process for knitting this short row heel isn’t hidden away in a pattern and you don’t have to be able to divine the mysteries of the universe to figure it out. The Quick Start Guide at the beginning of the book gives you everything needed to knit a a pair of socks this way and even a bit of troubleshooting help before diving into the patterns. Later in the ebook, she works out how to knit a padded, reinforced heel using this method. There are numerous diagrams, clear step-by-step instructions, and lots of helpful tips.  For example, instead of wrapping and turning when working the short rows, she uses a lifted increase to close the gap between stitches. Two versions of short row heels that can be knit from the cuff or the toe and numerous patterns aside, just that epiphany was worth the cost of this ebook to me. This video shows the technique off nicely. 

Reinforced heel flaps with a short row turn are still my favorite heel, but the Sweet Tomato is such a close second. It’s relatively easy to knit, uses less yarn, and - best of all - fits so well. The question of fit was the main reason I stayed away from short row heels to begin with but the tomato is so easy to modify on a foot by foot basis.

The first few pairs of Sweet Tomatoes that I knit taught me a few things. The first pair I made for myself and got the method in my brain. The second pair I knit for the Bearded One’s giant feet and they fit him just as well. The third pair - this pair - I knit in a fingering weight and decided to add a mini gusset to get a little more room in the gusset. The gusset made the fit all the better and saved the instep pattern from disruption since the heel is knit over more than 50% of the stitches. I also needed a fourth wedge instead of the three I needed in worsted weight socks. Such an easy change to make. 

I think I’ll be using this heel for a long time and for many, many pairs of socks. 

Almost Socks

Today was the monthly fiber guild meeting and I had a blast. Instead of our usual meeting and class, we had a picnic. The weather cooperated with mostly sunny skies, a nice breeze, and a comfy 70° temperature. There was a ton of tasty food and none of the cookies I brought made it back home. People brought their knitting, weaving, spindles, and wheels. I was kicking myself for not bringing my spindle along. I guess I just haven’t reached the SIP - Spinning in Public - Achievement yet. I did bring my current bit of travel knitting though: socks.

These are the Willamette Socks by Sara Morris. I’ve only been carrying them around in my purse since December 2011. Do not take the months I’ve been working on these socks as an indication of ill will. I love the pattern and the book, Shibui Socks, it came in. I fell in love with the patterns when I first saw them online and literally pounced on this book when I saw it at my LYS. The the photos are inspiring and the patterns are beatiful. Alameda and Ankeny are swiftly moving to the top of my sock knitting queue. 

Shibui Socks isn’t just a pretty book. The socks range from simple to complex and are a mix of toe-up and cuff down. The photos are large, clear, and show off the important details. The patterns have a nice layout and are easy to read. The charts are large and in charge. For the Willamette Socks, the charts take up an entire page. Full page charts make me so happy.

Okay, I’m done gushing. Back to my socks.

I am so close to binding off. A few more inches between the pair and I will be finished. Can’t wait. Even though it will be a few months before I can wear them.

Before you click over to something, here’s my knitting tip for the day: When you want to be absolutely sure that you’re knitting the same amount of ribbing on each sock, mark the first row with a locking stitch marker and keep knitting. Count the rows when you’ve reached your limit and repeat on the second sock. 

Make A Bow

Despite what all those posts about spinning might have told you, I do still knit. Some of is secret, some of it for commission, and some of it I just haven’t gotten around to photographing yet. These two little Saplings fall into the commission pile. Now that they’re finished and delivered I can show these off. 

I used my favorite yarn for baby hats, Elsebeth Lavold Cool Wool, which is a soft worsted weight wool cotton blend and great for spring time southern weather. It has wonderful stitch definition, holds it’s shape, and is machine washable. It does have a smaller gauge than recommended in the pattern though so I had to work the larger size to get a nicely sized and stretchy hat.

Since the hats were going to be a gift, a little tag with fiber content and care instructions was in order. Anything worth doing, is worth doing well. So, I wanted the tag to match the hat and share a theme. A cute little bow made from the same yarn as the hat fit the bill wonderfully.   

      Materials

  • 2x4” piece of card stock (I used kraft paper)
  • 4-6” length of leftover yarn used to make the gift
  • Tapestry needle
  • 1/8” hole punch
  • Pen
  1. Using the hole punch, make 2 holes in the card stock a half inch apart and a half inch from the top.
  2. Under the holes, write the recipient’s name (I left this part blank), the fiber content, and care instructions underneath. 
  3. Thread the yarn though the needle and push it through the holes so that both ends are hanging on the same side as the writing.
  4. Tie a bow. Done!