This Year's Pumpkin Patch

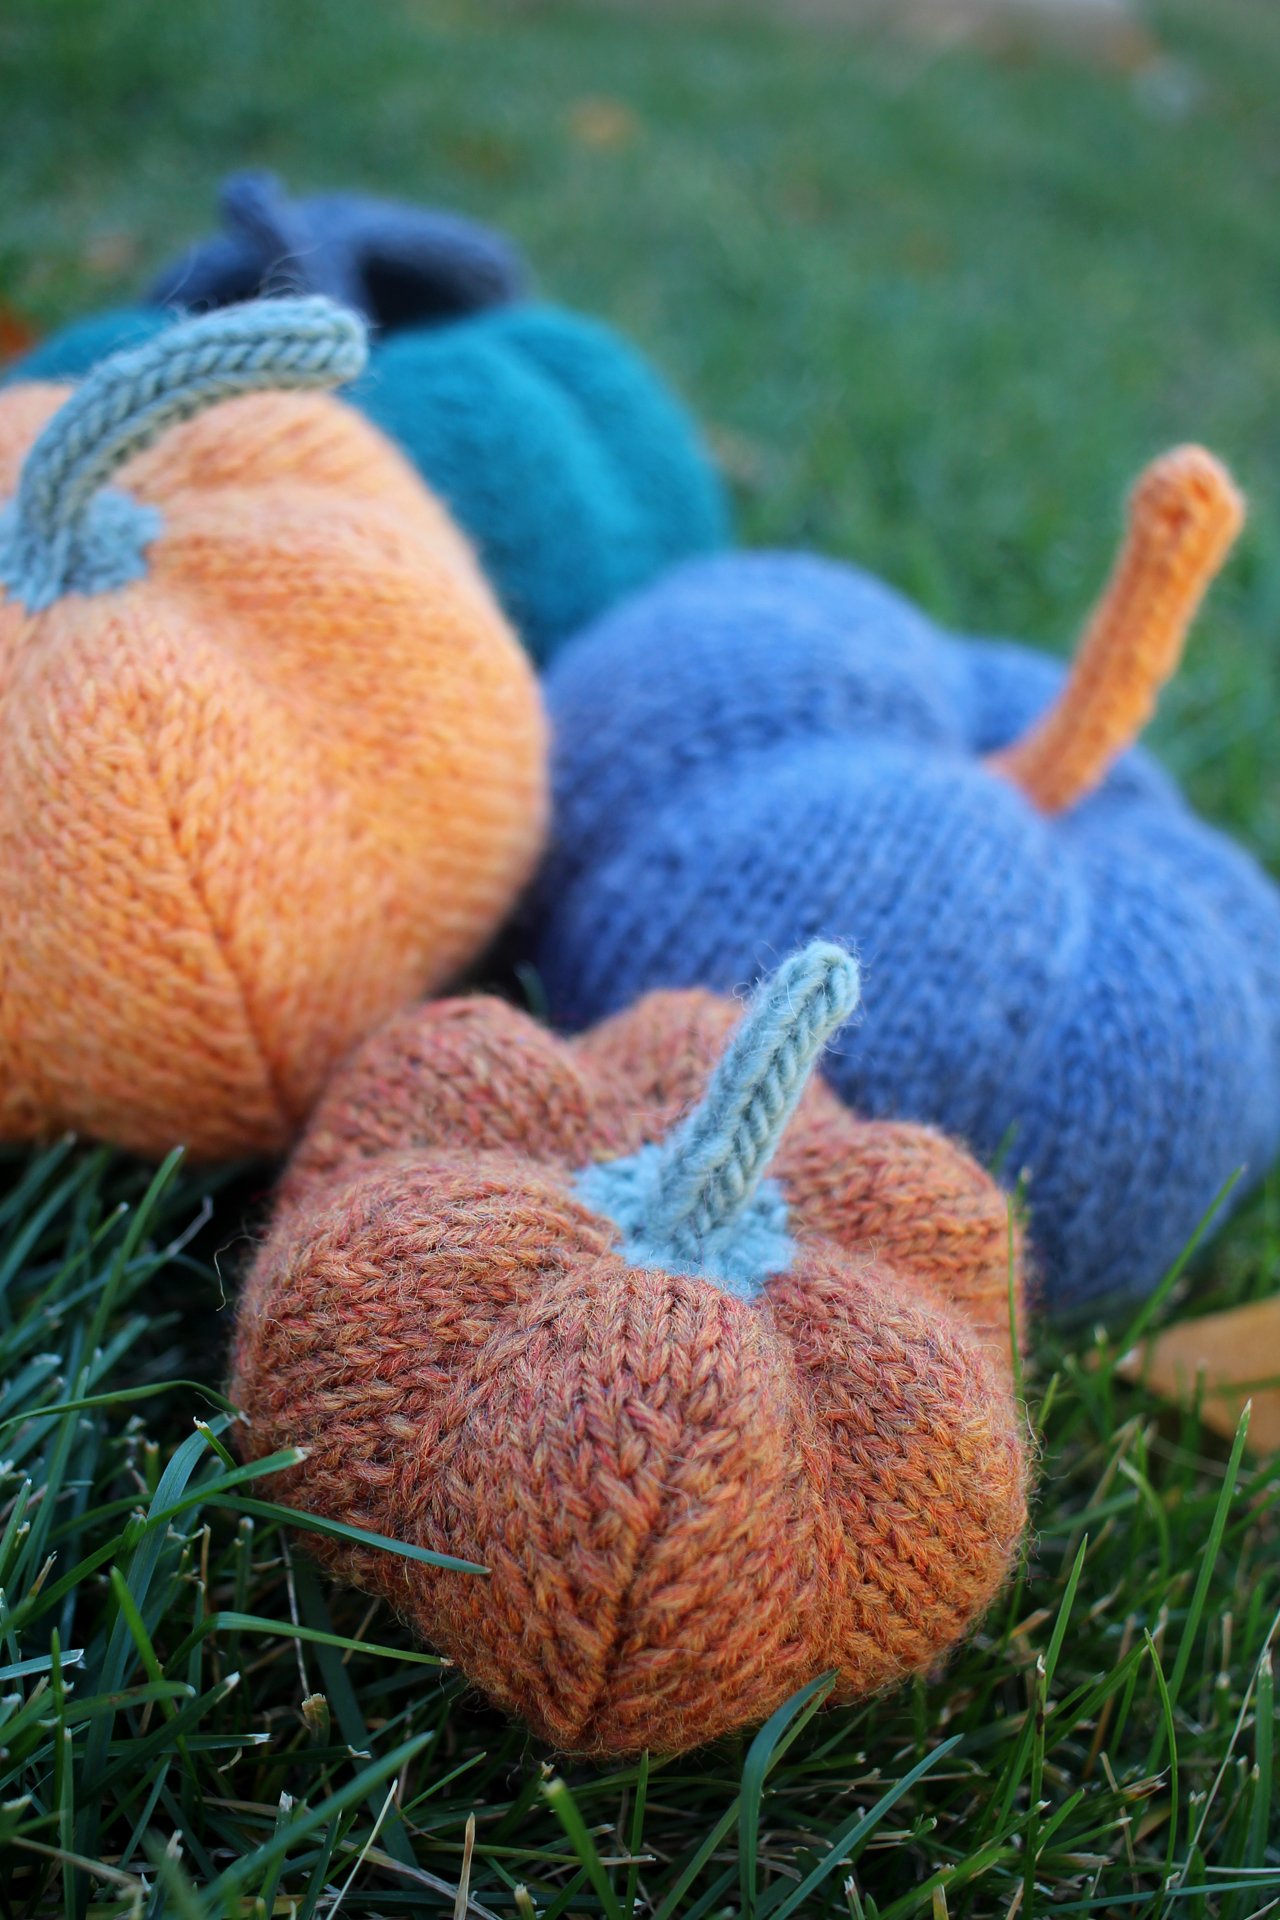
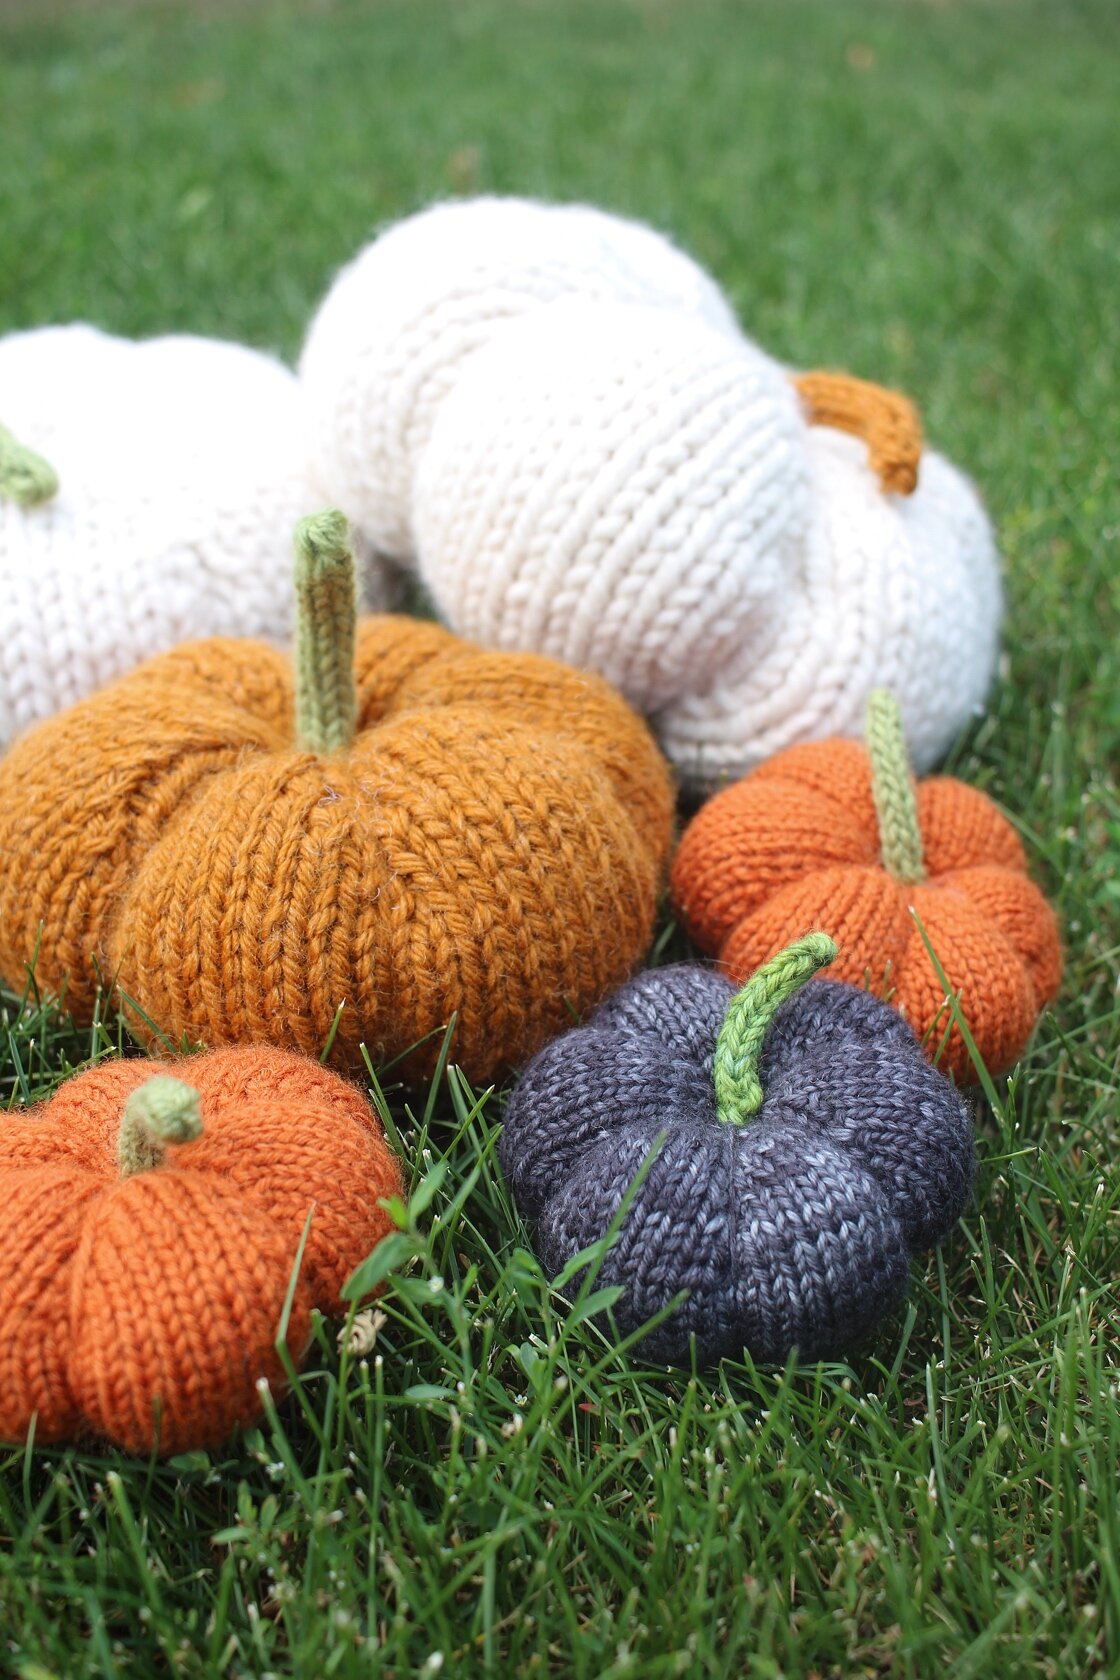
Knitted orange, blue, and teal pumpkins sitting in grass.

One of these days I’ll get to write about my knitting projects when I finish them instead of months later. One of these days. Most of the time I just enjoy the completed project and let the blog post go so I’m not creating a giant, overwhelming, ever-growing to do list. But these pumpkins are too cute not to share, even if it is December.

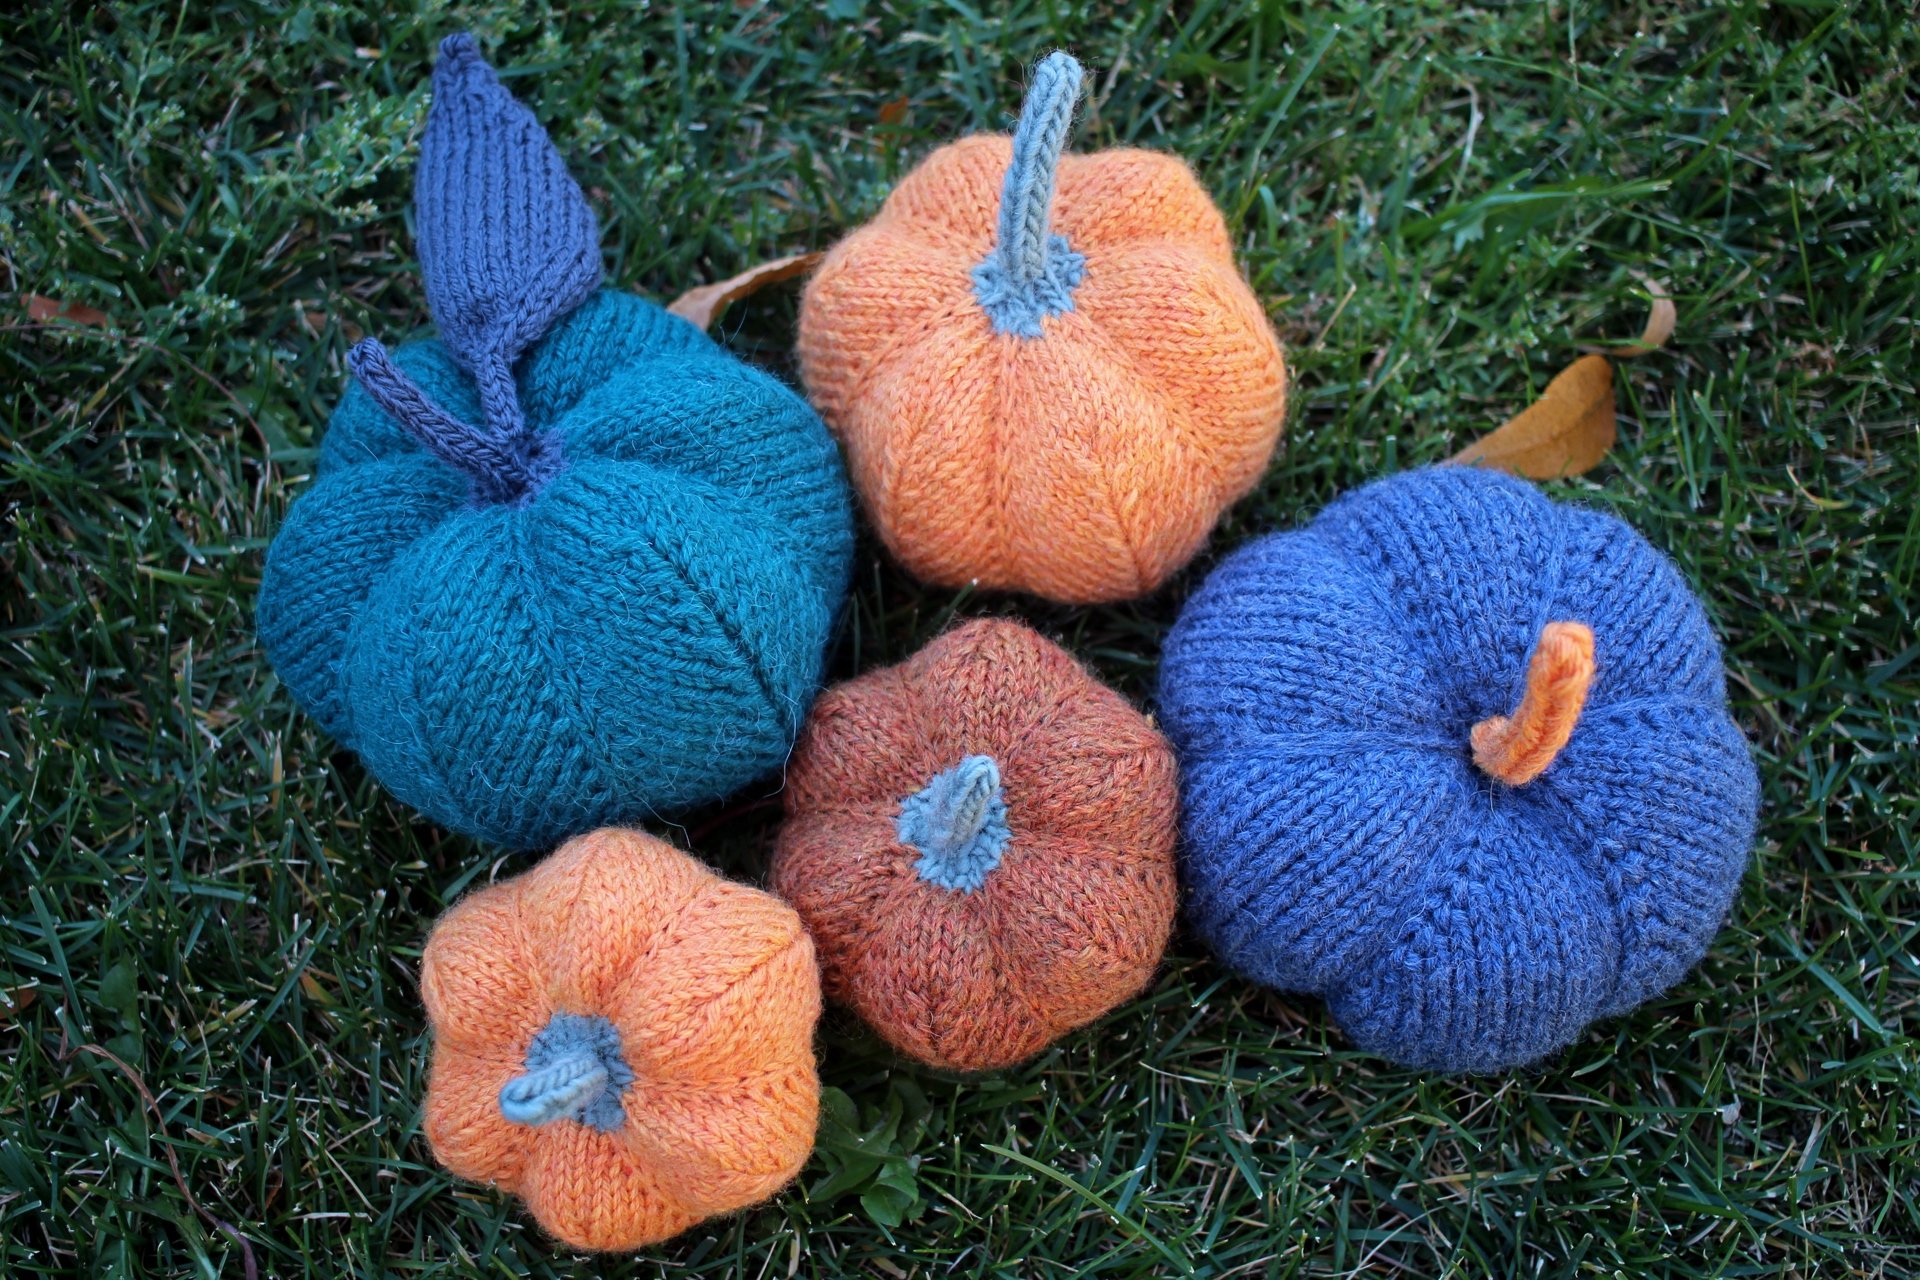
Overhead view of 5 hand knit orange, blue, and teal pumpkins sitting in the grass

When I felt the urge to knit a whole pumpkin patch in September, I went with the Cute Little Pumpkin Patch pattern by Norman Schwarze. It’s fun to knit, has just the right amount of technical detail, and makes a good pumpkin shape with increases and decreases. The dark orange one was even mistaken for an actual pumpkin!

I absolutely love this pattern, and it’s pretty easy to make larger or smaller either by using different weight yarn or working fewer increase rows. The pumpkins I made with worsted weight yarn are the perfect size to sit on a shelf. The tiny pumpkin I made with marled fingering weight yarn is my favorite of the bunch and fits easily in my hand. (Of course, it’s also the one I didn’t get any good photos of before packing it up for next year.)

Close up of a blue pumpkin knit using the Spice Knit Pumpkin Pattern from Knit Picks.

This blue pumpkin is the only one I made this year with the Spice pattern from Knit Picks. The kiddo wanted a squishy blue pumpkin and a squishy blue pumpkin is exactly what she got. Of course she didn’t let me pack that one up.

Teal knitted pumpkin front and center with orange and blue pumpkins sitting behind.

I’m sure I’ll knit more pumpkins next year. Some, like most of the ones I made this time, will be gifts. Some will be for me. But all of them will probably be cute and tiny.

Some Sock Knitting Woe

An almost finished pair of yellow cabled hand knit socks.

An almost finished pair of yellow cabled hand knit socks.

Gather round (digitally of course) while I tell a tale of woe and sock knitting misfortune. At the center of it all is this pair of socks which the recipient has dubbed the Celtic Waffle socks because the intricate cables remind her of waffles. I’m inclined to agree.

Now these socks are no strangers to ripping. I was a good chunk of the way into the foot of the first toe-up sock when I realized it was too small. So out it came. The second attempt went much better with a larger stitch count even with the long break I had to take in the middle of the gusset. Things were smooth sailing once I got started again. I finished the gusset, turned the heel, knit two full chart repeats, worked some 2x2 ribbing at the top, and bound off. This first sock is a beautiful thing that took a lot of work, planning, and attention. So, not wanting to lose momentum and or take another six months to finish, I immediately started the second sock.

The inside off my sock knitting project bag holding one in progress sock and too little yarn to finish.

The inside off my sock knitting project bag holding one in progress sock and too little yarn to finish.

Sock number two was going great. By this point, I was well past the heel and so happy to be knitting this complicated chart for the last time. Then the yarn started to tangle. Obviously the thing to do was to take the yarn out of my project bag, sort it out, and resume knitting. Instead, I pulled out the yarn, and thought, “Where’s the rest of it?” No amount of shuffling through the papers and accoutrements turned up more hidden yarn or a portal to Yarnia. The rest of the cake definitely didn’t jump out and say, “Surprise! Here I am!” Ugh.

There I was holding a sock that needed three more inches before the bind off in one hand and nowhere near enough yarn to do so in the other. That’s when I figured out just how badly I’d messed up this time. And it was such a simple, but absolutely massive, mistake too. Here it is:

I thought the yarn came in 100g skeins because many skeins of fingering weight sock yarn do. This yarn however came in a 115g skein.

So I could put 57.5g toward a sock instead of 50g. But I forgot all of this when figuring out how tall to knit the first sock. So, when I looked at the grams on the scale, I thought I had way more than yarn to work with than I actually did. And I was so excited to just start that I didn’t way weigh the first sock like I usually go when knitting socks from one skein. That would have been an immediate red flag that something was off. How much yarn did that first sock use? 62 grams. Once again, ugh.

The first finished cabled sock that used way more yarn than I expected.

The first finished cabled sock that used way more yarn than I expected.

I have already decided that I am not ripping out the first sock. The cable would be okay but the leg would be way too short. The sock is just right aside from that whole used too much yarn thing. That means I need to get more indie dyed yarn whenever the dyer dyes more. I haven’t had any luck finding this base in this color for sale or trade anywhere else either. Now I get to play the waiting game for yarn updates.

Now that I’m stuck waiting instead of gleefully finishing this pair, I’m left trying to figure out how to not make this mistake again. I’ll let you in on a secret: this is the second time I’ve done this. That other pair of socks is still waiting for me to unpick the bind off and rip enough out to match both socks. For the third time, ugh.

The mostly finished sock and the little bit of remaining yarn.

The mostly finished sock and the little bit of remaining yarn.

I’ve come up with two things that might help. One, write down how many grams I can put towards each sock in my notes. I keep fairly detailed notes as it is, so this shouldn’t be too hard to remember to do. Two, divide 100g+ skeins in half. I have an accurate scale and scissors so it’s doable. More work upfront (and something I used to do), but better than not having enough yarn to finish a pair or socks.

How do keep your sock WIPs from eating more yarn than you have?

The Mighty Raven Queen Mitts

Two grey and red fingerless mitts laying next to each other to show the front and back of the pattern.

“Ya know, the photos really didn’t do these mitts justice.”

That was the paraphrased text I got from my friend after she unwrapped these mitts, and I am inclined to agree. She knew that I making these for her so I kept her updated with progress pics. A finished cuff there, half a raven over here, and so on. I didn’t send her any photos after I blocked the mitts though so I wouldn’t spoil the final reveal. Still, they are so great to see in person and wear too. I had to try them on, of course, and make sure my floats weren’t too tight. Yeah, that’s the reason. :)

Two red fingerless mitts covered in grey raven color work.

I had a long list of Christmas knits that I wanted to make, but kept cutting it down as time ran out. I finally decided what was left would be Happy 2021 gifts instead since I’d have to put everything in the mail during massive shipping delays anyway. These mitts were one of the few projects that made the cut. Pretty sure the impressive and fun color work is the reason. I stayed up way too late many a night just to do one more row. Oh! And one extra bonus is that this pattern finally pushed me to understand how m1 increases work. Lifted increases are still my favorite, but I’ll keep the m1 in mind for color work.

Close-up of the inside of the Raven Queen mitts showing gray floats of yarn secured by red stitches. The other mitt right side out is behind.

And here are the floats since no post about finished color work is complete without a photo of the back side. There are a few sections where the floats are pretty long so I trapped them about every 8-10 stitches which worked really well. They didn’t catch my fingers when I tried on the mitts at all.

Looking at these photos makes me want to cast on for my own pair right now. I even have the yarn - a variegated charcoal and a golden yellow - wound and ready to go. Now if only I could find energy to start and the brain power to follow color work charts.

The Specs:

Pattern: Raven Queen by Jacquline Rivera (Ravelry Link)

Yarn: Knit Picks Hawthorne Fingering Kettle Dye - 75 yds slate and 147 yds Hood River

Needles: 2.25 mm circulars for ribbing and 2.5 mm circulars for color work

Dates: December 7 - 20, 2020

Ravelry Page

An Autumn Knits Round-Up

All-Pumpkins-3.jpg

After a summer spent doing pretty much anything other than knitting (besides from finishing a few pairs of socks), the urge to play with all the yarn came back strong this Fall. I made fun stuff to put around the house, whipped up gifts, and finished up the odd lingering project. It was cathartic to get my fingers on the needles again and go stash diving to find the perfect yarn.

A collection of small, medium, and large knit pumpkins sitting in the grass. The pumpkins are orange, white, black, and purple.

I’m pretty sure it was the Spice and Clove Pumpkin pattern that brought back my knitting drive. This pattern showed up on my radar last year, but I didn’t get the chance to knit it at the time. This year I dove into the stash and pulled out yarn to make all sorts of fun pumpkins. There are tiny pumpkins made from doubled up sock yarn and big, squishy pumpkins made with bulky yarn. It’s a pretty versatile pattern that way.

Some of these have stayed with me and taken up residence on random shelves all over the house. Kiddo likes totting them around so they get up to some off the wall adventures. The rest headed off to new homes as fun gourd surprises.

While I’ve mostly gotten knitting pumpkins out of my system for the time being, I’m thinking about making one more using this pattern. All the shaping is done with increases and decreases instead of wrapping with yarn. I don’t think I’ll be able to whip one up before Thanksgiving, but it’ll still be a fun project in December.

A knitted black cat and witch wearing a green dress and grey hat sitting at the base of a tree.

This adorable little witch duo (well, duos), is another pattern I came across last year, but didn’t get around to knitting until September and October. The green witch and cat were a gift. Then I couldn’t resist knitting a sunflower yellow witch for my own shelves. The pattern, Little Witch Charm Set by Susan B. Anderson, is a little fiddly at times and I made a few mods to avoid picking up as many stitches.

A speckled black cat and a witch with a broom, yellow dress, and brown hat sitting in front of a jack-o-lantern.

I couldn’t get gauge with the yarn I needed to use, so I used said fingering weight yarn doubled up. It was a great way to use up my sock yarn leftovers and gave the witches a nice size boost. Still small and cute, but not mini. Here’s a full list of all my mods on the Ravelry project page.

An orange cardigan with 3 blue buttons laying on a field of rocks and snow.

And a sweater for the kiddo! This is the In Threes sweater that I started and finished knitting in 2019. The problem was that is got packed up on a high shelf while I tackled other major projects. The lingering doubt of whether or not it would still fit said kiddo this winter finally made me pull it down. Then it took me a few more weeks to sew on three buttons. The good news is that the sweater fits and looks like it will still fit next winter. Whew! The even better news is that kiddo still likes the sweater and asks to wear it. That’s a win in my book any day.

A close-up of the yoke of the cardigan with short sleeves and three blue buttons.

What’s next on the knit list? The Red Scarf Project scarf is still on the needles, but I couldn’t resist casting on a for a sweater. A sweater for me, no less. Christmas gift knitting is also staring me in the face. There’s a whole pile of yarn waiting for me to wind it up. I’ve got plans for cute unicorns, color work mitts, socks, and ornaments. Here’s hoping I haven’t bitten off more than I can chew.

Halfway Finished With 100 Days Of Sock Knitting

A pair of blue striped toe-up socks on sock blockers with one sock flipped inside out.

Back in 2019, I wanted to spend 2020 knitting socks. Socks for me. Socks for the Bearded One. Socks for the kiddo. Socks for friends. Did I knit socks in Janaury? Nope. Did I knit socks in February? Kind of. I started a pair of kid socks, and then they sat untouched for months after my own kiddo pulled out a needle’s worth of stitches. Ugh. Then the 100 Day Project kicked off and I made yarn for 100 Days which didn’t leave much room for sock knitting, but did get me some lovely new handspun. When that project ended, I wasn’t sure what to do next. I’d given up on a year of socks or even six months of socks. 100 days of sock knitting, though? That I could do. I quietly kicked off the project on July 28th, 2020 and got back to work on the lingering kid socks. Those only took a week to finish at a few rounds every day. What was next on the list? These blue-striped beauties for the Bearded One, which thanks to daily knitting, were knit in just under a month.

Blue-striped socks on feet and showing off the princess sole.

While they weren’t unceremoniously removed from their needles by a curious kiddo, knitting these socks wasn’t without aggravation. I’m a stickler for making self-striping yarn match up on each sock. The first step is matching up the yarns and making sure both skeins are in the same point in the color sequence. It’s a good thing I bought this yarn at a discount and got two balls because both of them came with knots. The stripe sequence was completely reversed in the middle of one ball! Thankfully, the largest chunks from both balls were enough to knit matched socks. And I’ve got enough leftovers to make a smaller matching pair for the kiddo. So, pulling the yarn balls apart, cutting, detangling, and spreading them all over the room for a few days was totally worth it.

The other big aggravation was finding two dropped gusset stitches that somehow escaped being knitted together with the edge of the heel flap. That part was all me, and easy enough to sew up at the end.

A close-up of the heel flap surrounded by the reverse stockinette of a princess sole.

The pattern is my own much tweaked and refined default toe-up sock pattern. Tweaking continued with this pair because I had to figure out how to knit the socks so I could flip them inside out after binding off to get a princess sole without purling. Totally worked though it did feel odd to knit a heel flap with the right side inside the sock. The pair got the Bearded One’s seal of approval so they must have turned out great. :D

I’m aiming to get the pattern written up properly in a wide range of sizes as I knit them. Figured I’d start with the biggest size and work my way down. It’s going to be awhile before this particular pattern is anywhere close to finished, but I will keep you updated.

With these socks complete, I’ve knit 2 pairs during my 100 Days of Sock Knitting project. Pair three is on the needles and there are cables afoot with 50 days of dedicated sock knitting time left. More on those socks later though.

The Specs:

Pattern: My own default toe-up sock pattern

Yarn: 437 yds (390.3 m) of Wisdom Yarns Stanza - 703 Burns

Needles: US 1.5 - 2.5 mm circular needles

Dates: August 6 - September 4, 2020

Ravelry Page and more notes here

New (Free) Pattern: The Windbreaker Hat

The Windbreaker hat is a ridiculously stretchy cabled hat. Quick and easy to knit, the free pattern uses less than 1 skein of worsted weight yarn and is a great gift. #knitting | withwool.com

The Windbreaker hat got the chance to live up to it’s name this weekend. The Bearded One and I trekked through the falling snow, wind, and 19 degree temps to run errands and grab lunch. Every minute outside, the hat kept his head warm and the wind out. No cold ears here.
 
Windbreaker is a ridiculously stretchy cabled hat. Seriously. It fits both me (22") and the Bearded One’s 24” noggin. The secret to this stretch is that the hat, even the cables, are based in 2x2 rib. This has the added bonus of making the hat an easy knit while the cables keep things interesting. And thanks to the long brim, Windbreaker can be worn as a slouchy hat or with the brim folded for an extra layer against the cold.

The Windbreaker hat is a ridiculously stretchy cabled hat. Quick and easy to knit, the free pattern uses less than 1 skein of worsted weight yarn and is a great gift. #knitting | withwool.com

The pattern uses worsted weight yarn, and this hat is made with less than one skein of Berroco Ultra Alpaca (Oceanic Mix). Both written and charted instructions are included for the cables and crown decreases. The pattern includes two sizes, medium and large, and an option to work a longer section of cables and a shorter brim.

Add it to your queue and favorites on Ravelry!

Sizes: Medium (Large) - Shown in size Large which fits a head circumference up to 24" (61 cm)

Needles: US 7 (4.5 mm) 40" circular needle (for magic loop) OR 16" circular needle and DPN's

Gauge: 13 sts and 13 rows = 2" (5 cm) in 2x2 rib, unstretched

Yarn: 130 (145) yds / 119 (133) m worsted weight yarn. Shown in Berroco Ultra Alpaca - Oceanic Mix.

Notions: Cable Needle, Tapestry Needle

Sign up to the With Wool Weekly newsletter to get the Windbreaker pattern for FREE. You’ll also get news about new patterns, blog posts, tutorials, and a roundup of fiber arts links. Plus, get special discounts and bonuses just for subscribers.

With Wool Weekly

Spam is bad. There's none of that here.

6 Tips for Finishing Last Minute Gift Knitting

Whether you’re just casting on or have a long knit list, follow these tips to get your #knitting wrapped and under the tree. | withwool.com 

There’s no denying it. We are smack dab in the middle of the holiday season. There’s not much time left to get those knitted gifts bound off and wrapped. Whether you’re just casting on or started early and still have a chunk of stuff to stitch, follow these tips to get that stuff under the tree.

Make a list, and check it twice.
I know it’s tempting to just get started, but a list of what you’re making and for whom is your best friend. The “knit this” list might not seem that long in your head, but could be a bit more daunting on paper. Trim as needed to save your sanity and make sure you get a few hours of sleep here and there. Plus, you’ll be able to make sure you have all your supplies ahead of time and skip late night trips to the store.

If you’ve got a lot of people to knit for, stick to small projects.
Hats, fingerless mitts, small toys, ornaments, washcloths, slippers/chunky socks are all fair game. T-minus twenty days and counting is not the best time to cast on for that heirloom lace weight shawl with patterning on every row.

Go big.
Thicker weight yarn, worsted and up, works up way faster than fingering weight. A cabled hat knit in worsted weight yarn can be quick project with big impact.

Give yourself some wiggle room.
That color work stocking might take more time than you think. Or you could run out of yarn and have to make a late night shopping trip. Or you want to enjoy the holiday season and parties without furiously stitching through every one of them. And you can take well needed breaks. Your wrists will thank you when they’re not sore and stiff on December 26th.

Monogamous knitting works.
Hear me out. Knitting one project all the way through goes so much faster than splitting your knitting time between 5 different WIPs. I stuck with monogamous knitting in November 2017 and rocketed through a scarf, two hats, the 2nd half of a shawl, and a bundle of ornaments.  If you really can’t stand the thought of one project at a time or need some out and about knitting, focus on just two projects. One can be simple and the other complex. A little variety can help get you over the “don’t want to work on this” hump.

You can quit.
Seriously, you can quit. Maybe there’s a point where you look at your knit list and know that there’s no way it’ll be finished, late nights or not. I’ve been there. It’s frustrating. The upside is that you’re in control of your knitting, goals, and plans which means you can decide what’s right for you and your time. And if you don’t tell people what you’re making them, they can’t be disappointed it’s not done. So get some sleep, go to that party, and ditch the added stress.

Monogamous Knitting For The Win

A little bit of monogamous #knitting works! I knit a scarf and hat in 2.5 weeks.  | withwool.com 

I did it! Two and a half weeks of monogamous dedicated knitting turned into cabled scarf and a matching hat. It’s nice to know I can still speed my way through a project or two every now and then. Why the rush? The scarf and hat were gifts for a friend visiting over Thanksgiving and I wanted to give them to him in person. Nothing like a hard deadline to light a fire under under your butt.

A little bit of monogamous #knitting works! I knit a scarf and hat in 2.5 weeks.  | withwool.com

I spent way too long trying to pick out a pattern which is part of why I cast on at the last minute. Nothing seemed quite right, and I was just about to give up and design something myself when the Palindrome scarf popped up. Easy reversible cables? Yes, please. I knit this pattern way back when as a newish knitter and was pleased with the results then. And I’m pleased again with this latest version. The only difference this time is that I made a few mods. The scarf started and ended with 2.25” of ribbing. I added an extra cable repeat for width. Plus, cable twists happened every 8 rows for a looser cable.

I can’t leave out the yarn’s wonderful contribution either. Normally, I wouldn’t choose Ultra Alpaca for a cabled project because the alpaca/wool blend wouldn’t have the same crisp texture as a 100% wool yarn. I wasn’t worried about that in this case since the purls would be “hiding” and not acting a background for the cables. The blend created a beautiful textured fabric that is perfect. And warm. Did I mention warm? The main reason I picked a wool/alpaca blend was that it’d be worn through winters with regular snow, wind, and freezing temps.

A little bit of monogamous #knitting works! I knit a scarf and hat in 2.5 weeks.  | withwool.com

And because the weather required it, I made a matching hat. I did end up coming up with a pattern for this beauty at the last minute. My original plan was to have both the scarf and hat finished before he arrived. That didn’t quite happen. In fact, I knit most of the hat in front of him and figured out the crown decreases on a drive through the mountains.  Then I gave it to him mere moments after weaving in the ends. The look on his face was totally worth it.

I am absolutely smitten with this hat pattern. So much so that I’m writing it up with a few more sizes so I can knit at least one more for myself or as gifts. I’m all for versatility. In the meantime I’m getting on with the rest of my gift knitting and making. Since monogamous knitting has been working for me, I’m going to keep it up. Thankfully, the rest of my projects are on the small side so I won’t get bored and can power through.

The Pattern: Palindrome Scarf and a hat pattern I’m writing up
Yarn: 3 skeins Berroco Ultra Alpaca
Needles: US 7 (4.5 mm) circulars
Dates: November 5 - 24, 2017
Scarf details @Ravelry
Hat details @Ravelry


A Knitting Conundrum

I can’t settle on a stitch pattern for this sock. Cables? Texture? Ribbing? 

This is a sock toe, and the first of a pair that I’m making for the Bearded One. It also happens to be one of my most confounding pieces of knitting I’ve got going right now. Not because it took frequent try-on’s to make sure the stitch count is correct. Not because of its 76 stitch circumference. Not because I’m knitting the sock inside out so I can skip purling a princess sole. Nope, all of that stuff is stuff I’m used too - even knitting a pair of socks inside out.  The problem is that I can’t decide what stitch pattern to use over the top of the foot and up the cuff.  

My original back of the envelope plan was to work an alternating 2x2 rib for the entire sock. For example, *k2,p2* for 8 rounds, and switch to *p2, k2* for another 8 rounds. Repeat until bind off.  Now I’m not sure. 38 stitches for half the sock is a lot of space to cover, and I wanted to add some interest both for the eye and my fingers. And of course I want the Bearded One to like them too. Does that mean cables? A simple texture pattern? Some sort of edge detail going up the side of the foot? I have no idea. Good thing the yarn is pretty and nice to look at while I ponder my choices.

Any tips to help me solve this knitting conundrum? 

The Inseparable Duo

Rebecca Danger’s patterns never let me down with I need a cute gift. Say hello to Beatrice and Bernard! | withwool.com

I knew I was going to have leftover yarn. Not a tiny little ball I could put in my hand and post to Instagram tagged #socute. Nope. After binding off the February Baby Sweater, I had about 125 yards to work with and I want to make something cute to match. I thought about booties and hats but shelved the idea. I wanted something that could be used and enjoyed for more than a few minutes before being tucked away in a drawer to keep safe for later. A cute, soft toy seemed like just the thing.

Rebecca Danger’s patterns never let me down with I need a cute gift. Say hello to Beatrice and Bernard! | withwool.com

Every toy I’ve made from a Rebecca Danger pattern has been a big hit. Like this cat that’s now a favorite. And this tiger. I picked The Inseparable Beatrice and Bernard this time because they’re adorable and not too big. The fact that the duo is a relatively quick and easy project might have had something to do with it too. Didn’t hurt that I already had the right safety eyes too. 

I knit the arms and tail first just to get the fiddly bits out of the way. Knitting the bodies went fast once I actually sat down to do it. I followed all my usual mods, which I’ve listed on the Ravelry project page, and ended up with 2 adorable buddies. And who could resist that cute bunny tail!

A post shared by April Klich (@aprilklich) on

Pattern: The Inseparable Beatrice and Bernard by Rebecca Danger

Yarn: 57 yds Cascade 220 Superwash - Lake Chelan Heather

Needles: US 4 (3.5 mm)

Dates: March 28 - April 28, 2017

All mods listed on Ravelry

The Famous February Baby Sweater

Pithy instructions, a little garter stitch, and a bunch of lace make up the famous February Baby Sweater. It’s a good test of knitting skill too. | withwool.com

I spent the first few months of 2017 working on secret knitting. It was a baby gift for a good friend of mine, and now that the sweater is at it’s new home, I can share it with you too. When I first heard that my friend was having a baby, I thought about making a blanket. She had plenty of those coming in though so I decided to make a cute sweater instead. After scrolling through page after page of baby sweaters on Ravelry I picked Elizabeth Zimmerman’s February Baby Sweater. The pattern has been in my queue for awhile but that’s not why I picked it. It looked cute and I wanted to make something with lace for a dedicated lace knitter.  

I went into this project knowing EZ’s patterns have a reputation of being, as she calls them, “pithy”. Concise, terse, succinct, condensed… Having made a Pi Shawl a few years ago, I thought I knew what I was getting into. I was mistaken. 

Pithy instructions, a little garter stitch, and a bunch of lace make up the famous February Baby Sweater. It’s a good test of knitting skill too. | withwool.com

After years of knitting from (and writing) more detailed row-by-row instructions, the 3 paragraph pattern took some getting used to. It wasn’t that the pattern was hard to understand - the gist of it was definitely there - I just had a lot of questions about specific details. So I had to answer them for myself. Thankfully, lots of other people have knit this sweater and I found helpful mods and size charts to make a 9-month sized sweater. Swatching was definitely a requirement. 

Pithy instructions, a little garter stitch, and a bunch of lace make up the famous February Baby Sweater. It’s a good test of knitting skill too. | withwool.com

Since I was writing more detailed instructions to work from, I made a few of my own modifications to knit the sweater to my own preferences. You can find the full details on the project page.

  • Cast on more stitches and worked fewer rows before starting the first yoke increase row to get a wider neck opening.
  • Switched out the "M1" for "kfb" because it looked neater. 
  • Worked the button band over more stitches and made larger button holes.
  • I knit the body of the sweater flat, but worked the sleeves in the round. After reaching the spot to set up for the sleeves, I knit those stitches with waste yarn and decreased to get the stitch count of the sleeves. Then I came back, picked out the waste yarn, and put the live stitches on the needles to knit the sleeves just like an afterthought heel. Finicky? A little, but I got a neat, seamless join that didn’t break the lace pattern. Totally worth it in my book. 
Pithy instructions, a little garter stitch, and a bunch of lace make up the famous February Baby Sweater. It’s a good test of knitting skill too. | withwool.com

The February Baby Sweater is definitely worth the effort, and I encourage you to make one yourself. I say this counting the time that I frogged the sweater back to the cast on because I had to re-do the yoke increases. Figuring out how to get exactly what you want out of this pattern is a good test of skill that will up your knitting game. Plus, the lace and garter stitch are an absolutely beautiful combination. I am proud to give this sweater to a good friend who is also an amazing knitter. 

P.S. Since this post has gotten on the long side, I’ll show you what I did with the leftovers next. 

Pattern: Baby Sweater on Two Needles (February) by Elizabeth Zimmerman

Yarn: 317 yds Cascade 220 Superwash - Lake Chelan Heather

Needles: US 6 (4 mm)

Dates: January 18 - April 28, 2017

@Ravelry

FO: Shawls for Two

I made an Elder Tree Shawl and a Myndie Shawl as gifts for two excellent friends. | withwool.com

An Elder Tree Shawl and a Myndie Shawl. These were the 2 big projects I made for the holiday gift knitting rush. I was definitely rushing and around to finish things at the last minute, but these two were first on the list so I wouldn’t stress over them. Staying up late, counting, beads, and an impending sense of doom are not a good mix for me. So, once I’d finalized the knitting gift list and pulled the needed yarn from stash, I started on the Elder Tree Shawl. It was the most complicated project on the list and I didn’t want to rush it. 

I made an Elder Tree Shawl and a Myndie Shawl as gifts for two excellent friends. | withwool.com

Elder Tree turned out to be a fairly easy knit once I got the pattern straight in my head. Except for this one repeat. It was almost finished and I was all too happy to mark my progress. Then I got to the far edge of the pattern and noticed my stitch count wasn’t quite right. My first inclination was to fudge it and keep going, but no such luck. The leaves were mashed together and I had no choice but to rip back. Still, I didn’t want to lose a night’s progress and tried ripping just that one portion. Probably would have worked too if there’d been enough yarn to work all the stitches. I ripped and reknit that one section 2 or 3 times and it never looked right. So, out came the needles, all of those rows turned into yarn again, and I spent the rest of the night making sure the yarn overs didn’t run away. Worth it. 

I made an Elder Tree Shawl and a Myndie Shawl as gifts for two excellent friends. | withwool.com

The yarn, Jojoland Melody Superwash, and the lace worked so well together. I happened to have purple beads from a previous project and they were the perfect added touch to the last repeat. This was the first time I’ve knit a beaded shawl and I love the look. Definitely need to add a few to the queue for myself. 

I made an Elder Tree Shawl and a Myndie Shawl as gifts for two excellent friends. | withwool.com

And now the Myndie Shawl. This pattern is also on the list of things I want to knit for myself this year. Once I figured out how to work the pattern in a heaver yarn, it was smooth sailing. I ended up using way less yardage than the pattern called for, but you wouldn’t be able to tell. Thanks to a firm blocking, this shawl grew from a sad looking lump to beautiful 80” long wrap. 

Knitting a shawl or anything else as a gift can be a stressful and time consuming endeavor, but I’m happy to do it for good friends and family. It’s not something I do lightly either, because every stitch is a declaration of how much I care for and appreciate the recipient. I’m not a human knitting machine after all. 

I made an Elder Tree Shawl and a Myndie Shawl as gifts for two excellent friends. | withwool.com

Pattern: The Elder Tree Shawl by Sylvia McFadden

Yarn: 431 yds Jojoland Melody Superwash - ms08

Needles: US 4 (3.5mm) circulars

Dates: September 21 - October 9, 2016

@Ravelry

Pattern: Myndie by Ambah O’Brien

Yarn: 358 yds Araucania Nature Wool - 07

Needles: US 8 (5 mm) circulars

Dates: October 10 - 16, 2016

@Ravelry  

Aubie The Captivating Tiger

Say hello to Aubie the Captivating Tiger! | withwool.com

Say hello to Aubie the Captivating Tiger! He was one of the last projects I made for the 2016 gift knitting rush, and definitely the cutest of the bunch.  At first Aubie was going to be a cat knit in a bright, unnatural color like this one, but then a few thoughts came at me all at once. One, said cat is going to be knit for the daughter of one of my best friends from college. Two, said college mascot is a tiger (War Eagle!) and there’s no lack of school spirit in their house. Three, I had yarn in perfect Auburn colors. There was no way I couldn’t knit Aubie.

Say hello to Aubie the Captivating Tiger! | withwool.com

I made the arms and tail first so I could sew them on as soon as the body was finished. I also spent a good chunk of time embroidering the face and getting the expression just so. He was technically done, but looked naked. So he got a bandana. I used my Show Off Boomerang shawl pattern as a base. When it was wide enough to cover the front half of the body, I cast on more stitches to wrap around the rest of the neck. Then I knit a few more rows, bound off, and added a button. Aubie was ready to hit the road.             

Say hello to Aubie the Captivating Tiger! | withwool.com

Since I’ve made several of Rebecca Danger’s toys, I have a few mods that I make every time. You can see the full list on the Ravelry project page. For Aubie, I also tried something new. I’ve always had a hard time sewing arms on toys with a nice looking seam. Were the arms on there? Sure, but it wasn’t always pretty. This time I used duplicate stitch, making sure to go through both layers of arm every time I made a new stitch. The seam is both sturdy and near invisible. This kind of seaming does make the arms stick up a little, but that only adds to the charm. 

The pattern base I used, Greta the Captivating Cat by Rebecca Danger, has never let me down. It’s cute in any yarn, a quick & easy project, and is a great canvas for special added touches. Plus, kids and adults love it. I was so tempted to keep this one for myself because it was too cute. I’ve got plenty of yarn to make a twin though and I’m sure I will.

Say hello to Aubie the Captivating Tiger! | withwool.com

Pattern: Greta The Captivating Cat by Rebecca Danger

Yarn: 93 yds Knit Picks Telemark, Tangelo and Skyline, and 17 yds Wool of the Andes Sport, White

Needles: US 3 (3.25 mm) circulars

Date: December 3 - 11, 2016

@Ravelry

2016 Gift Tag Round-Up

It's almost time to put all those knitted, crocheted, and handmade goodies under the tree. So, I'm rounding up a few of my favorite printable gift tags to make wrapping faster and easier. Anything to get a few more minutes of knitting time is a good thing!   

And here's the last gift tag round up with even more goodies!

Lovely, and simple gift tags for puresweetjoy.com

I love the simplicity of this lovely gift tags from puresweetjoy.com.

Enjoy these cute fox and reindeer gift tags with Scandinavian flair from foxandhazel.com

Looking for something cute and colorful? foxandhazel.com has beautiful gift tag printables with a Scandinavian twist. 

Gift tags with just the right amount of snark from smallfriendly.com

Need a little snark to go with your handmade gift? smallfriendly.com has you covered. 

Printable gift tags with vintage flair from Sew DIY.

Want a vintage touch to your tags? Here are some simple, cuties from Sew DIY

Sweet and straight to the point gift tags from masondixonknitting.com

Simple and straight to the point gift tags are great too. Get this free tag from masondixonknitting.com.

Free Pattern: Waffle Time Washcloth

The Waffle Time Washcloth is just the right size with a stitch pattern that looks great on both sides. | withwool.com

After knitting more washcloths and kitchen towels than I care to count, I have some very definite opinions about washcloths. The stitch pattern doesn’t have to be reversible, but it should look good on both sides. Garter stitch borders are a plus. Cloths with a bit of texture are perfect for scrubbing. And any washcloth much larger than a 7” square is unwieldy and too big. 

The Waffle Time Washcloth is just the right size with a stitch pattern that looks great on both sides. | withwool.com

I wanted to make a few washcloths as gifts and couldn’t find a pattern that I matched all my criteria. So I picked a scrubby stitch pattern and went from there. The cloths were quick to knit, and they’ll be sweet gifts with some lotion and a nice bar of soap.

If you share any of my opinions on washcloths, you can get the pattern below. Happy knitting! 

The Waffle Time Washcloth is just the right size with a stitch pattern that looks great on both sides. | withwool.com

Still Gift Knitting

Just need to finish this tiger and I’ll be so close to finishing 2016’s gift knitting. | withwool.com

I’m knitting a tiger. Well, a cat with orange and blue stripes. The pattern, Greta the Captivating Cat by Rebecca Danger, is one I’ve knit before with great results. It’s cute, cuddly, and sweet too. Once you cast on, it’s also a fast and simple knit though it doesn’t seem that way if you knit the body and then the arms, tail, and ears. To speed things along and get a finished tiger sooner, or at least make it seem that way, I knit the arms and the tail first. Then I don’t have to wait to sew them on. Anything to make holiday gift knitting in December a smoother process is fine by me. 

As for the rest of this year’s gift knitting, I’m calling it. All the big stuff I wanted to do, is done aside from a good soak and blocking. It’s all the little things that I kept adding to the list that I’m skipping. The endless variations of ornaments and “wouldn’t this be neat” things were stressing me out. So they’re gone. I’m going to knit a few ornaments, finish that pair of handspun socks, and call it good. Besides, I’d much rather stay up late playing Final Fantasy XV than worry over my knitting. My wrists and shoulders are already thanking me. 

Knitting Handspun Socks Part 2

I’m knitting a sock inside out! | withwool.com

I’m still knitting my first pair of socks from handspun (you can read part 1 of the tale here). It’s also the first time I’ve tried adding a princess sole - the smooth side of stockinette stitch is against the sole of the foot instead of the bumps - to a pair of socks. The socks have been great purse knitting, but the making the first sock was slow going because off all the purling on the sole and gusset increases. 

I’m knitting a sock inside out! | withwool.com

Why is so easy to overlook the simplest solution to a problem and instead go with a more complicated fix? After I turned the heel and knit the heel flap, a light bulb went off in my head. I could knit the second sock inside out! The only purling I’d have to do would be for the top half of the toe and the ribbing. I used the same cast on at the toe and the same increases. Instead of purling the sole, I purled the top half of the toe. I reversed the rib pattern from *k2, p2* to *p2, k2*. I’m glad I went with a simple stitch pattern over the foot otherwise knitting the sock inside out would be a little more complicated. 

I’m knitting a sock inside out! | withwool.com

The little bit of effort I put in upfront has been worth it because the second sock is zooming along. It’s almost time to knit the gusset which will actually be easier to work inside out. The combination of purled increases and marled yarn made it really hard to tell if I’d correctly worked an increase row on the first sock. Or if I was even on an increase row. Happy to have solved that problem this time around.

Okay, now it’s time to double check my gusset math and get back to the gift knitting. 

FO: Gramps Cardigan

Adorable baby sweaters and adorable! I made the Gramps Cardigan as a gift and am absolutely thrilled with how it turned out. FO: Gramps Cardigan | withwool.com

My secret knitting is no longer secret! The sweater can get its time in the spotlight now that it’s arrived at its new home. If I hadn’t been keeping this a surprise, it would have shown up several times and probably with a poem titled ‘An Ode To Ripping’. I haven’t written said poem but could have thanks to all the inspiration knitting the sweater gave me. All the frogging aside, the Gramps cardigan turned out to be a lovely sweater that I was proud to give to a very good friend and her new baby.

Adorable baby sweaters and adorable! I made the Gramps Cardigan as a gift and am absolutely thrilled with how it turned out. FO: Gramps Cardigan | withwool.com

When I was trying to decide what to make, I had to cross blankets off the list because I didn’t have the time. A hat or booties didn’t seem like enough, but a sweater seemed just right. After a couple hours looking through baby sweater patterns on Ravelry, I picked the Gramps Cardigan by Kate Oates. The finished sweaters all looked really cute. Plus, I like the idea of dressing up babies in vintage “old-man” style sweaters. Sold. I ordered the yarn, knit a swatch, and cast on. 

The knitting was pretty easy and the cables were fun to work once I got the pattern in my head. All the times I had to rip were my own fault for not reading ahead. I ripped because I didn’t like how I’d handled the cable pattern next to the neck decreases. I ripped again because I knit the first sleeve before knowing where I’d have to match up the cable patterns and said sleeve turned out way too long. I ripped a third and forth time because I kept messing up the short row shawl collar. Tinking short rows worked in 2x2 rib is not my jam, but binge watching Haven helped get me through it. 

Adorable baby sweaters and adorable! I made the Gramps Cardigan as a gift and am absolutely thrilled with how it turned out. FO: Gramps Cardigan | withwool.com

It’s been awhile since I’ve blocked a sweater and it wasn’t as complicated as this one. The cables definitely needed some tidying up and the shawl collar needed a little preening too. It got a good bath with a capful of Eucalan before I squeezed all the water out that I could. I was holding my breath when I unrolled it and did my initial measurements so I could block it to size. It hadn’t grown, or shrunk, and the sleeves hadn’t added any extra inches. Whew. I used my blocking wires and this tutorial from Tin Can Knits to get the cables looking crisp and even. The wires also added just the right amount of structure to support the shawl collar while it dried. 

Adorable baby sweaters and adorable! I made the Gramps Cardigan as a gift and am absolutely thrilled with how it turned out. FO: Gramps Cardigan | withwool.com

The last step was sewing on the buttons which I did after the sweater had dried. Then I just had to mail it and it got there just in time. Now, I’m not saying this sweater has baby summoning powers but I’m not going to explicitly deny it either. 

The Specs

Pattern: Gramps Cardigan by Kate Oates 

Yarn: 363 yds Cascade 220 Superwash - Citron

Needles: US 6 (4mm) Circulars

Date: April 12 - May 12, 2016

@Ravelry

FO: Precipitous Cuffs

The kind of yarn you use matters! I used 2 different yarns to make 2 pairs of Precipitous cuffs on the same needles, and got two wildly different finished projects. - FO: Precipitous Cuffs | withwool.com

I’ve been a little lazy updating Ravelry with project details and recent stash enhancements. Part of the plan for this week is to photograph fiber and update my stash catalog. I’m bribing myself into doing the work with knitting on a fun new project which is working pretty well.  As I was scrolling through my project page, I realized that I’ve never talked about the last few things I made as gifts in 2015. That’s the problem with secret knitting - sometimes it easy to forget to talk about it after it’s been given away and the festivities are over. Fixing that right now. So, here’s the Precipitous Cuffs I knit for my Mom and a friend.  

The kind of yarn you use matters! I used 2 different yarns to make 2 pairs of Precipitous cuffs on the same needles, and got two wildly different finished projects. - FO: Precipitous Cuffs | withwool.com

I had some difficult criteria to match while picking out stuff to knit for gifts. The pattern had to be relatively quick to knit ( I was on a holiday gift knitting deadline); use yarn I already had; and be small enough to pack in a suitcase for the flight to visit my folks. Plus, the recipients had to like it too. Enter Precipitous by Hunter Hammersen. I had a dark charcoal yarn which would be perfect. Partway through this first pair, I realized my Mom would like a pair too. While these weren’t the hardest things to knit from almost black yarn, I was glad to make the second pair in golden yellow. They were both pretty quick to knit too even with all the twisted stitches.

The kind of yarn you use matters! I used 2 different yarns to make 2 pairs of Precipitous cuffs on the same needles, and got two wildly different finished projects. - FO: Precipitous Cuffs | withwool.com
My thanks to @HunterHammersen for sharing this blocking trick. Instead of graph paper, I made a template to get the 5 points evenly spaced and sized. - FO: Precipitous Cuffs | withwool.com

After I’d bound off, I knew blocking was a necessity. There was no way the points would be distinct or that the twisted stitches would pop otherwise. Plus it would help even out the stitches on the increase rows and ribbing. I wasn’t sure how I was going to block these until I saw this neat trick using bottles and graph paper on Violently Domestic. Finding the bottles was the easy part. The hard part printing the 5 pointed star template so I could block both mitts of a pair to the same size and angles. Thankfully, the ink didn’t bleed onto the yarn during the whole process. 

The kind of yarn you use matters! I used 2 different yarns to make 2 pairs of Precipitous cuffs on the same needles, and got two wildly different finished projects. - FO: Precipitous Cuffs | withwool.com

It is so easy to see the difference yarn choice can make on a project after both pairs were dry. The gold pair is made from Knit Picks Gloss, a merino/silk blend, and the charcoal pair is made form Knitted Wit Gumballs Fingering which is 100% merino. I knit both pairs on the same needles and, aside from a few extra rows on the cuffs of the gold pair, the two pairs are the same. Row gauge and stitch gauge are definitely different. The gold cuffs have a lot more drape because of both the looser gauge and blend of fibers. The charcoal pair has body and memory because they were made from a firmly spun wool yarn at a tighter gauge. When I took the pair off the blocking rig it held it’s shape, and I didn’t knit bullet-proof fabric.

The kind of yarn you use matters! I used 2 different yarns to make 2 pairs of Precipitous cuffs on the same needles, and got two wildly different finished projects. - FO: Precipitous Cuffs | withwool.com

Of course I had to try them to make sure they would fit. They both passed with flying colors, and now I’m tempted to make myself a pair. Not sure if I want drapey cuffs or a no nonsense kind of pair. Either way, the pattern doesn’t use much yardage and I’ve got plenty of sock yarn leftovers. Just need to pick out the right needle size and get to knitting. 

The Specs

Pattern: Precipitous by Hunter Hammersen 

Yarn: Knit Picks Gloss - Honey and Knitted Wit Gumballs Fingering - Carbon

Needles: 2.75 mm and 3.25 mm circulars

Dates: November 15 - December 3, 2015

@Ravelry 

Notes About Spinning Cashmere

My first handspun skeins of cashmere! Cashmere is as soft as everyone says it is, and here's how I turned 2 oz of it into yarn. | Notes About Spinning Cashmere - withwool.com

Brave readers, it’s time for the next installment of adventures in spinning cashmere. In the first entry, I wrote about my attempt at drafting the singles and overcoming the idea that spinning cashmere would be as hard as everyone made it sound. At the time, I was working on the second single with the idea that the true test of whether or not I could spin cashmere would be in the plying. If the singles fell apart every couple of feet, then I’d failed. If the singles stayed together, then I could actually spin cashmere without screwing it up. 

One mama skein and one baby skein of plied cashmere ready to come off the bobbins. Cashmere is as soft as everyone says it is, and here's how I turned 2 oz of it into yarn. | Notes About Spinning Cashmere - withwool.com

Did the singles pass the plying test? If you haven’t already guessed from all the pictures, yes! Seeing all the plied yarn on the bobbins was a relief because I wasn’t sure I was going to pull it off until they were done. There were a few times with the singles pulled apart on me, but I didn’t need all the fingers on one hand to count them. Whew. 

A little uneven and limp, the yarn is ready to be finished with a good soak. Cashmere is as soft as everyone says it is, and here's how I turned 2 oz of it into yarn. | Notes About Spinning Cashmere - withwool.com

The final test came with the finishing. Would the skeins be the lofty, airy yarn I set out to spin? Before the skeins went into the bath, they looked a little limp - plenty of plying twist in them, but limp all the same. Finishing the skeins with a soak and a gentle thwack changed them for the better. The yarn plumped up to a beautiful, airy body and texture. Soft too. Oh, so soft. Of everything I’ve spun, this was the hardest to let go of. If the fiber hadn’t been sent to me to spin and then send back, I probably would have kept the yarn as a pet. Have I mentioned how soft it was? Mmmm…

My first handspun skeins of cashmere! The mama skein is about 240 yrds and mini is about 25 yrds. Cashmere is as soft as everyone says it is, and here's how I turned 2 oz of it into yarn. | Notes About Spinning Cashmere - withwool.com

Enough with the daydreaming, onto the technical details. Now that I know that what I did to spin this cashmere actually works, I can share my notes in good conscience. They still come with the disclaimer that I’m still a newb when it comes to working with this luscious stuff though. 

I didn’t actually read up on how to spin cashmere before I started the singles. My idea to spin cashmere woolen came from a cotton spinning demo with Stephanie Gaustad when she visited the Greater Los Angeles Spinning Guild. (Side note: Fiber guilds are great resources and worth joining.) My biggest takeaway was Gaustad’s comment that people thought spinning cotton, a short staple fiber, was hard was because they tried to spin it the same they they spun grabby, long-stapled fibers. Instead, she recommended woolen spinning because the twist would move into the fiber supply and keep things from falling apart during drafting. 

My first handspun skeins of cashmere! Cashmere is as soft as everyone says it is, and here's how I turned 2 oz of it into yarn. | Notes About Spinning Cashmere - withwool.com

I decided to try this idea with the short, slippery cashmere. So, I used a woolen drafting style and let the twist come into the fiber supply. To keep the twist from locking up the fibers, I set the take up low and used a larger whorl. There’s usually at least good foot and a half between my hands and the wheel’s orifice, so this distance let more twist enter the single before it went on the bobbin. As for plying, I didn’t do anything beyond the ordinary tensioning andbalance checks. 

I did do some research on how to finish cashmere but didn’t turn up much in my cursory internet search. I was working on a deadline, remember. Ended up following my usual steps for finishing a woolen yarn. First, the skeins soaked in cool water with a little Eucalan for about 20 minutes. After the yarn came out of the bath, and I squeezed out as much water as possible first with my hands and then by rolling the yarn up in a towel. I evened out the twist with a few good snaps around my hands before giving the yarn a few gentle thwacks against the shower wall. Gentle is key here since I wanted the plies to open up but not develop a halo. Then I hung them up to dry, and the wait proved to be the hardest part of finishing. The last step, which I heartily recommend, is petting the yarn like it’s an adorable kitten. So soft... 

Made sure to send off the handspun with a tag detailing the weight, WPI, and construction. Cashmere is as soft as everyone says it is, and here's how I turned 2 oz of it into yarn. | Notes About Spinning Cashmere - withwool.com

Fiber: 2 oz cashmere top

Yardage: Mama ~240 yds and Mini ~25 yds

Plies & Weight: 2-ply Sport; Mini skein plied on itself

Start & Finish: November 28 - December 15, 2015

@Ravelry