FO: The Cassidy Sweater

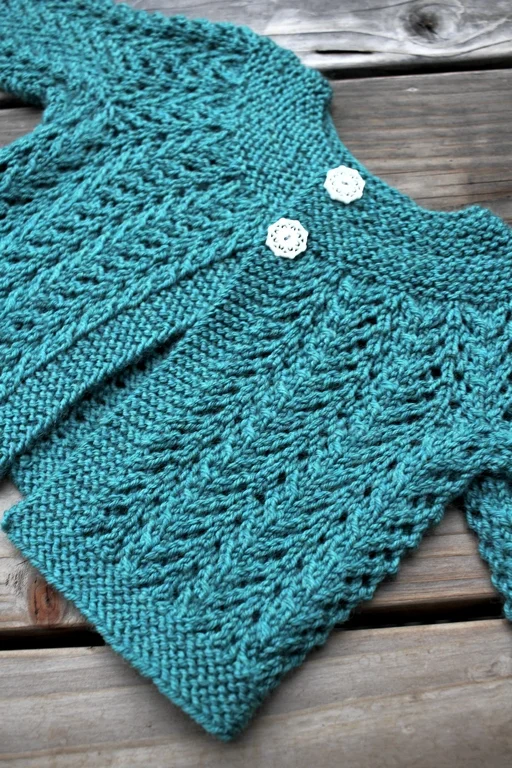
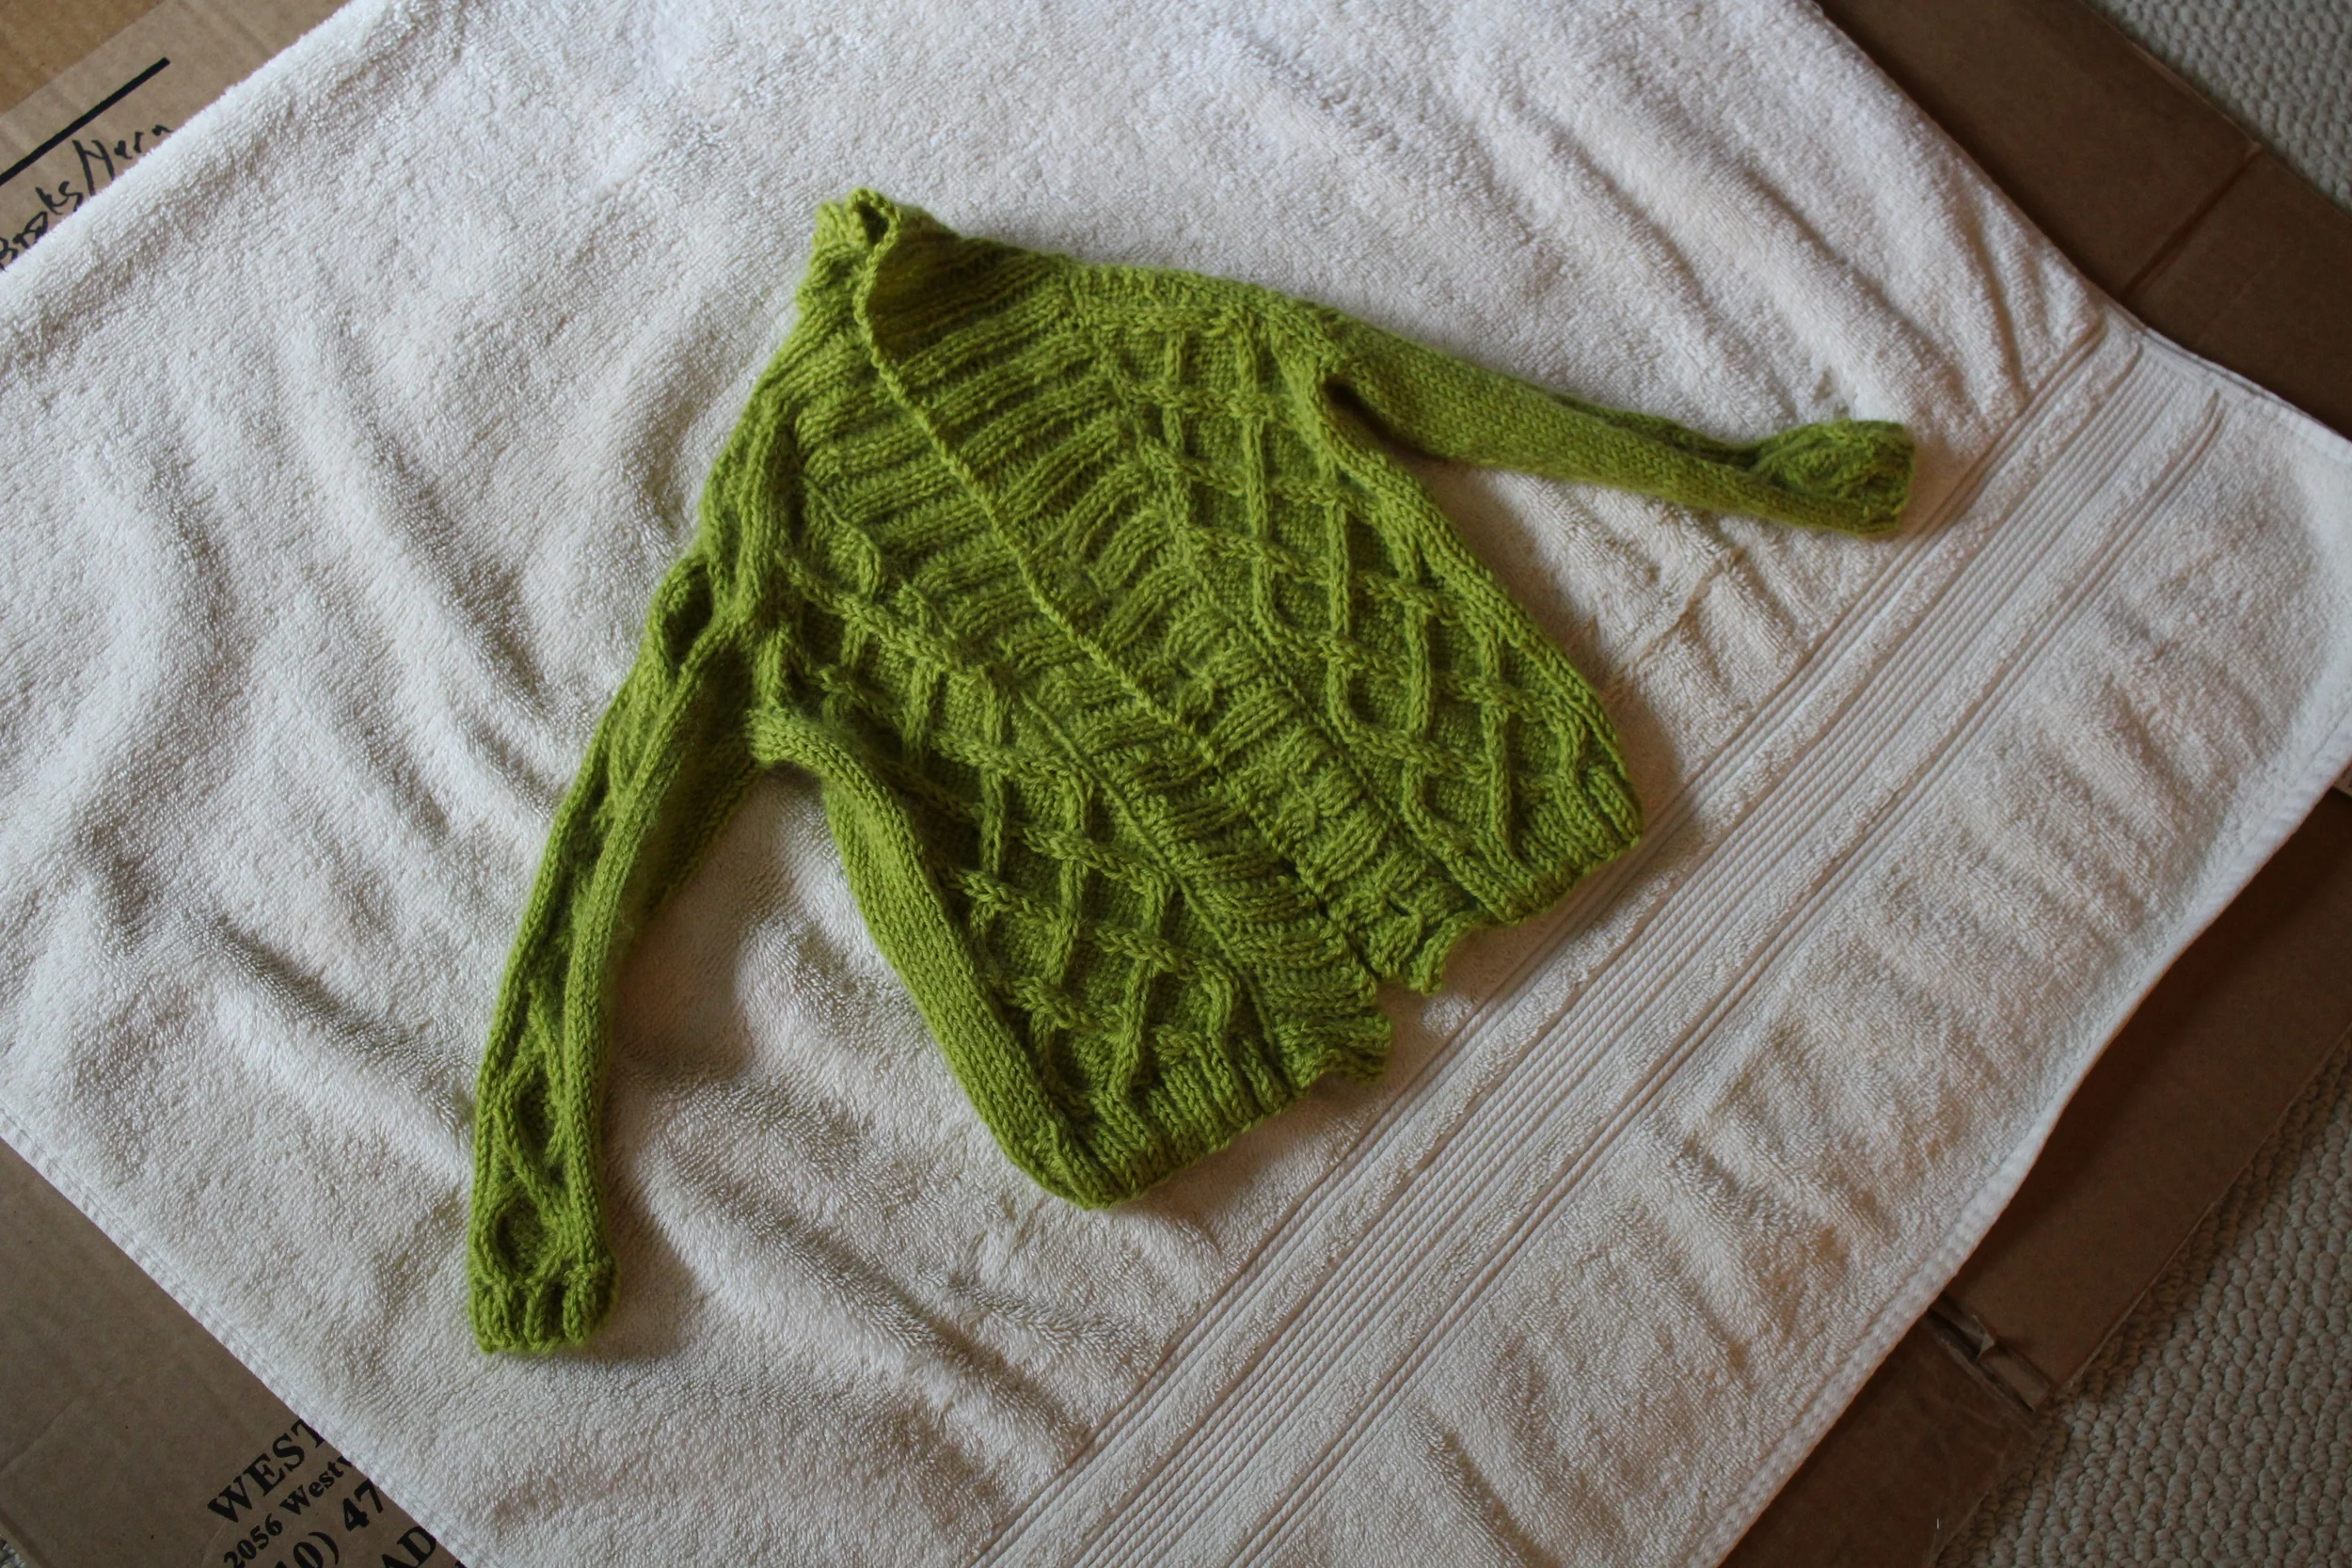
A finished dark green hand knit sweater folded in half.

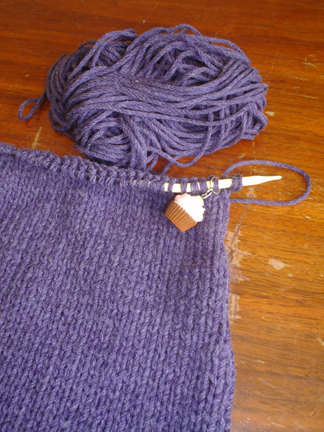
There are a lot of things I love about this sweater. I love that I knit it from stash yarn in a dark green that I wear all the time. I love that it was a big, yet portable project that I could work on in the car or on the couch. I love the neat rolled edge detail at the cast-on and bind-off edges. I love that my guesses about how the sweater would grow after blocking were spot on. I love the heavily modified sleeves that are just the right amount of long (and actually fit). I love the curved hem, even though I’d like it to be a little deeper.

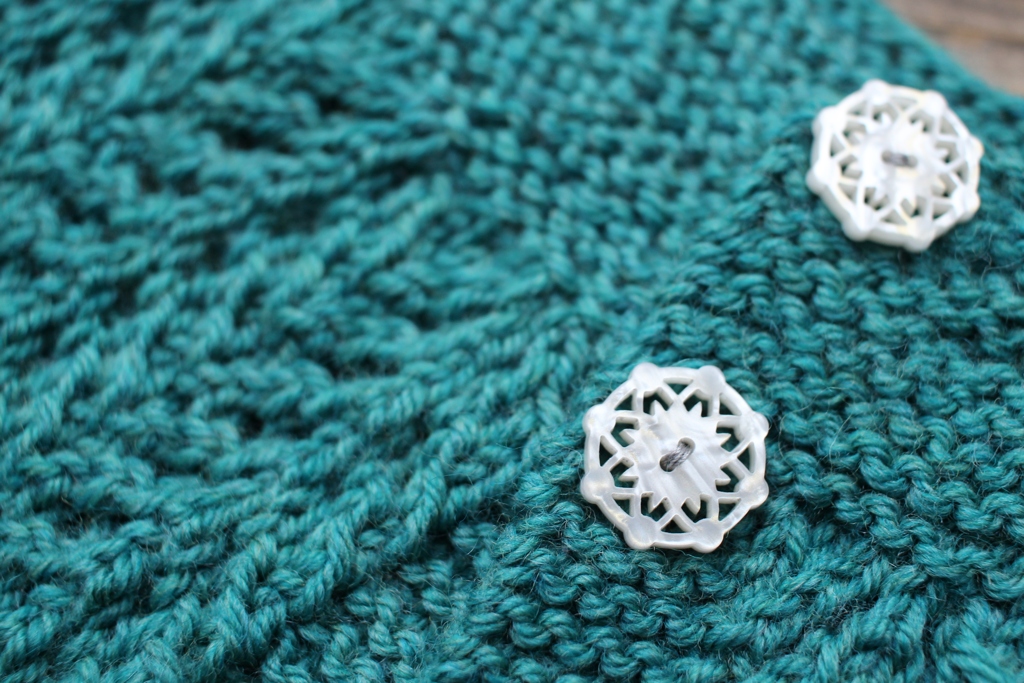
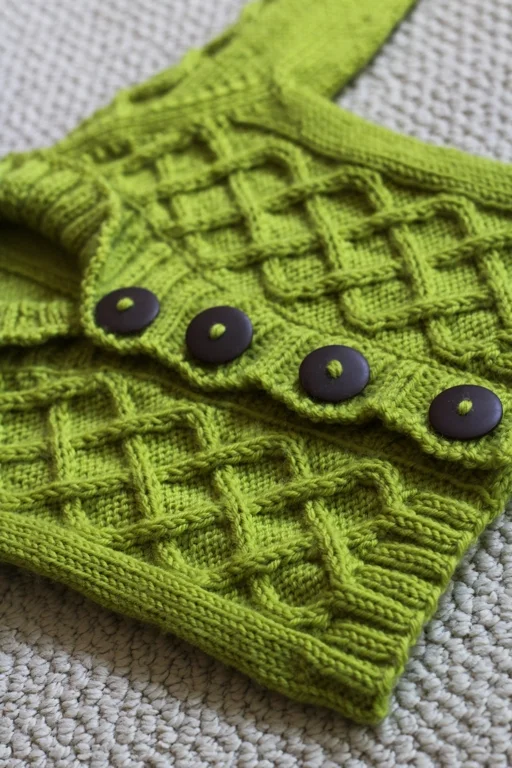
Close up of the rolled edge and ribbing at the cast-on and neck.

What I especially love is that, on only the second sweater I’ve made for myself, I was able to mash up different sizes to make something that fits me. It’s the right length. Both the shoulders and the sleeves fit which is more than I can say for most of the commercial shirts and sweaters I’ve tried. Just that last part is enough for a chef’s kiss. I’m especially proud of the sleeves because I basically eye-balled and tried them on to get the right fit after completely ditching the tapered sleeve shape that seems to be the default of many sweater patterns.

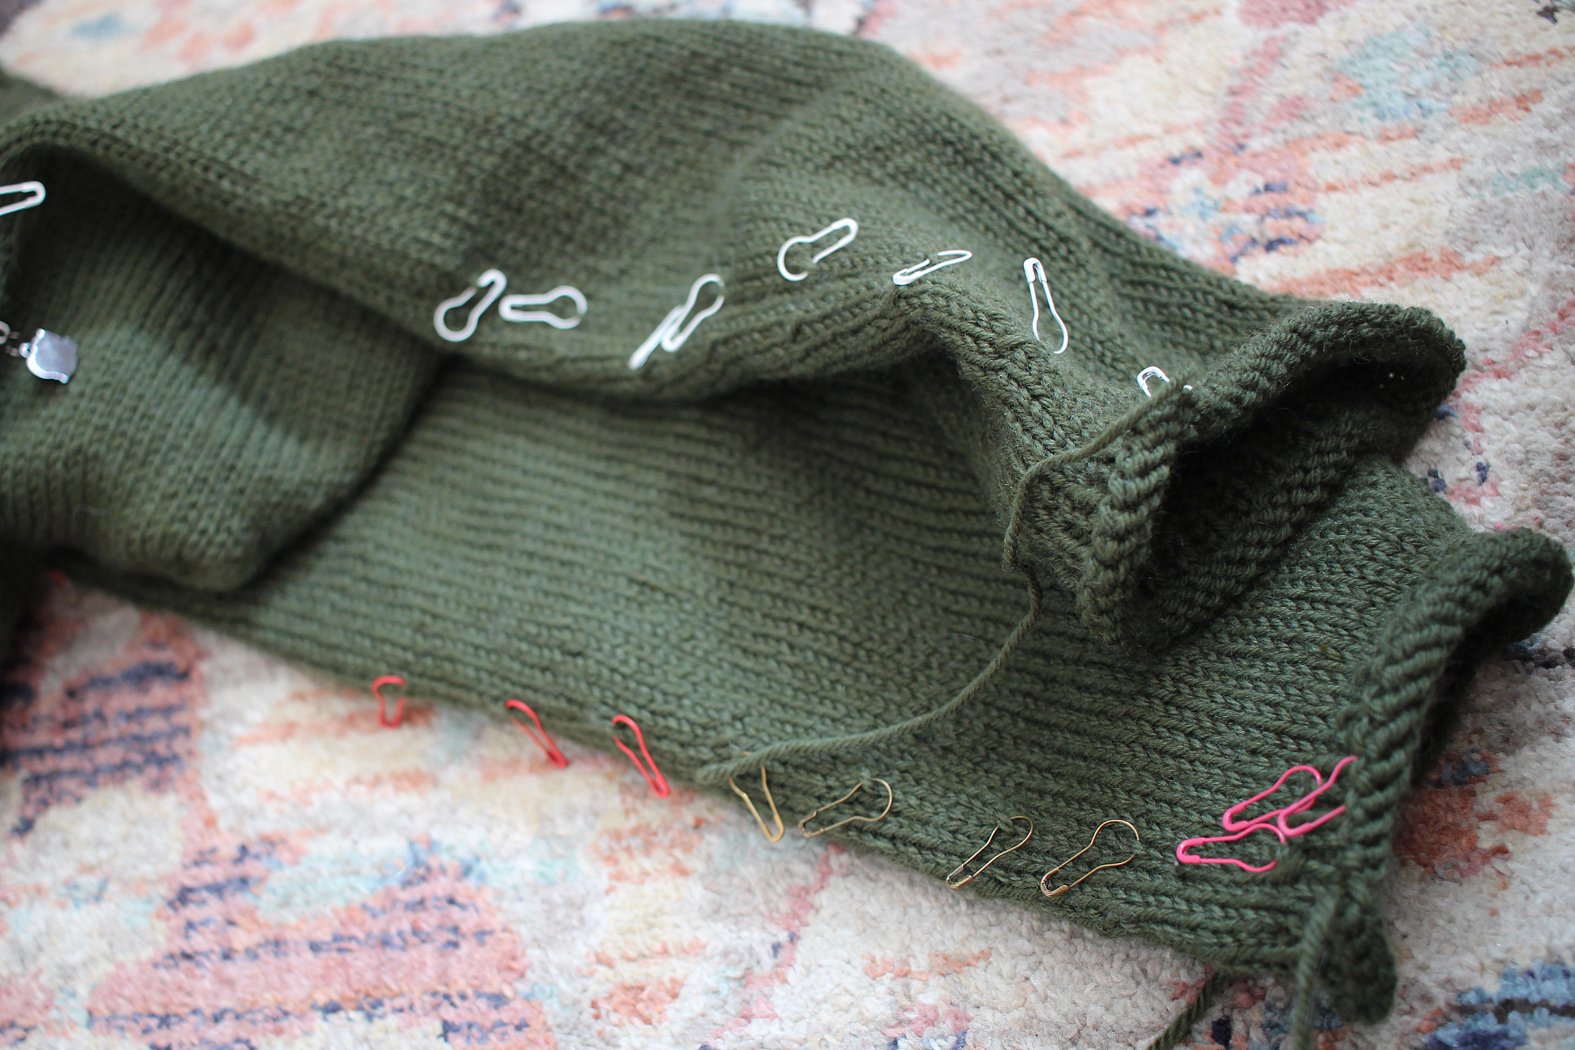
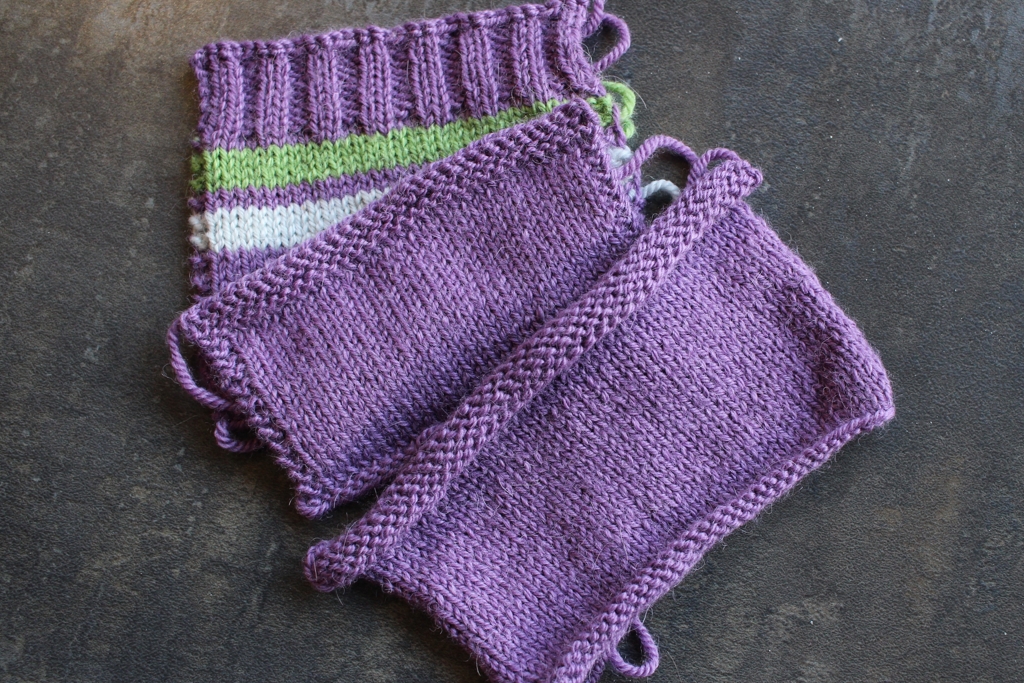
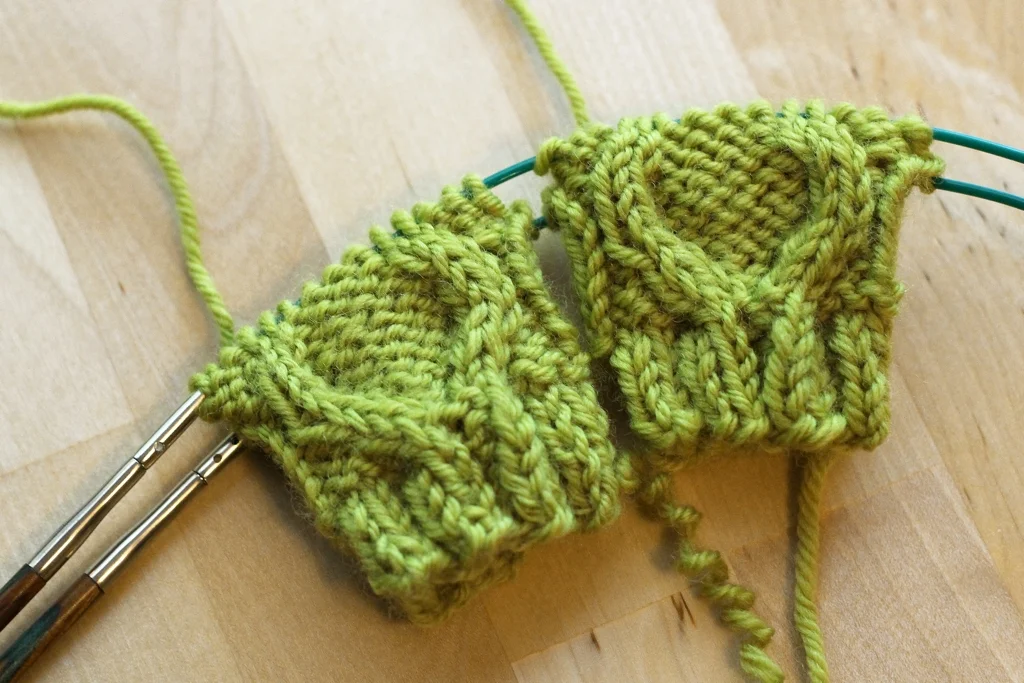
The finished sleeves with all the decrease rows marked with colorful coil-less safety pins.

The only modification which didn’t really turn out was shrinking the body circumference. I did it gradually with one decrease row every inch for 4 inches. The body did drop down to the smaller size, but there’s still a lot of extra fabric hiding under the arms. I don’t quite look like a flying squirrel when I wear it, but I kinda do. It’s a good thing that I wanted this sweater mainly for puttering around the house and being cosy. Next time I need to mash up bigger shoulders with a smaller body in the same sweater (which is basically every sweater I make for myself from now on), I’ll work the decreases over a much shorter length.

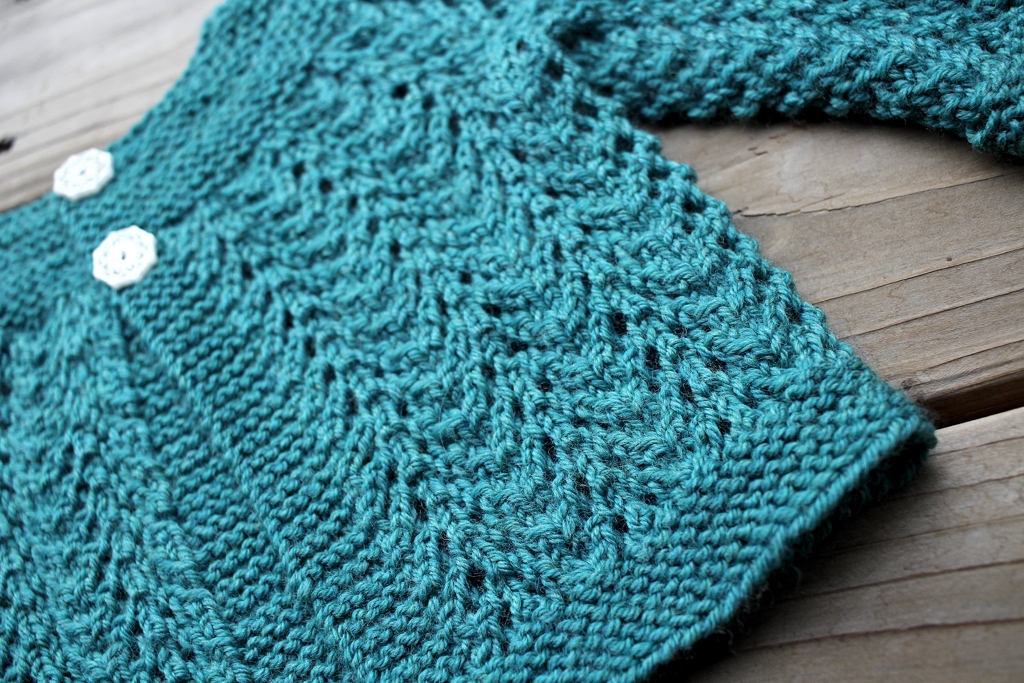
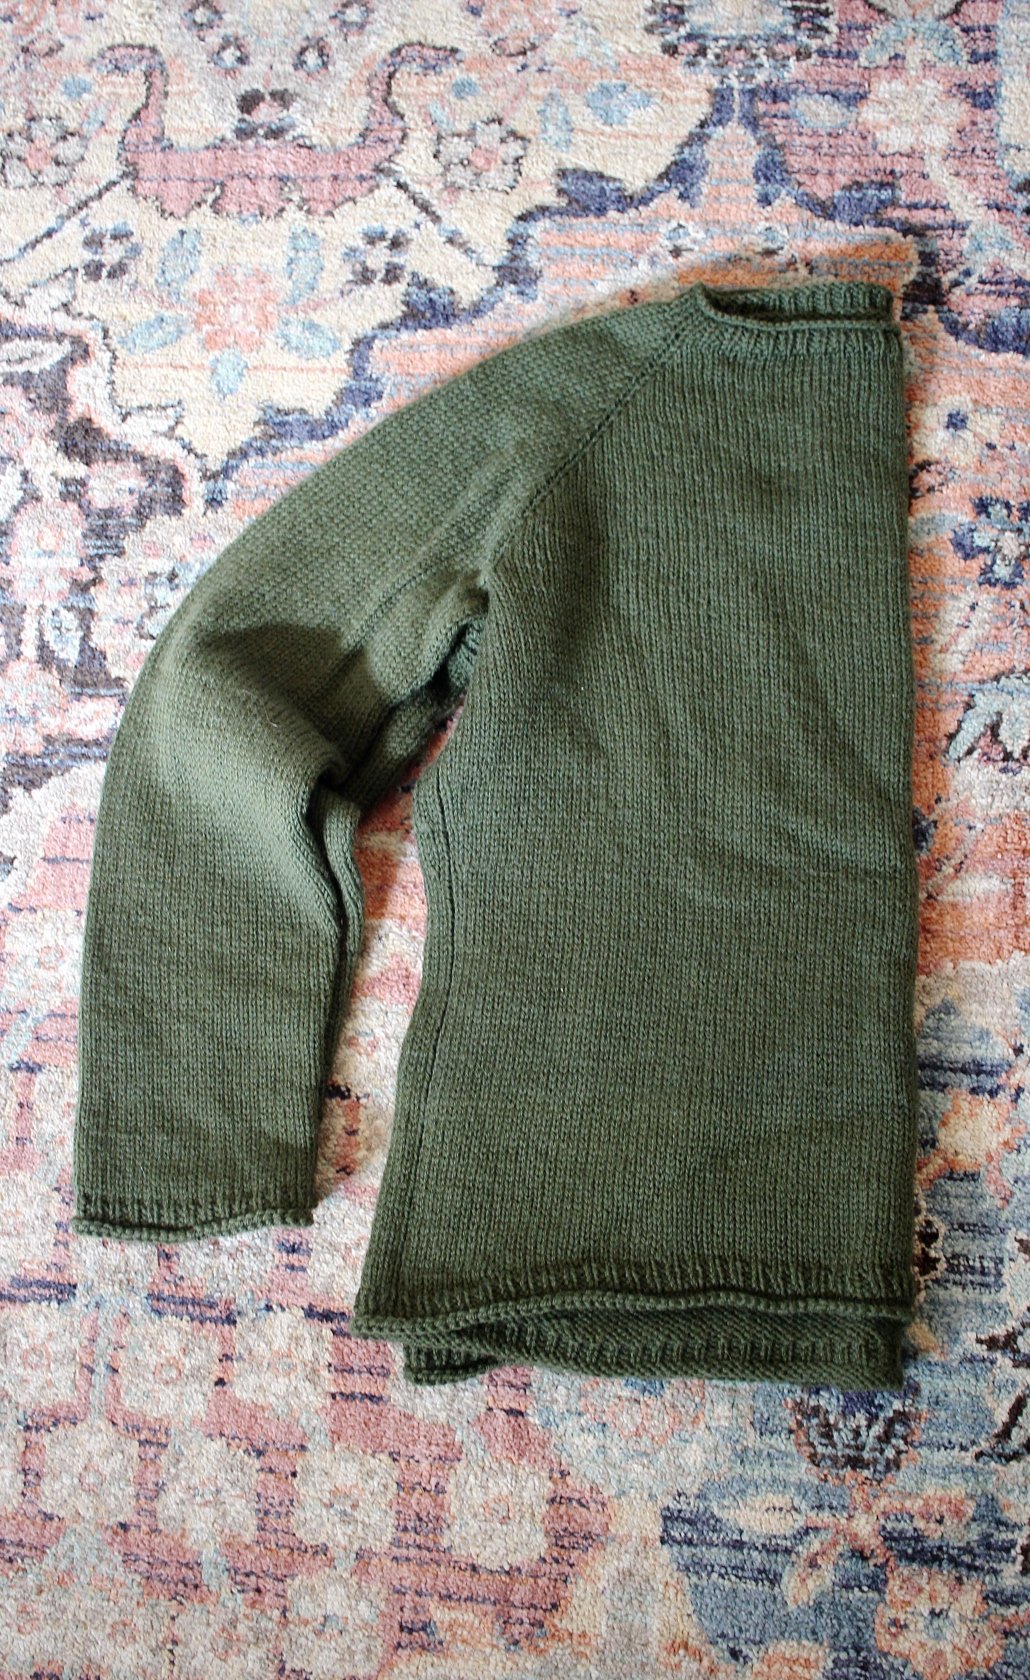
Side shape of the heavily-modified Cassidy sweater.

On the whole, I’m really happy with this sweater. It fits well and will help me make even better fitting sweater next time. Plus, it’ll keep me warm and cosy on the snowy and rainy days of this not-quite spring weather.

Pattern: Cassidy by Maria Leigh (Ravelry Link)

Yarn: Mystery Aran Weight Stash Yarn - 515 g (about 1,150 yds)

Needles: US 7 (4.5 mm) circulars

Dates: November 12, 2020 - February 1, 2022

Around Here - November 2019

Two feet standing on a handwoven rag rug with labels attached.Around Here || withwool.com

There’s been lots of small great things happening around here. Let’s catch up!

Last weekend, I packed up the family and headed up to the Boulder Handweavers Guild and Sale. It’s always interesting walking around and seeing what all the different fiber artists in the area are getting up too. There were knitted items of all kinds from tiny baby booties to giant shawls. There were beautiful woven clothes, hand dyed silk scarves, felted bowls, as well as yarn and fiber. I also saw some really cool crocheted t-shirt yarn baskets which made me want to give crochet another try.

Beams of sunlight falling on a handwoven rag rug.Around Here || withwool.com

We spotted a beautiful handwoven rag rug that had to come home with us too. The rug is cushy to stand on, a good size, and has great colors. Said rug is also the first thing we bought for our new place! I’m looking forward to having more room to spread out, and plenty of space for the kiddo to play.

A half-finished sweater for a toddler sitting next to a ball of yarn.Around Here || withwool.com

Much progress has been made on kiddo’s Fall sweater. It’s taken a back seat the last few days to other overdue projects, but the sweater has still come a long way in the past week. The yoke is finished, the sleeves are bound off, and now I’m working through the body. It’s been great autopilot knitting to pick up at random moments throughout the day. Still looking for buttons though.

The first and second attempt at making the Cattywampus Hat look like the flag of Trinidad and Tobago. #knitting The second attempt is going much better, and in the right direction.Around Here || withwool.com

Remember the hat I was trying to make in the likeness of the Trinidad and Tobago flag? I finally figured out how to make the stripes slope in the correct direction! Charting out the rewrites really helped. Now I’m past the spot where I stopped on the first attempt and quickly moving towards the grafting. Who knew I’d be so excited about kitchener stitch.

Two skeins of Berroco Vintage DK in Cracked Pepper and Smoke. #knittingAround Here || withwool.com

I decided to take on a project for a friend that sounded so fun I couldn’t resist. That grey and dark grey yarn above? That’s the yarn I’m using, and I don’t think I’ve even been so excited to knit with so much grey. More details on that later.

Sweater Weather

An orange ball of yarn and an in progress sweater yoke sit on a table covered in snow. #knittingSweater Weather || withwool.com

The world outside my windows is covered in falling snow for the third day in a row. All that white stuff is really stacking up so what better thing to do than hunker down inside and cast on for a sweater?

This bright orange number is for the Kiddo and she picked out the color herself when we went to Yarn Fest 2019. The festival was a few months ago, but I can tell she still likes the color because she would not stop staring at it while I knit through breakfast. Maybe the color means she’ll like wearing it more than any of the hats I’ve made her? A mom can dream.

An orange ball of yarn and an in progress sweater yoke sit on a table covered in snow. #knittingSweater Weather || withwool.com

The pattern is In Threes: A Baby Cardigan which has only been in my queue since 2011. I’ve been waiting for the right time to knit it which is apparently right now. The sweater’s simplicity and size make for quick knitting and very noticeable progress. It is also really nice to have something easy to knit during the day when I’m keeping an eye on an inquisitive toddler.

The other reason I started this sweater was because I finally wrote up my Christmas knitting plans. There, I wrote the dreaded words: Christmas knitting. Oh, there they are again. Though, in my case, this end of year dash should probably just be called “Stuff I Want Done Before 2020”. Hmm, not as catchy. There is some holiday knitting on said list, but it’s mostly a bunch of unfinished projects like 70% knit socks or long lingering hats. This sweater made the list because I wanted to knit Kiddo a Fall sweater. Looks like it might be a Winter sweater now though. Guess I better keep knitting.

An in progress orange sweater yoke being held up in front of a snow covered cityscape. #knittingSweater Weather || withwool.com

A Finished Sweater for the Mini

A cool and comfy baby sweater with room to grow. #knitting | withwool.com

#The100DayProject has been a great kick in the pants for my knitting. Not only am I knitting at night again, instead of scrolling through my phone, I’m actually finishing stuff. My first finished item is a Marigold Fields sweater for the Mini. I know baby/kid sweaters can be ridiculously fast knits, but the push to do something every day kept me from tucking this away to work on later. I got through the hard work of swatching, and figuring out mods for gauge, and actually starting which was the hardest thing of all. Working on the sweater, even as the yoke rows seemed to get longer and longer and longer, was the easy part.

This is only the second sweater that I’ve ever knit for the kiddo. I’ve got plans for a few others to make over the summer and fall, but this is the second which makes it special. The first sweater I finished before she was born, and it’s a special sweater too. That sweater was about what I wanted to make, and I planned it just so from the yarn to the pattern. It’s a warm, cosy welcome to the family even if she did have to grow into it. Now, well, she’s just about grown out of it. This second sweater isn’t just about what I want to make because now I have an idea of what she likes. And she likes the color yellow. So, I can make a sweater more for her and less about me. I’m looking forward to seeing what she wants in the years to come.

A cool and comfy baby sweater with room to grow. #knitting | withwool.com

I couldn’t resist dressing up her in the sweater the other day after I’d wove in the ends. While she didn’t immediately wriggle out of it, she did put the sweater through its paces. I’m hoping she’ll like it better now that it has buttons. I haven’t actually put it on her since sewing on the buttons, because I made the next size up. So, it’s a bit big which is so much better than a bit small. She’ll have the rest of spring and the whole summer to grow into it. Probably won’t take that long though.

Finishing the sweater turned out to be more interesting and collaborative than usual. I did the usual first step of dropping it in some cool water with a squirt of Eucalan, and gave it 20 minutes to soak. Then I laid it out to dry on a mat on my studio floor. That only lasted until the Mini crawled in and got a good grab of it. To prevent any more drastic adjustments to the shape, I put the whole blocking rig on top of my printer. The problem was that the sweater was much bigger and stretched out than it had been before going in the bath. Plus, it was still rather damp even after sitting out all night and most of the morning. Something had to change. The yarn, Knit Picks Comfy, is a blend of cotton and acrylic. I’ve had good luck putting similar blends in the dryer before so I chucked this one in the dryer too. On low, of course. The dryer did the trick! The yarn plumped up, the stitches got neater, and the sweater went back to its original size. That’s a win on all fronts. Once I had some free time that night, I sewed on the buttons. The cuteness was complete.

A cool and comfy baby sweater with room to grow. #knitting | withwool.com

What am I going to do for #The100DayProject now that this sweater is finished and documented? Next on the list is sewing buttons on a pair of slippers so I can finally wear them…next fall. Then I need to get started on a pair of fingerless mitts, including rewriting the pattern for scratch, to match a lace hat. My plans after that are still nebulous, but I’ve got some time to figure it out.

The Specs:

Pattern: Marigold Fields by Taiga Hilliard

Yarn: 251 yds Knit Picks Comfy - Semolina

Needles: US 8 (5mm) and US 9 (5.5mm)

Dates: April 13 - 30, 2019

Full modifications and notes listed on Ravelry

Big News + What's Next

The Pacific Coast sweater is finally done and I couldn’t be happier! | withwool.com

This sweater has shown up a lot during the past few months. I used it to test out a more truthful and accurate method of swatching.  When I was feeling overwhelmed by all of my knitting projects, I focused on this sweater to feel like I was making progress. Plus, there were the random WIP updates. In all that, I never shared who I was making this sweater for. Well, I’m not mailing it cross-country, and I’m not giving it away at a baby shower. This little beauty is staying right here with me for my own little one!

The Pacific Coast sweater is finally done and I couldn’t be happier! | withwool.com

Aside from a few fiddly details of my own making, the pattern - Pacific Coast - was a pretty easy knit. I made a few changes, but mostly followed the instructions since I haven’t knit a lot of sweaters of any size. You can check out all of my notes, mods, and more photos here on the sweater’s project page.

The Pacific Coast sweater is finally done and I couldn’t be happier! | withwool.com

Since it’s almost baby time, there’s going to be a few changes around here too. First, this will mostly likely be the last blog post for awhile. Second, I’m not sure when I’ll be back to regular posting or what that schedule will be. I’m just going to play it by ear. There might be a random post here and there over the summer or maybe not. We’ll see. Third, the With Wool Weekly newsletter will also be taking a break and will return eventually.

Happy knitting and happy spinning. I’ll see you on the other side and on Instagram.

Knitting A Gauge Swatch That Tells The Truth: The Results Are In

The sweater is washed and blocked. Did the different method of swatching tell the truth? Is my sweater the same size it was before washing? Yes and yes!  #knitting | withwool.com

I knit myself a sweater a few years ago and did all the things a “good” knitter is supposed to do. I knit a reasonably sized swatch on the same needles I was going to use for the sweater. I washed and blocked the swatch the same way I was going to wash and block the sweater. I liked the results and got gauge, so I cast on for the real thing. Said sweater was cute and fit perfectly until I washed it. Instead of the cute cropped cardigan I wanted, I ended up with an oversized sweater that I still wore and enjoyed. So not a total loss, but not really a success either. Blasted lying swatch.

Then a few months ago, I read an article which helped explain why my swatch didn’t react the same way as my sweater when it hit the water. Seeing as how I was about to knit a baby sweater, I decided to try out this different swatching method that skipped the garter edges and blocking pins for what seemed like very logical reasons. You can read all about the swatching attempts here and an update from when I was halfway though the sweater here.

A few notes before we get down to the knitty gritty: I did not knit this sweater all at once, but in bits and pieces over a few months. I knit it while watching tv and not watching tv. I knit it on the same needles I swatched with. I knit it when I was tired and when I was wide awake. I can’t remember if I knit it on road trips. All of this is too say that my gauge had the opportunity to change a lot during knitting even though the sweater was stockinette.

The sweater is washed and blocked. Did the different method of swatching tell the truth? Is my sweater the same size it was before washing? Yes and yes!  #knitting | withwool.com

I measured the stitch/row gauge and overall dimensions before dropping the sweater in the bath. Here are the numbers:

  • Stitch/row gauge (measured across the back): 29 sts and 38 rows = 4”
  • Stitch/row gauge of washed and blocked swatch: 28 sts and 37.5 rows = 4”
  • Sweater measurements across chest: 9.75”
  • Sweater length from neck cast on to body bind off: 11.5”
The sweater is washed and blocked. Did the different method of swatching tell the truth? Is my sweater the same size it was before washing? Yes and yes!  #knitting | withwool.com

I washed the sweater the same way as the swatch. I soaked them both in cool, soapy water (I like unscented Eucalan (<<— affiliate link!*)) for 20 minutes. I rolled them in a towel and squeezed out the excess water. Then I laid them flat to dry without pinning them down (this is one of the important parts of this swatching method). The only change I made when blocking the sweater was gently pulling the button bands and collar into place to make them lie flat and even up both sides. See what a difference blocking made to how neat and even the stitches look? After the sweater dried, this is what I found:

  • Stitch/row gauge (also measured across the back): 28 sts & 38 rows = 4”
  • Sweater measurements across chest: 10.25”
  • Sweater length from neck cast on to body bind off: 11.75”

Wow! The only gauge difference between the washed and blocked swatch and the washed and blocked sweater was half a row over 4”. The chest measurement changed too, but the stitch gauge changed to match the swatch so I’m calling it true. Overall, the length of the entire sweater only changed by .25” which could have happened for several reasons - me tugging out the edges, the ribbing growing, etc. I’m not worrying over an extra .25” on a baby sweater.

I also measured the sleeves. Their length and diameter stayed the same; however, I’m not counting this info towards the swatch experiment because they were knit in the round and not flat like the swatch.

I’d say this method of swatching - skipping the garter edging and not pinning the swatch into a rectangle - is the most accurate and truthful method of swatching I’ve ever tried. You can read about the full method and why it it works here. It’s definitely how I’m going to swatch for all my future sweaters and anything else that has to fit. Definitely give it a try.

I’m looking forward to seeing how truthful the swatches are when I knit a sweater for myself. I suppose that will be the true test, and I’m more than willing to give it a shot.

The sweater is washed and blocked. Did the different method of swatching tell the truth? Is my sweater the same size it was before washing? Yes and yes!&nbsp; #knitting | withwool.com

*This post contains an affiliate link which means, if you decide to buy through that link, I’ll get a small commission. My opinions are unbiased, my own, and formed after years of use. I wouldn’t recommend this soap if I didn't think it worked. Thanks!

A Solution to WIP Overwhelm

Feeling overwhelmed and stuck in your #knitting projects? Try working on them 20 minutes at a time. | withwool.com

Normally, I’m a knitter and spinner that has a lot of projects going at any one time because what I want to work on changes. I’ve got simple projects for autopilot knitting, small projects for travel knitting, and complicated projects for a challenge. The large number of these different project usually doesn’t bother me. Usually. At the moment though I’m feeling rather overwhelmed by them all. There’s the baby sweater that’s also a gauge swatch experiment. There’s the shark that still needs a sweater. There’s unfinished gift knitting leftover from the holidays. There’s a bunch of alpaca singles waiting to be plied. There’s all the knitting patterns that I’m in the middle of designing. And never mind the general day-to-day routine and work and projects that aren’t fiber related. Being stuck in the middle of all these different projects with all their deadlines has been weighing me down. So, last week, I took a break to watch tv, waste time online, and play games. The down time helped me think.

Feeling overwhelmed and stuck in your #knitting projects? Try working on them 20 minutes at a time. | withwool.com

The only way to finish these all these different projects is by focusing on just one of them at a time. Rushing to do bits and pieces on 20 things at the same time is just dragging things out. So I’m picking the baby sweater to work on until it’s done. While I can’t finish it in a night, the sweater is the closest to the finish line of everything. Plus, I didn’t have to tackle a bunch of other to-do’s first in order to get back to knitting.

Still, this grand decision didn’t make it any easier to get going again. Being in “the middle” is a slog. When I need a kick in the butt to get to work, I use the pomodoro technique to help me focus. The technique boils down to 20 minutes of work followed by a short break. And repeat. That’s it. I use an app called Focus Keeper which lets me set the length of my work sessions, breaks, repeats, and tailor lots of other nifty options. I use it when I need to get to work or just don’t want to do something necessary, like cleaning the bathroom.

Feeling overwhelmed and stuck in your #knitting projects? Try working on them 20 minutes at a time. | withwool.com

This time I used the app for my knitting. All I had to do was work on the sweater for 25 minutes. After that, I could stop or keep going. Surprise, surprise - I kept going and finished the decreases on the first sleeve. I’m glad I had the timer to keep me accountable because I would have put the sleeve down halfway through otherwise. Figuring out how to work jogless stripes that happened in the same spot as the decreases while I kept track of rounds and carried the other colors up the sleeve took all of my attention.

Feeling overwhelmed and stuck in your #knitting projects? Try working on them 20 minutes at a time. | withwool.com

I’m pleased with how the sleeve turned out except for this hole where I started knitting again. Picking up a stitch at the beginning and end of the round did nothing. I’m going to sew it up with a yarn tail when I weave in the ends. Do you know any tips or tutorials so this hole doesn’t happen on the second sleeve?

Feeling overwhelmed and stuck in your #knitting projects? Try working on them 20 minutes at a time. | withwool.com

Oh, I picked up some buttons too! I found these cute little wood hearts at my local yarn shop. They’re a cute match, and I’m glad they’re the right size since I had to guess if they'd fit.

There’s still a good chunk of knitting to do on the sleeves before I can get to washing and blocking this baby. And I’m going to keep using the timer because it’s helping me get through the slog. Maybe it’ll become a daily goal of one 25 minute session until the sweater is done and buttoned. If you’re stuck in the middle like I am, give the pomodoro technique a try. Even 5 or 10 minutes will get you closer to the finish line and out from under the overwhelm.

A Gauge Swatch Update and Yarn Chicken

Want to know if you’ve got enough yarn for your #knitting project? Here’s a simple way to find out. | withwool.com

I’ve been working on the Pacific Coast sweater for the past week. The “just one more row” litany has been good motivation to keep knitting. After regularly checking that the stitch counts were correct, I finished the raglan increases and put the sleeves on waste yarn. Now my little WIP is finally starting to look like a cute sweater! And I’m loving the stripes more and more with every row.

Since I’m using this sweater is part of a little swatching experiment, which you can read all about here, here’s an update. The sweater is about 6” from cast on to my current row, and my gauge has remained consistent across the entire length and width. Said gauge still matches up with swatch #3, the un-pinned chunk of stockinette. I was curious if the switch to working fewer body stitches would change my gauge after the constant increasing of the raglan. So far, no.

Want to know if you’ve got enough yarn for your #knitting project? Here’s a simple way to find out. | withwool.com

One thing that has been nagging me though is if I have enough yarn to knit all the stripes. I’ve got plenty of purple, but only one ball each of the green and grey. And I really don’t want to buy more. Before casting on, I made sure I had the required yardage, but I still couldn't help but wonder if I’m playing yarn chicken. So I’m falling back to my tried and true method for estimating yardage.

Want to know if you’ve got enough yarn for your #knitting project? Here’s a simple way to find out. | withwool.com

Step 1: Weigh the yarn ball in grams (the math is a lot easier in metric). I’ve got 35g of light grey.
Step 2: Knit a 4 row stripe and weigh the yarn again. Now I’ve got 32g of grey which means each 4-row stripe uses about 3g of yarn.
Step 3: Now it’s time to make math work for me. I’m knitting 10 more 4-row stripes so I’ll need a total of 30g of green and grey combined to finish the body. I’ve got 70g which leaves plenty of yarn to knit both the body and the sleeves. Definitely not playing yarn chicken and I’m rather pleased about that.

P.S. If you're not working by the stripe, work by the inch or centimeter and with the final length of the project instead. 

This is a simplified version of how I usually calculate and estimate yardage. I’ve written up a tutorial for the more detailed method which you can find here.

Now that I’m not worried about running out of yarn, I can get on with the rest of this sweater and enjoy the knitting. And since this is made with fingering weight yarn, there’s lots of knitting to enjoy.    


Knitting A Gauge Swatch That Tells The Truth

#Knitting a gauge swatch is an important first step in making a sweater. So how do you make an accurate swatch? | withwool.com

This year’s knit list includes a sweater or two because I haven’t made very many of them, and I want to change that. I’ve only knit 1 sweater for myself in the *ahem* decade+ since I first learned to knit. It was the Amiga sweater, and it was cute and just the right size until I blocked it. Afterwards it was still cute, but had turned into an oversized cardigan. I definitely wore it, but it wasn’t what I set out to make or wear. I did all the things the knitting police said you’re supposed to do: knit a big swatch, used the same needles, and blocked the swatch the same as the finished sweater. I got gauge, or so I thought, but the swatch didn’t tell the truth. So for this first sweater of 2018, I’m taking a more rigorous and experimental approach to swatching. Instead of making just one swatch, I made three.

#Knitting a gauge swatch is an important first step in making a sweater. So how do you make an accurate swatch? | withwool.com

For swatch #1 I cast on enough stitches to equal 4” and a little extra for a garter stitch border. I added stripes as in the pattern and a section of 2x2 rib knit on smaller needles.  Then I washed and blocked the swatch the same way I would the finished sweater. The square was a little uneven at the sides so I pinned it out to straighten the edges. This first swatch answered a few different questions.

Would the dye bleed between the different colors? No.
Would I like knitting the fabric on the needles I had? Yes.
Would I like the fabric after washing and blocking? Yes
Did I like the stripe pattern? Yes
Did I have the right needles to knit the ribbing at a tighter gauge? Yes.
Did I get stitch and row gauge? No, my gauge was off on both counts.

#Knitting a gauge swatch is an important first step in making a sweater. So how do you make an accurate swatch? | withwool.com

With swatch #2 I was only trying to answer the gauge question. So I went down two needle sizes and tried again. Same stitch count. Same garter border. Same blocking method. This time my gauge was too tight. And I didn’t like the finished fabric - too stiff - or knitting it.

#Knitting a gauge swatch is an important first step in making a sweater. So how do you make an accurate swatch? | withwool.com

I didn’t cast on for swatch #3 right away because I didn’t have the right size needle. My needle collection has been lacking a 3mm circular for years and this was project the first reason I had to buy one. In between refreshing the package tracking, I happened to read this article on how to knit accurate swatches and how to keep them from lying to you. Contrary to a lot of what I’d read up to this point, the advice was to skip the garter stitch border and not pin the swatch at all during blocking. The article is definitely worth the read and explains the why’s behind all of these tips.

So I switched things up and followed the advice in the article: skipped the border, worked 6” worth of stitches instead of 4”, and plopped a swatch of stockinette in the sink to soak. I didn’t pin it out or even try to control the roll as it dried. Know what? I finally got both stitch and row gauge. The fabric was nice to knit and has good drape. Win win.

So why do I “trust” this method of swatching to tell the truth? It’s given me numbers and measurements that didn’t require pinning and pulling on the fabric. Plus, the accuracy for swatches knit with borders and pinned is far from 100%. There’s no reason to not try it out. And if the sweater does grow, at least it’s a baby sweater and a little extra room isn’t a bad thing. 

#Knitting a gauge swatch is an important first step in making a sweater. So how do you make an accurate swatch? | withwool.com

Since it seemed like I made an accurate swatch, I finally cast on for that sweater. It’s the Pacific Coast baby cardigan by Gabrielle Danskknit. It starts at the neck with a bit of ribbing before moving on to the stripes and raglan increases. My gauge is spot on. There’s still a lot of knitting to do before this beauty gets the blocking treatment, but I’ll let you know if gauge swatch #3 lied or told the truth.

Excited About Knitting Again

After spending so much time spinning yarn, I’m thrilled to be knitting with it again! | withwool.com

I have not touched my spinning wheel since Tour de Fleece. Well, that's not entirely true. I did move it to a different spot where I wouldn't trip over it all the time. After spinning everyday for more than 100 days, it's weird to realize that I haven't spun anything for weeks. Making yarn was such a big part of my routine, and now it's not. I'm sure I'll get back to my wheel soon, but all my creative mojo has gone towards using yarn instead of making it. I have been knitting so much recently. And planning a bunch of future knitting. I even started writing up my Christmas and holiday knit list. And we're only halfway through August!

I’ve finished and blocked both the Regina hat and the Feeling Groovy shawl. More on those later. 

After spending so much time spinning yarn, I’m thrilled to be knitting with it again! | withwool.com

I bought a sweater's worth of Cascade 220 Superwash Effects and the Ease sweater pattern! The package arrived this morning and I am positively smitten with the yarn. Can’t wait to get swatching.

I finished a swatch for a new design, but I haven’t figured out all the details. I'm not sure where to take the pattern next because I have many questions and ideas about what to try next. 

After spending so much time spinning yarn, I’m thrilled to be knitting with it again! | withwool.com

The Bearded One has been patiently waiting for a new pair of socks so I pulled out some yarn to make that happen. This is a long term purse project right here. I tried knitting him a pair of socks with this yarn before, but ripped them out for some reason. Hopefully, I’ll have better luck with the yarn this time around.

On the holiday knit list is a scarf for the Red Scarf Project. Probably going to knit another Melded Scarf and mix up the color scheme a bit. Red and blue, maybe? Or 2 different shades of red?

After spending so much time spinning yarn, I’m thrilled to be knitting with it again! | withwool.com

The most recent project on the needles is a new kitchen towel. Dug into the stash, pulled a couple balls of cotton out, and cast on for the Lizard Ridge Dishcloth. It's been a really fun knit, and now I really want to make the Lizard Ridge blanket

The Tour de Fleece yarn has been calling my name too. Pretty sure I’ll be casting on for a Boneyard Shawl soon, because why not?

I haven’t forgotten about my big spinning projects. There’s the 4 alpaca singles waiting on the bobbins, and writing up my notes so I can move to the next step of the Epic Green Spin. I’m really enjoying and excited about my knitting right now so I’m not rushing back to my wheel just yet. 

What about you? Is there a project you’re really excited about?

The Famous February Baby Sweater

Pithy instructions, a little garter stitch, and a bunch of lace make up the famous February Baby Sweater. It’s a good test of knitting skill too. | withwool.com

I spent the first few months of 2017 working on secret knitting. It was a baby gift for a good friend of mine, and now that the sweater is at it’s new home, I can share it with you too. When I first heard that my friend was having a baby, I thought about making a blanket. She had plenty of those coming in though so I decided to make a cute sweater instead. After scrolling through page after page of baby sweaters on Ravelry I picked Elizabeth Zimmerman’s February Baby Sweater. The pattern has been in my queue for awhile but that’s not why I picked it. It looked cute and I wanted to make something with lace for a dedicated lace knitter.  

I went into this project knowing EZ’s patterns have a reputation of being, as she calls them, “pithy”. Concise, terse, succinct, condensed… Having made a Pi Shawl a few years ago, I thought I knew what I was getting into. I was mistaken. 

Pithy instructions, a little garter stitch, and a bunch of lace make up the famous February Baby Sweater. It’s a good test of knitting skill too. | withwool.com

After years of knitting from (and writing) more detailed row-by-row instructions, the 3 paragraph pattern took some getting used to. It wasn’t that the pattern was hard to understand - the gist of it was definitely there - I just had a lot of questions about specific details. So I had to answer them for myself. Thankfully, lots of other people have knit this sweater and I found helpful mods and size charts to make a 9-month sized sweater. Swatching was definitely a requirement. 

Pithy instructions, a little garter stitch, and a bunch of lace make up the famous February Baby Sweater. It’s a good test of knitting skill too. | withwool.com

Since I was writing more detailed instructions to work from, I made a few of my own modifications to knit the sweater to my own preferences. You can find the full details on the project page.

  • Cast on more stitches and worked fewer rows before starting the first yoke increase row to get a wider neck opening.
  • Switched out the "M1" for "kfb" because it looked neater. 
  • Worked the button band over more stitches and made larger button holes.
  • I knit the body of the sweater flat, but worked the sleeves in the round. After reaching the spot to set up for the sleeves, I knit those stitches with waste yarn and decreased to get the stitch count of the sleeves. Then I came back, picked out the waste yarn, and put the live stitches on the needles to knit the sleeves just like an afterthought heel. Finicky? A little, but I got a neat, seamless join that didn’t break the lace pattern. Totally worth it in my book. 
Pithy instructions, a little garter stitch, and a bunch of lace make up the famous February Baby Sweater. It’s a good test of knitting skill too. | withwool.com

The February Baby Sweater is definitely worth the effort, and I encourage you to make one yourself. I say this counting the time that I frogged the sweater back to the cast on because I had to re-do the yoke increases. Figuring out how to get exactly what you want out of this pattern is a good test of skill that will up your knitting game. Plus, the lace and garter stitch are an absolutely beautiful combination. I am proud to give this sweater to a good friend who is also an amazing knitter. 

P.S. Since this post has gotten on the long side, I’ll show you what I did with the leftovers next. 

Pattern: Baby Sweater on Two Needles (February) by Elizabeth Zimmerman

Yarn: 317 yds Cascade 220 Superwash - Lake Chelan Heather

Needles: US 6 (4 mm)

Dates: January 18 - April 28, 2017

@Ravelry

Giving 2-At-A-Time A Second Shot

My first attempt at knitting two-at-a-time felt like wrestling an octopus. I gave it another try and decided the technique wasn’t that bad if paired with the right project. Giving 2-At-A-Time A Second Shot | withwool.com

I've tried knitting two-at-a-time before. The exact details of the project are fuzzy - maybe it was a pair of socks - but I do remember not being fond of the technique. Learning to knit with double pointed needles felt like holding an ornery hedgehog. Trying to knit a pair of socks at the same time on one long circular needle was like wrestling an octopus. After that initial attempt, I didn't bother trying two-at-a-time again as it seemed more frustrating than useful. 

Let's jump to 2016 when I was in the middle of knitting the Gramps cardigan. When I cast on, it seemed like a great idea to start with the sleeves and skip second sleeve syndrome. That first sleeve went quickly, but I couldn't finish it until I knew what cable row I'd have to match on the body. So I started the sweater body and knit to the join. Then I added the necessary rows to the sleeve and put the two together. My satisfaction of having something that looked sweater-like was short lived because the sleeve was too long. Ugg. I tinked back, removed the sleeve, and ignored the whole thing for a day.

My first attempt at knitting two-at-a-time felt like wrestling an octopus. I gave it another try and decided the technique wasn’t that bad if paired with the right project. Giving 2-At-A-Time A Second Shot | withwool.com

There was a fair bit of math involving gauge, cable repeats, and cuff ribbing, but I figured out how to get a perfectly sized sleeve. Then I ripped out sleeve #1. Knowing that I was essentially knitting three sleeves didn't appeal. For once, trying to knit two sleeves at the same time seemed more appealing than slogging through them one at a time. I'm blaming The Knitmore Girls podcast for putting the idea back in my head.

This video tutorial from KnitFreedom about how to cast on for two-at-a-time was the least fiddly that I found. Still, the first couple of rows were like wrestling with an octopus. There were strands of yarn and dangling cables everywhere. A needle tip even flicked up and winged me in the face. This only made me more determined to wrangle the sleeve beast. Thankfully, things did calm down after the first couple of rows. Knitting the sleeves went reasonably quickly and wasn't a complete slog either. The thought that I'd essentially be knitting 5 sleeves if I messed up this pair did occur to me. Fortunately, the sleeves turned out the right length this time around.

A photo posted by April Klich (@aprilklich) on

Since working sleeves two-at-a-time went so well, I decided to try knitting a pair of socks the same way. To be fair, the only reason I did was because I couldn't find my second 2.0mm circular. Casting on would have been easier if I'd started both socks at the same. I added the second sock to the needles when the first toe was almost finished. By the way, I do not recommend this. I've since put a few more rounds on these socks and I'm not loving the process. Maybe it's the stitch count. Maybe it the cable on the circular needles I'm using. Maybe it's how often I have to untangle yarn. All of these frustrations are adding up and it feels like wrestling an octopus again. These socks are supposed to be purse knitting: easy to pick up and work on for a minute or two at a time. This pair is anything put. The good news is that I found my other 2.0mm circular so each sock will get it's own needle ASAP.    

Knitting two things on the same needle has proved itself to be a mixed bag. It was great for making matching sleeves without having to psych myself up to make the second. Though trying to knit two socks at the same time is everything aggravating that made me ditch the technique in the first place. Two-at-a-time isn't going to become my default way of knitting pairs of everything, but I'm not throwing is aside either. It's great for knitting pairs of small things: baby sweater sleeves, ear flaps for hats, or softie parts. I'm definitely going to use the technique again, just matched with the right project. Octopuses are awesome but I don't want to wrestle one every time I knit.  

FO: Gramps Cardigan

Adorable baby sweaters and adorable! I made the Gramps Cardigan as a gift and am absolutely thrilled with how it turned out. FO: Gramps Cardigan | withwool.com

My secret knitting is no longer secret! The sweater can get its time in the spotlight now that it’s arrived at its new home. If I hadn’t been keeping this a surprise, it would have shown up several times and probably with a poem titled ‘An Ode To Ripping’. I haven’t written said poem but could have thanks to all the inspiration knitting the sweater gave me. All the frogging aside, the Gramps cardigan turned out to be a lovely sweater that I was proud to give to a very good friend and her new baby.

Adorable baby sweaters and adorable! I made the Gramps Cardigan as a gift and am absolutely thrilled with how it turned out. FO: Gramps Cardigan | withwool.com

When I was trying to decide what to make, I had to cross blankets off the list because I didn’t have the time. A hat or booties didn’t seem like enough, but a sweater seemed just right. After a couple hours looking through baby sweater patterns on Ravelry, I picked the Gramps Cardigan by Kate Oates. The finished sweaters all looked really cute. Plus, I like the idea of dressing up babies in vintage “old-man” style sweaters. Sold. I ordered the yarn, knit a swatch, and cast on. 

The knitting was pretty easy and the cables were fun to work once I got the pattern in my head. All the times I had to rip were my own fault for not reading ahead. I ripped because I didn’t like how I’d handled the cable pattern next to the neck decreases. I ripped again because I knit the first sleeve before knowing where I’d have to match up the cable patterns and said sleeve turned out way too long. I ripped a third and forth time because I kept messing up the short row shawl collar. Tinking short rows worked in 2x2 rib is not my jam, but binge watching Haven helped get me through it. 

Adorable baby sweaters and adorable! I made the Gramps Cardigan as a gift and am absolutely thrilled with how it turned out. FO: Gramps Cardigan | withwool.com

It’s been awhile since I’ve blocked a sweater and it wasn’t as complicated as this one. The cables definitely needed some tidying up and the shawl collar needed a little preening too. It got a good bath with a capful of Eucalan before I squeezed all the water out that I could. I was holding my breath when I unrolled it and did my initial measurements so I could block it to size. It hadn’t grown, or shrunk, and the sleeves hadn’t added any extra inches. Whew. I used my blocking wires and this tutorial from Tin Can Knits to get the cables looking crisp and even. The wires also added just the right amount of structure to support the shawl collar while it dried. 

Adorable baby sweaters and adorable! I made the Gramps Cardigan as a gift and am absolutely thrilled with how it turned out. FO: Gramps Cardigan | withwool.com

The last step was sewing on the buttons which I did after the sweater had dried. Then I just had to mail it and it got there just in time. Now, I’m not saying this sweater has baby summoning powers but I’m not going to explicitly deny it either. 

The Specs

Pattern: Gramps Cardigan by Kate Oates 

Yarn: 363 yds Cascade 220 Superwash - Citron

Needles: US 6 (4mm) Circulars

Date: April 12 - May 12, 2016

@Ravelry

To The Frog Pond

Half-Bilateral-Cardigan.jpg

All I wanted was my favorite knitting bag. The pretty one with the pockets, snaps, needle loops, and enough space for all the yarn. So, I dug it out and, when I opened it up, found a forgotten project, the Bilateral Cardigan. It’s my only serious attempt at knitting a sweater because the pattern seemed easy and forgiving in fit. Instead of casting on at the neck, you knit two hexagons, creatively sew them together, and end up with a short-sleeved, cropped cardi. This explains why the one piece, which is way too big, looks more like a blanket then a sweater.

Bilateral-Swatch.jpg

It’s been 2 years, almost to the day, from when I cast on and I don’t want to wear the finished object anymore. I’m still very much in love with the yarn, Elsebeth Lavold Silky Wool, though. Yesterday, I happily ripped out every single yarn and wound the yarn. Then I went to Ravelry to find a pattern for a cropped, light weight cardigan. An old favorite from my queue, Amiga, jumped to the top of my list. Don’t tell anyone but I may have already started swatching.

A First

Ever since I started knitting, I've always thought that my first sweater would be the result of meticulous planning and endless hours searching through Ravelry to find that one perfect pattern. In reality, all it took was a random look at a pattern book and yarn in close proximity. Five minutes worth of decision and I was off and swatching for this sweater.

Once I figured out that whole gauge and ease thing, I cast on and began working my way through inch upon inch of stockinette. The odd decrease row has kept it interesting and its been perfect TV knitting. If it keeps going this well, I might have a new top come June. Here's hoping it fits.