Double The Stripes

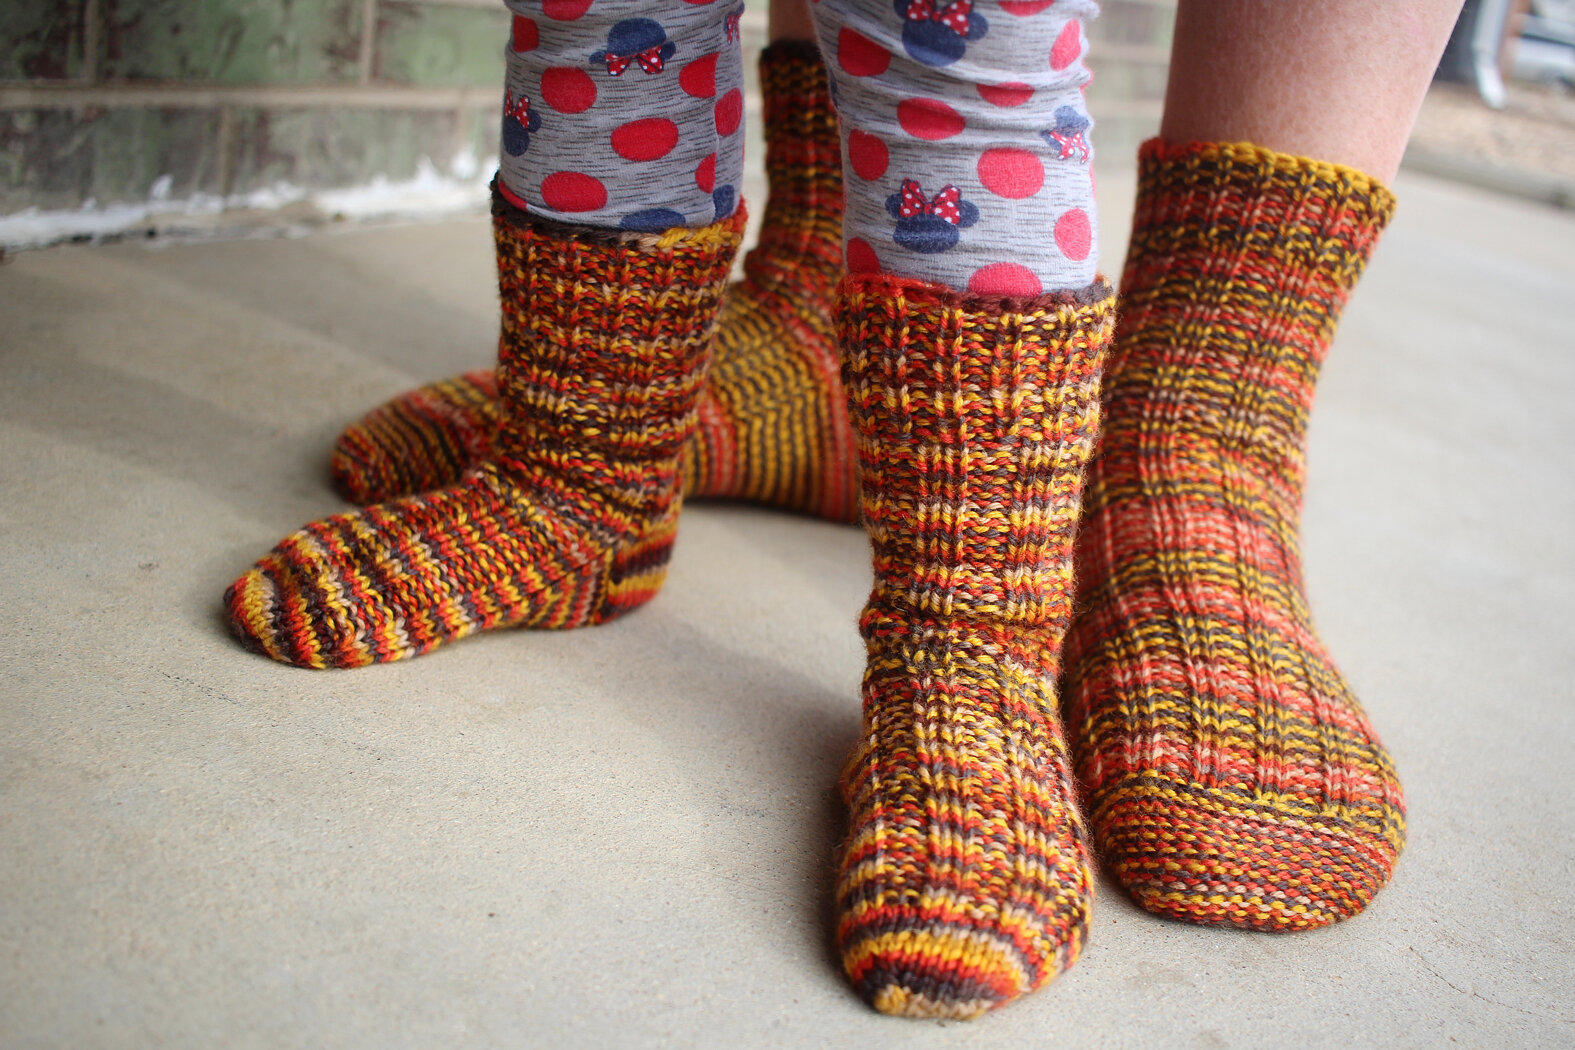
Mom and kiddo wearing matching socks with green, blue, and black stripes.

I’m been struggling to figure out what to say about these socks. They’re both great pairs, but everything I write about them sounds hollow. All this not writing/blogging business is taking its toll, and making it harder to find my voice. So I’m going to let the socks, all four of them, get things started.

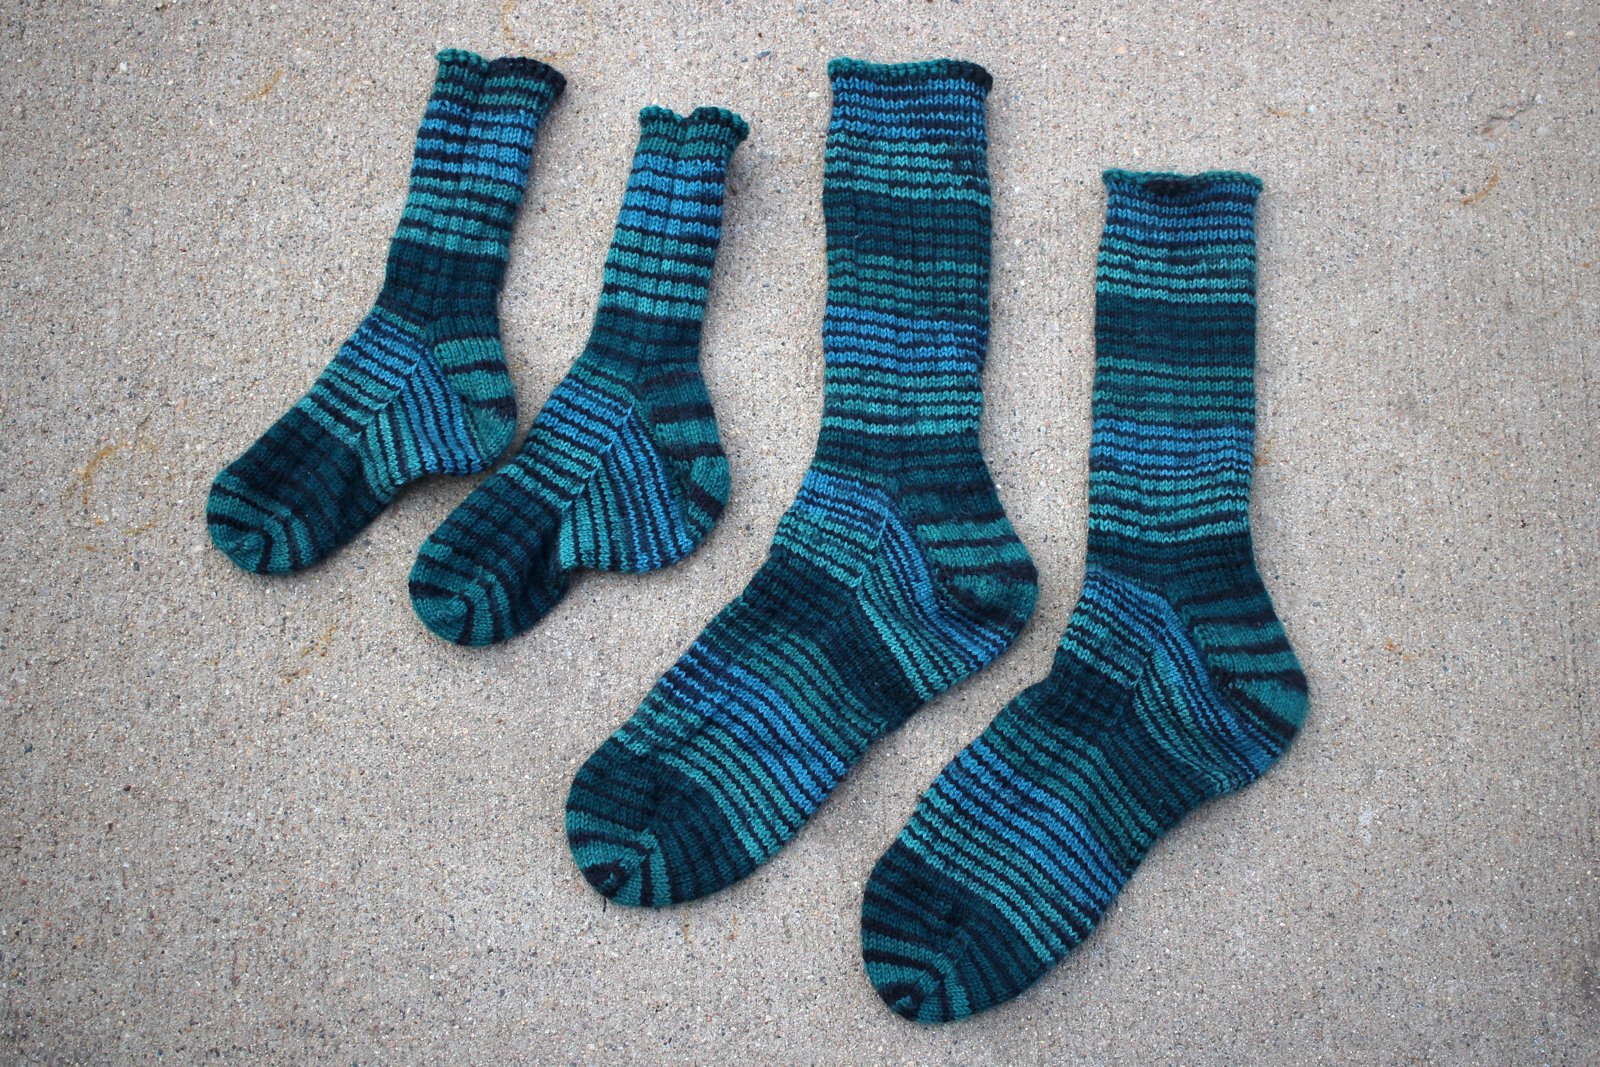
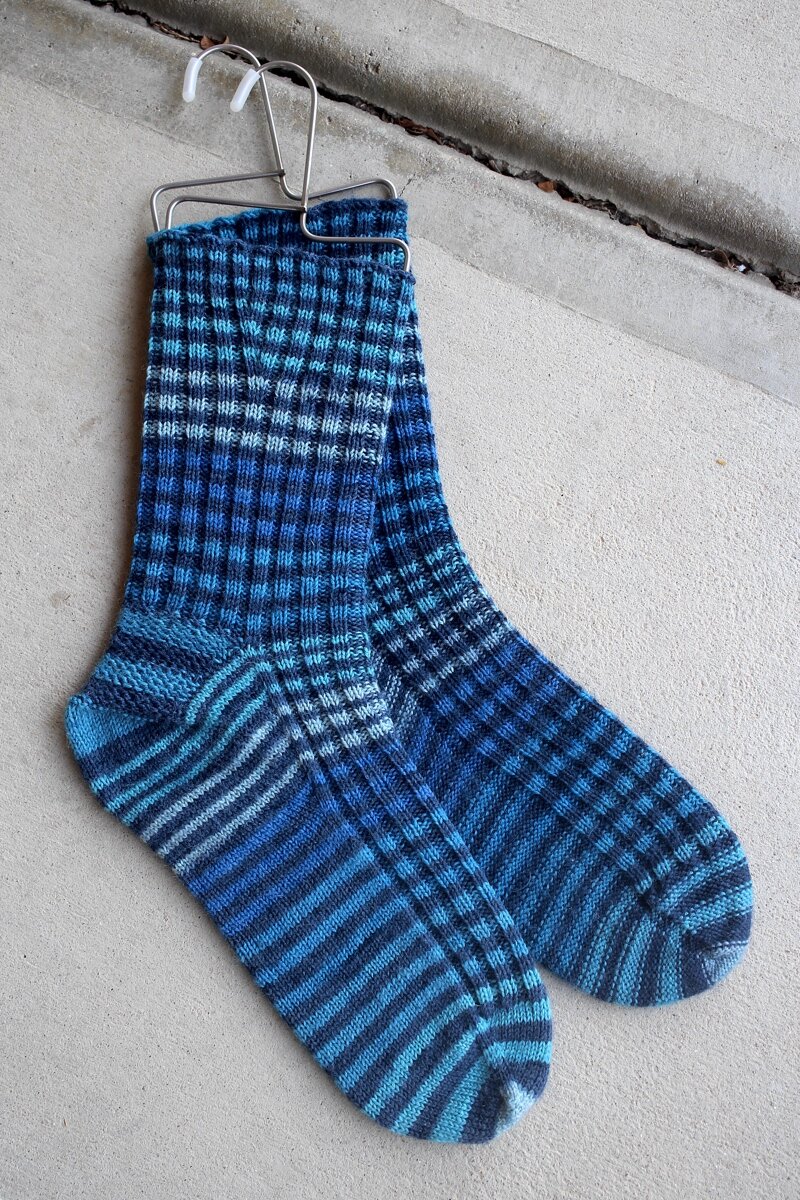
Matching adult socks and toddler socks with matching green, blue, and black stripes.

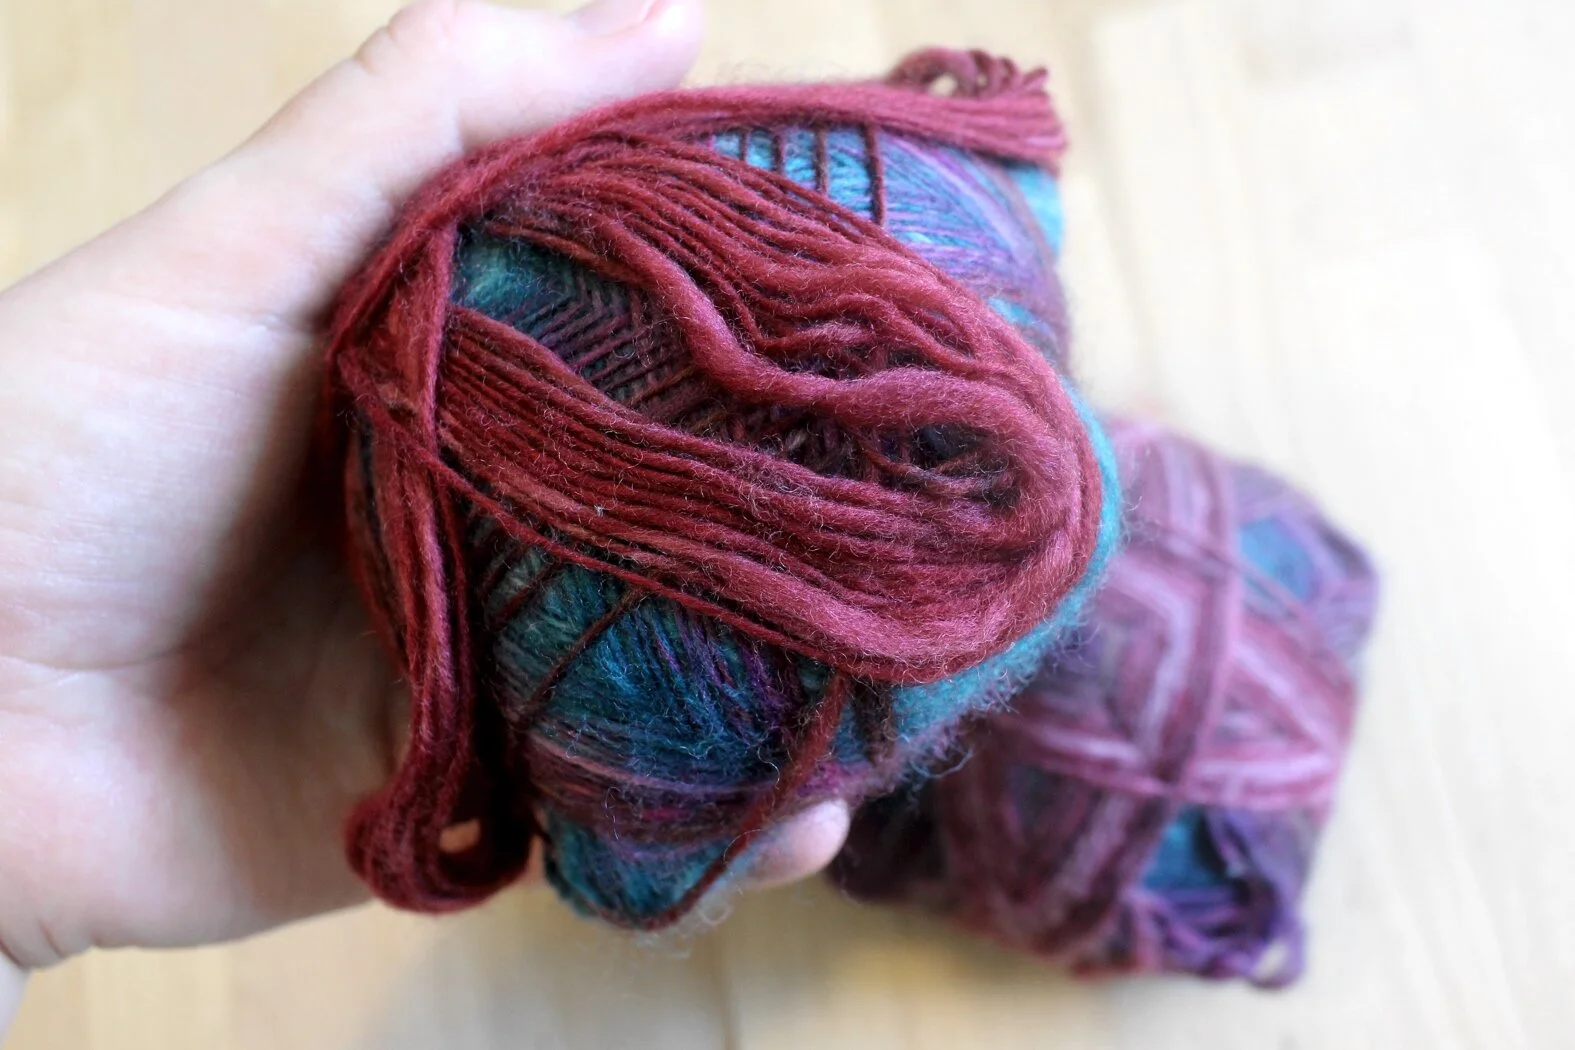
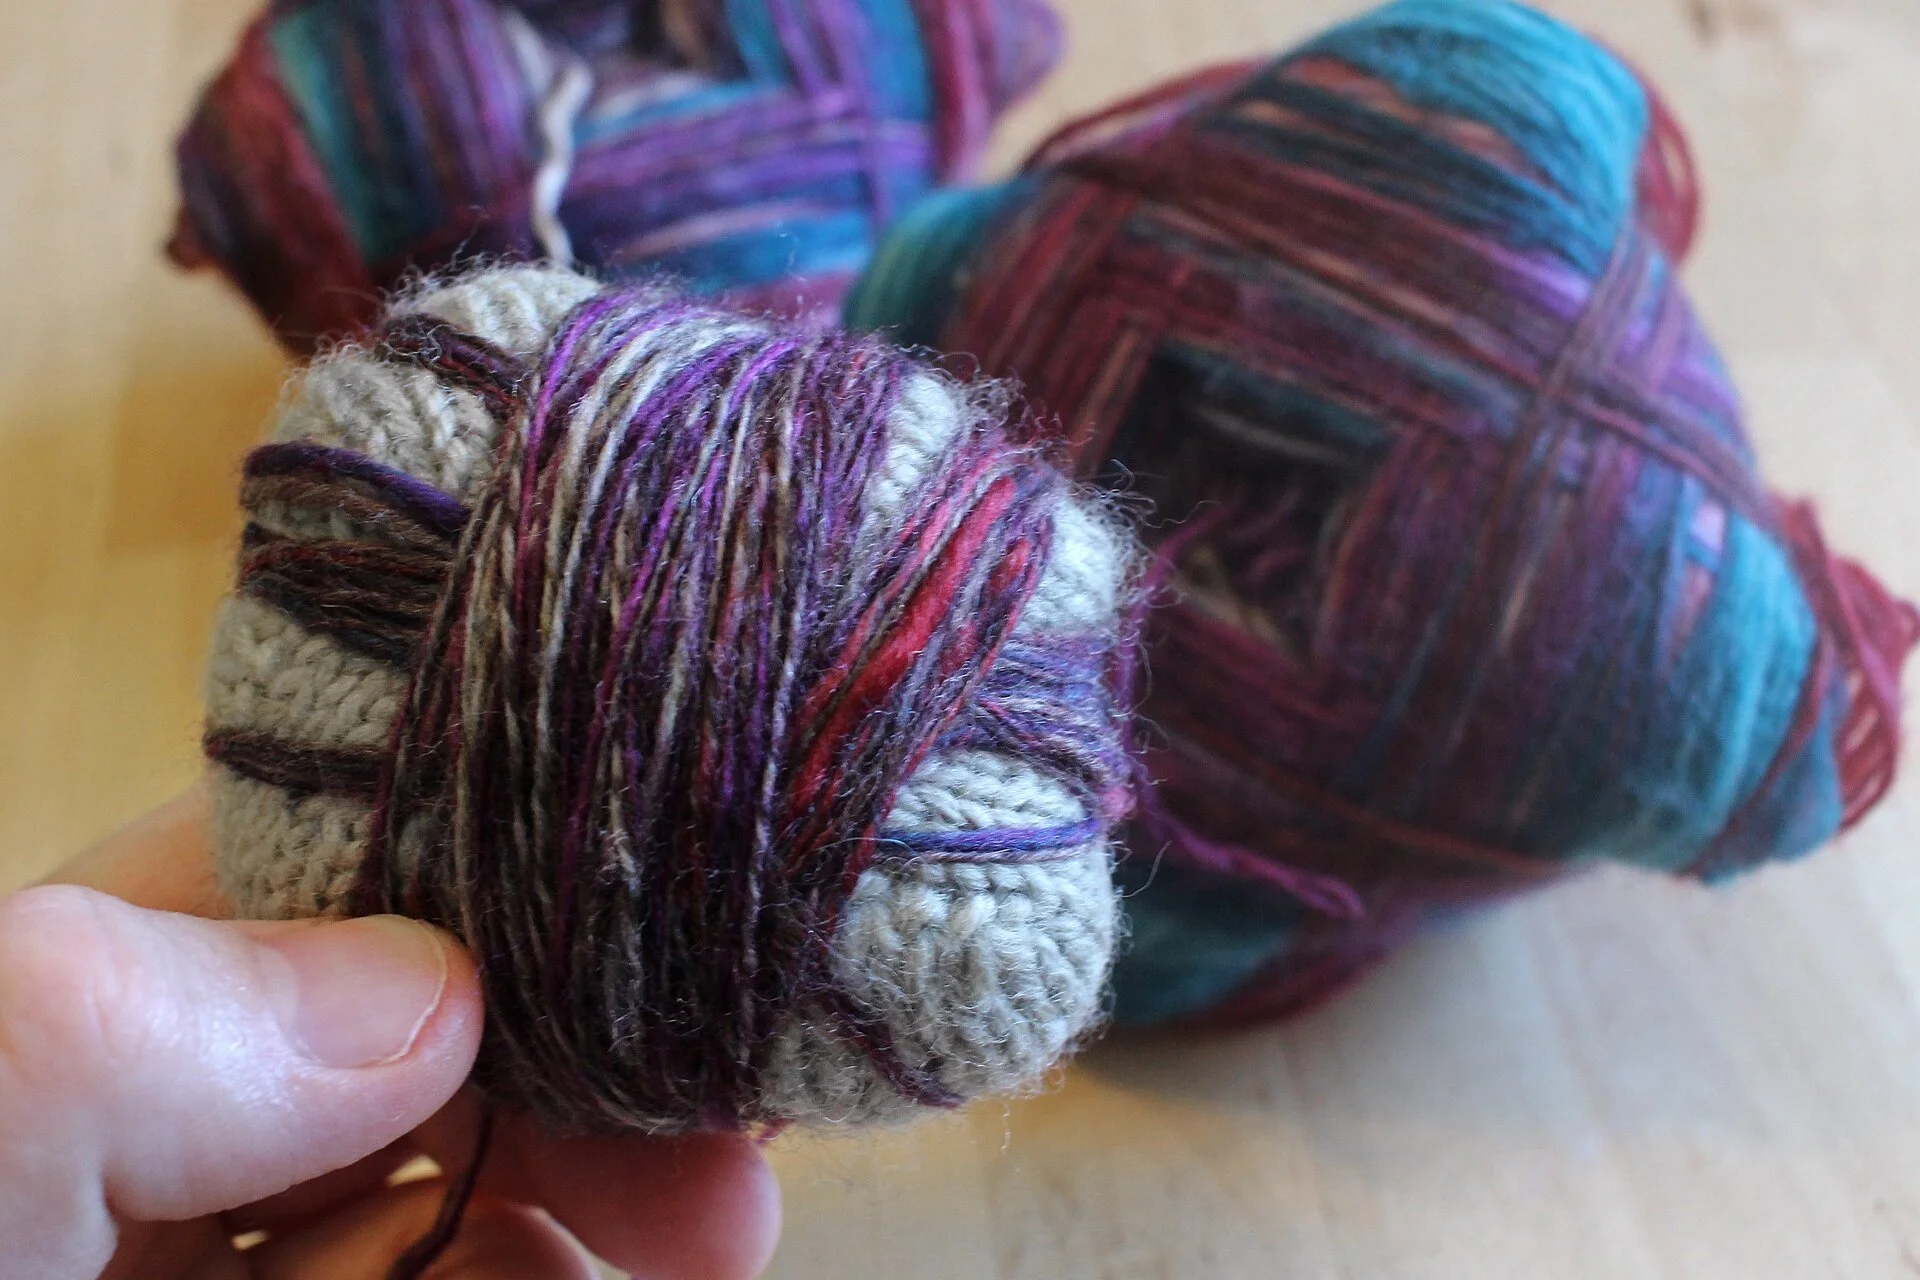
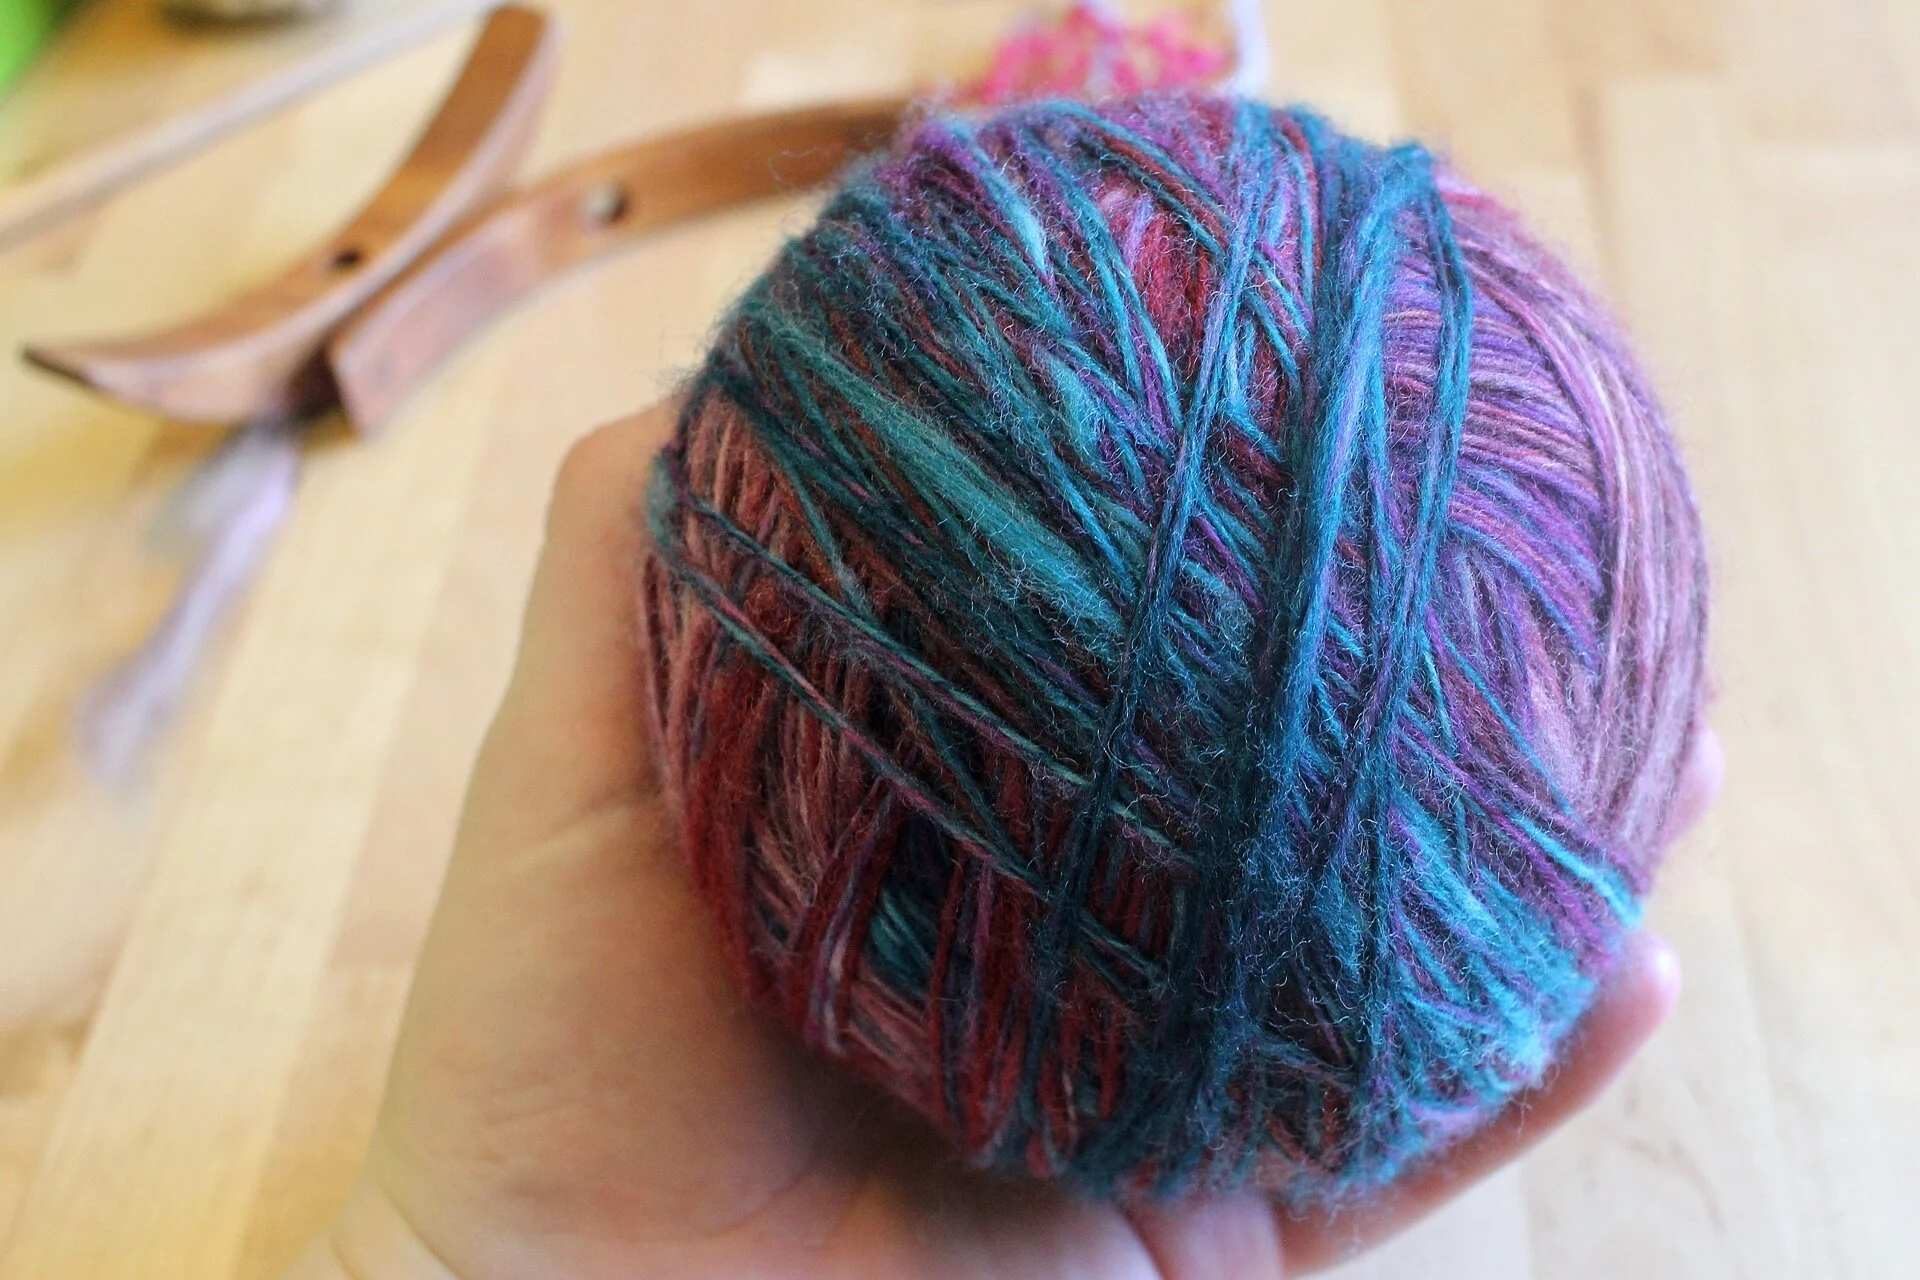
I was out wandering the yarn aisles one day and came across a few balls of Patons Kroy Sock in a new to me color, Turquoise Stripes. This yarn is a staple of my sock stash and I’ve made so many comfy socks with it. Of course I had to get a few balls because I do love green sock yarn. Then I had a fun idea. Sure I could knit socks for me, but also the Kiddo, and the Bearded One. We could all have matching socks until Kiddo outgrows hers. Sounded like a great idea to me, and enough yarn came home to make it happen.

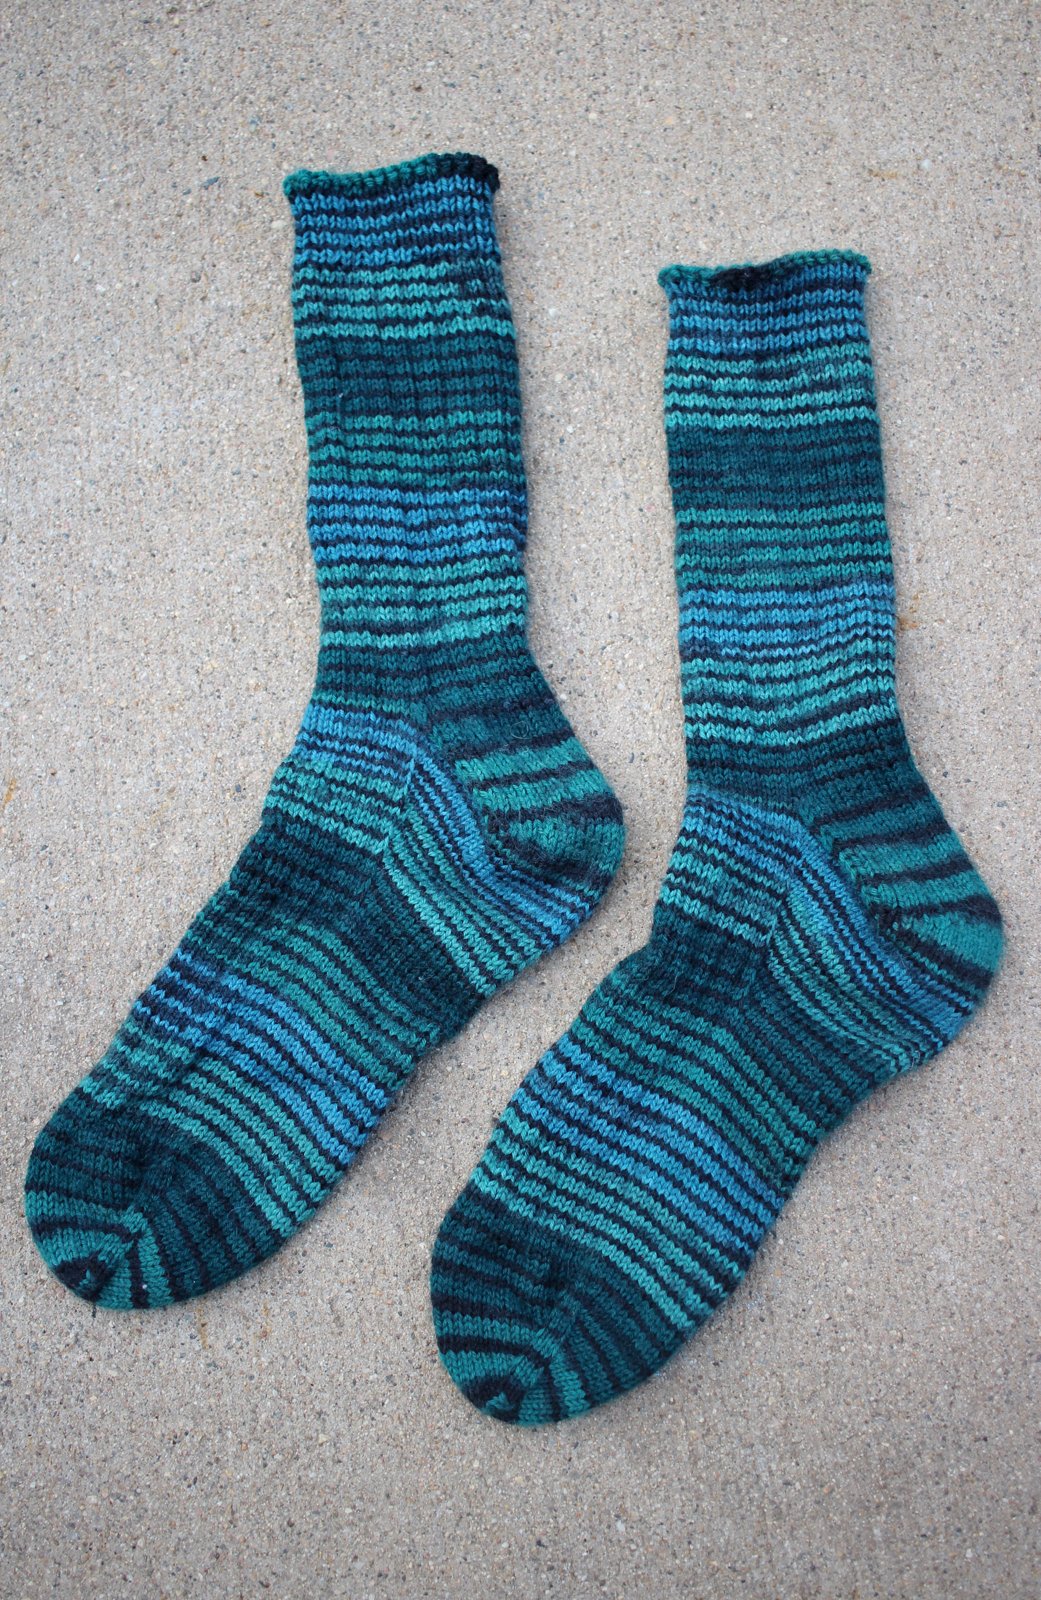
Hand knit adult socks with blue, green, and black stripes laying on concrete.

The first pair I started was for me because both of my most recent finished sock projects were for them. I stuck with my usual toe-up sock pattern. The only change was making the leg and cuff longer because I had the yarn.

I’ve knit this pattern dozens of times, but they were no means a quick project. They were the thing I knit when I had a few minutes of downtime at the playground, or riding in the car, or when I didn’t want to stare at my phone. So these took me about two months to finish. Then I got started on the Kiddo’s pair.

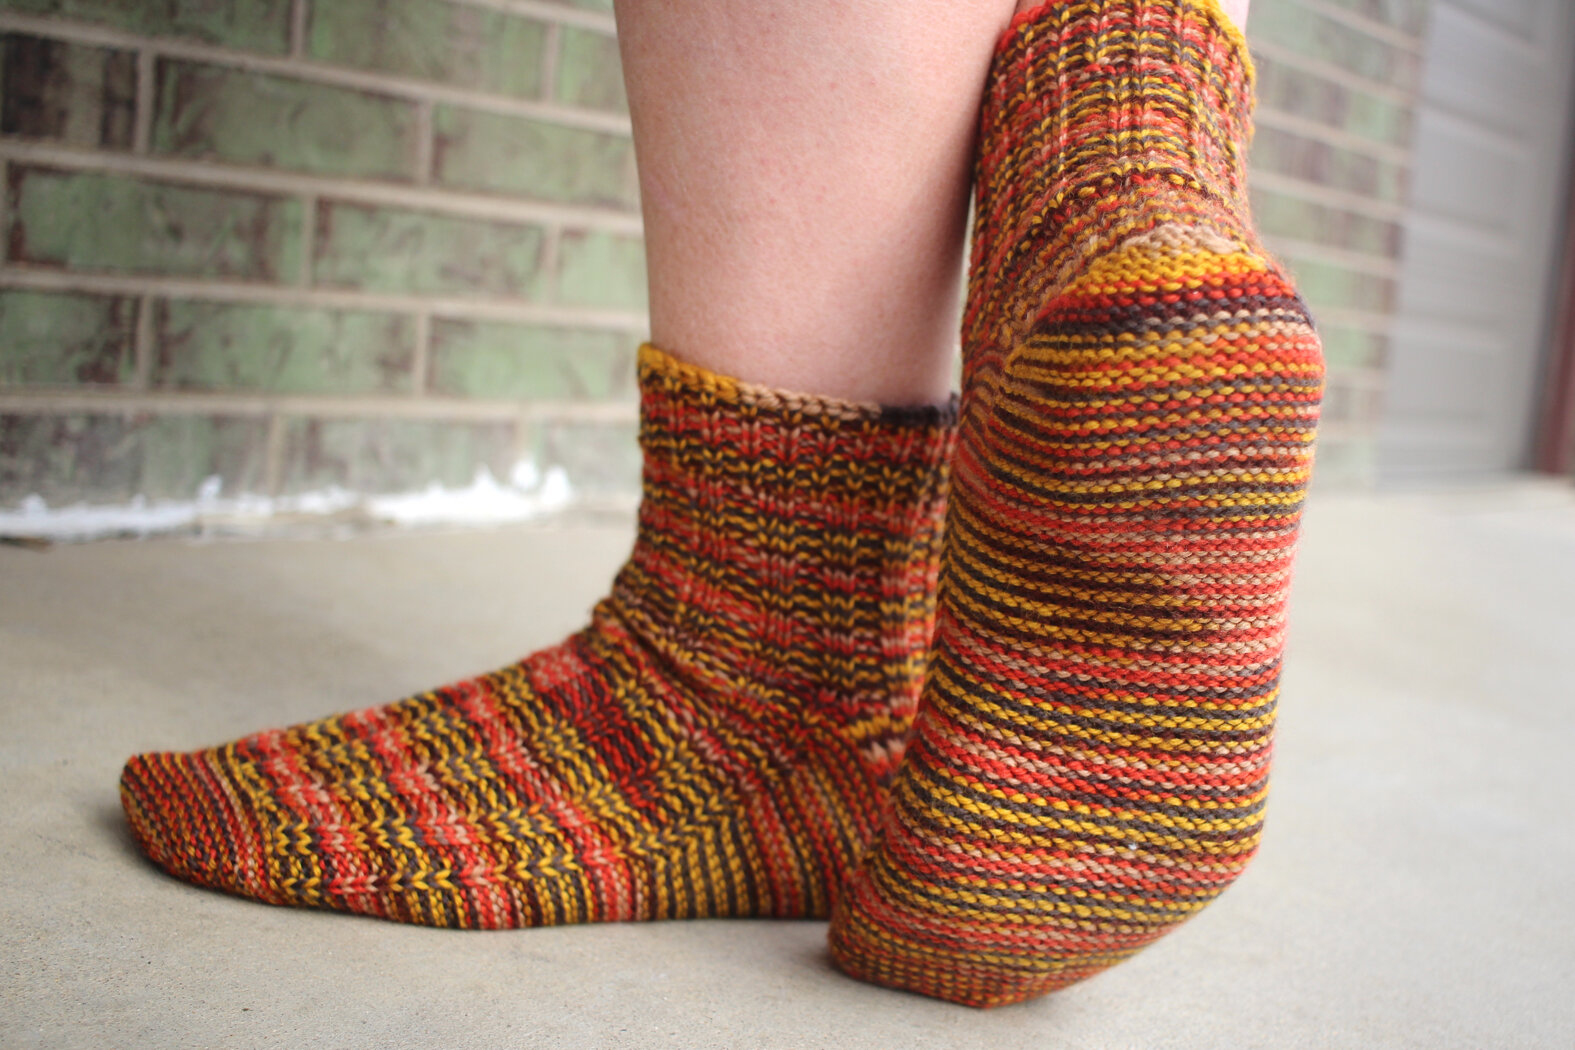
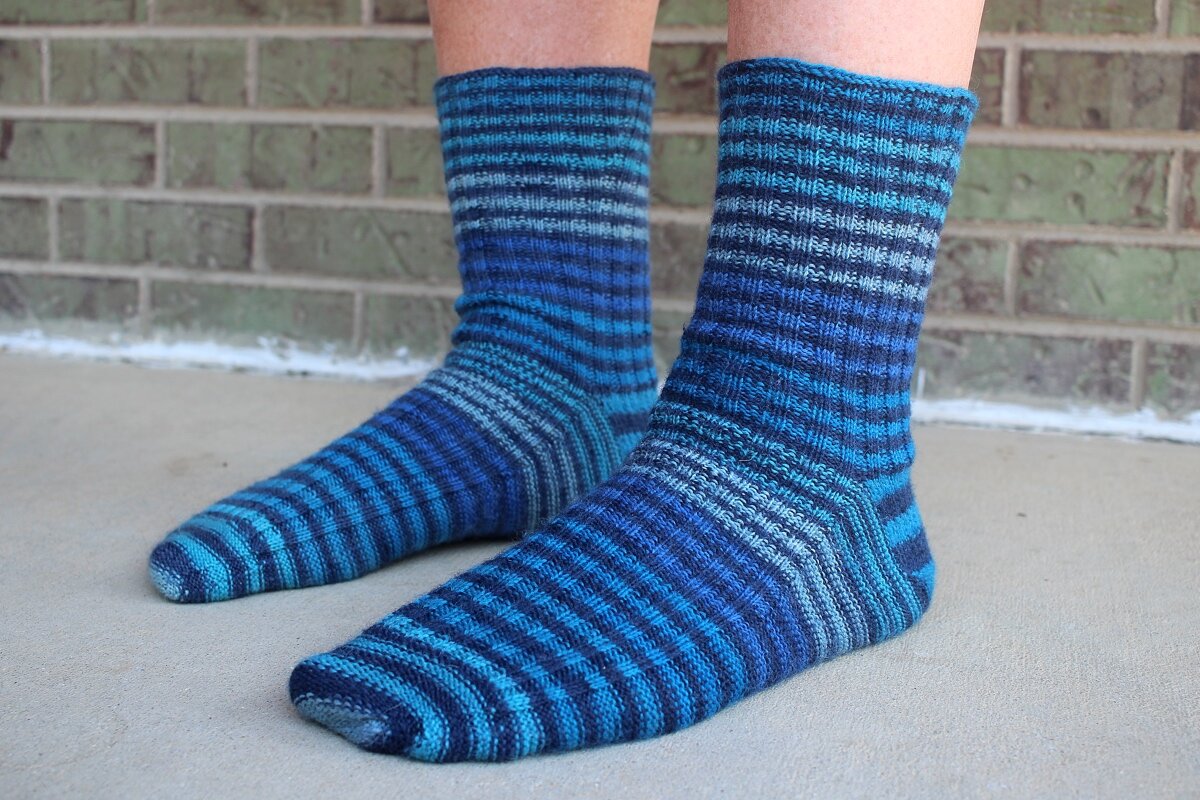
Small kiddo wearing handknit striped socks outside.

You’d think that these small socks would fly off the needles. I certainly hoped they would. But, nope. This pair took me two months to finish too. I also used my default sock pattern for these, just a sized down version. Of course, I made these with room to grow because she’s almost outgrown the last pair I made her at the beginning of the year. Maybe this pair will fit through to next winter. Maybe.

As cute as this pair is, making them was bittersweet. This was the first pair of her socks that needed more than a single 50g ball of sock yarn. It’s a good thing, but I can’t help but be a little sad about it. Probably won’t be long before she can wear my shoes.

Kiddo and mom wearing matching hand knit socks.

After making these two pairs, I decided to knit the Bearded One socks with different yarn. I still love the color and the stripes, but I don’t think they’d look as nice at a larger stitch count. 64 - 70 stitches around seems to be the limit before the stripes turn to static. And I definitely need more than 70 stitches per round to make him a pair of socks. Think I’m going to use the extra yarn to make the kid another pair of socks when she eventually outgrows her current pair. Until then, I’m going to tackle all that gift knitting that’s piling up. Cute unicorns don’t knit themselves.

Wooly Links: September 2021

I’ve been trying to come up with a new way to gather up these Wooly Links since ending my newsletter. I’m not trying to send them out at a certain interval anymore, so how do I know when to these bundles of fiber arts goodness are ready? 10. The answer is 10. When I have 10 good links to share, I’ll post them here. This mean that Wooly Links might be a little sporadic, but they’ll still get out there to share tutorials, neat patterns, and fun stuff.

I love the color work designs of Jacquline Rivera, and the Mermaid Warrior socks are no exception.

The Little Pumpkin Patch is an amazing pattern to knit a pumpkin that you don’t need to cinch up with yarn afterward. I used this pattern when it was free last year, and the newly updated pattern is totally worth the price.

I have never knit anything with the brioche technique, but I really do love how it looks. The Briochepria Cowl makes me want to finally learn how.

Bagel Breakfast by Andrea Love

Check out this massive crocheted canopy that covers a shopping district in Malaga.

Yay! I loved reading Craft Leftovers 7+ years ago and definitely missed it when it went into hiatus no thanks to hacking. I’m so happy to hear that it’s back up and that she’s working on getting all 100+ knitting patterns back online.

What a cute crochet rainbow pillow!

Some good tips for spinning bulky yarn from Jillian Moreno and some fun examples of bulky handspun too.

I’ve wanted to spin yarn to make a Shift Cowl and this tutorial has some good steps for how to deconstruct a pattern and the yarn to get started with the spinning.

A little different….

A documentary about the incredibly time intensive and beautiful hand stitched art made by Salley Mavor for the book My Bed.

Some Sock Knitting Woe

An almost finished pair of yellow cabled hand knit socks.

An almost finished pair of yellow cabled hand knit socks.

Gather round (digitally of course) while I tell a tale of woe and sock knitting misfortune. At the center of it all is this pair of socks which the recipient has dubbed the Celtic Waffle socks because the intricate cables remind her of waffles. I’m inclined to agree.

Now these socks are no strangers to ripping. I was a good chunk of the way into the foot of the first toe-up sock when I realized it was too small. So out it came. The second attempt went much better with a larger stitch count even with the long break I had to take in the middle of the gusset. Things were smooth sailing once I got started again. I finished the gusset, turned the heel, knit two full chart repeats, worked some 2x2 ribbing at the top, and bound off. This first sock is a beautiful thing that took a lot of work, planning, and attention. So, not wanting to lose momentum and or take another six months to finish, I immediately started the second sock.

The inside off my sock knitting project bag holding one in progress sock and too little yarn to finish.

The inside off my sock knitting project bag holding one in progress sock and too little yarn to finish.

Sock number two was going great. By this point, I was well past the heel and so happy to be knitting this complicated chart for the last time. Then the yarn started to tangle. Obviously the thing to do was to take the yarn out of my project bag, sort it out, and resume knitting. Instead, I pulled out the yarn, and thought, “Where’s the rest of it?” No amount of shuffling through the papers and accoutrements turned up more hidden yarn or a portal to Yarnia. The rest of the cake definitely didn’t jump out and say, “Surprise! Here I am!” Ugh.

There I was holding a sock that needed three more inches before the bind off in one hand and nowhere near enough yarn to do so in the other. That’s when I figured out just how badly I’d messed up this time. And it was such a simple, but absolutely massive, mistake too. Here it is:

I thought the yarn came in 100g skeins because many skeins of fingering weight sock yarn do. This yarn however came in a 115g skein.

So I could put 57.5g toward a sock instead of 50g. But I forgot all of this when figuring out how tall to knit the first sock. So, when I looked at the grams on the scale, I thought I had way more than yarn to work with than I actually did. And I was so excited to just start that I didn’t way weigh the first sock like I usually go when knitting socks from one skein. That would have been an immediate red flag that something was off. How much yarn did that first sock use? 62 grams. Once again, ugh.

The first finished cabled sock that used way more yarn than I expected.

The first finished cabled sock that used way more yarn than I expected.

I have already decided that I am not ripping out the first sock. The cable would be okay but the leg would be way too short. The sock is just right aside from that whole used too much yarn thing. That means I need to get more indie dyed yarn whenever the dyer dyes more. I haven’t had any luck finding this base in this color for sale or trade anywhere else either. Now I get to play the waiting game for yarn updates.

Now that I’m stuck waiting instead of gleefully finishing this pair, I’m left trying to figure out how to not make this mistake again. I’ll let you in on a secret: this is the second time I’ve done this. That other pair of socks is still waiting for me to unpick the bind off and rip enough out to match both socks. For the third time, ugh.

The mostly finished sock and the little bit of remaining yarn.

The mostly finished sock and the little bit of remaining yarn.

I’ve come up with two things that might help. One, write down how many grams I can put towards each sock in my notes. I keep fairly detailed notes as it is, so this shouldn’t be too hard to remember to do. Two, divide 100g+ skeins in half. I have an accurate scale and scissors so it’s doable. More work upfront (and something I used to do), but better than not having enough yarn to finish a pair or socks.

How do keep your sock WIPs from eating more yarn than you have?

Time For Some Wooly Spring Cleaning

Close up details of the unwashed wool blanket with plenty of lanolin and veggie matter to go around.

Close up details of the unwashed wool blanket with plenty of lanolin and veggie matter to go around.

Warmer Spring weather has kicked up in fits and spurts over the past few weeks. So, it’s time for that giant box of fiber that’s been sitting on a shelf in the garage to finally get some time in the sun and the tub.

My dad sent me a 16” x 16” x 17” box last year. I poked at it a little bit, but wasn’t quite ready to jump into washing it just then. I wanted to do a little practice first and had a much smaller chunk of alpaca that would be a good start to learn how to wash raw fiber. I chronicled that learning attempt here, and it went really well. With a little experience and confidence under my belt, I was ready to get started…eventually.

One of the two bags from the box and absolutely stuffed full of a skirted wool fleece.

One of the two bags from the box and absolutely stuffed full of a skirted wool fleece.

I opened this box and dug in before I could change my mind or the weather changed my plans for me. The box was packed with two bags that each contained a full skirted fleece! I only had the time and bags to work with one of the bags, so I left the second fleece in the box for later. Maybe this summer? Hopefully this summer.

A small sample of the wool from this fleece.

A small sample of the wool from this fleece.

A close up of one of the wool locks.

A close up of one of the wool locks.

Anyway, I don’t have any details about what kind of wool this, just that it’s wool. The fleece wasn’t dirty and dusty like alpaca, but a little bit greasy and yellow from the lanolin. There was a fair amount of veggie matter and some second cuts - both of which I pulled out much of what I could. While the locks don’t have much in the way of a tight crimp, it is strong with a 4-5” staple length. After pulling out the dirtiest sections (spoiler alert: I should have pulled out more), I divided the fleece into 7 bags for easier washing.

7 mesh bags full of wool fleece ready for a wash in a utility sink.

7 mesh bags full of wool fleece ready for a wash in a utility sink.

My original plan was to wash the fleece in a big tub in the back yard, but that was before I had a utility sink. Washing a big chunk of wool seemed like the perfect thing to really break that sink in. I grabbed the 4 of the 7 bags to get started because I only have so much drying room. Then I filled up the tub with the hottest water I could get, 120 F, and added my soap. I’m using Mrs Meyers Clean Day Dish Soap (<- affiliate link) which is sulfate free (and what I used to wash the alpaca fiber). This batch got two soaks in soapy water (so much dirt!) and two soaks without soap. Then I laid them flat to dry. It was so hard not to poke the bags every hour to see if they were dry yet.

A handful of washed fleece showing off the lock structure and a little bit of veggie matter.

A handful of washed fleece showing off the lock structure and a little bit of veggie matter.

When all the wool was finally dry, I was afraid that I’d felted it in the wash! I didn’t - whew! - but the wool was compacted. It takes a little effort, but I can still pull it apart and tease out the individual fibers. Now that the wool was clean I could finally get a good look at it. Most of the fiber is a bright white and only a few of the tips stayed yellow. It is also very soft and fine. I’d say that I lucked out with this fleece. Thank you, Dad!

Of course, I couldn’t resist seeing what would happen after the wool took a trip through the drum carder. This was a learning experience on all fronts. The wool (because it was compacted from the wash), took a chunk of work to get ready to feed into the drums. Then all the veggie matter I hoped would come out with drum carding, didn’t. So I spent way more time picking out grass and hay that I’d skipped over in the beginning. Bah. I also learned that this particular wool is very fine and two passes through the carder is the most it can take. Anything more will tangle the fiber into neps which would be a complete waste of some really beautiful wool.

I was also reminded of a few absolutely key points:

  • Don’t wear all black when working with white fiber.

  • An apron to wipe your hands and hold tools would be really helpful.

  • Save outside drum carding for less windy days.

  • Keep your hands moisturized so the fiber doesn’t just cling to your fingers for the fun of it.

  • Find all the tools you’re going to need before you start working with the carder.

  • Toddlers don’t care about drum carding. Toddlers care about being pushed on the swings. (This one is the most important.)

The first finished batt from the washed wool fleece ready to come off the drum carder.

The first finished batt from the washed wool fleece ready to come off the drum carder.

The fluffy and flighty wool batt after pulling it up to come off the drum carder.

The fluffy and flighty wool batt after pulling it up to come off the drum carder.

Close up view of the underside of the batt as it comes of the drum carder.

Close up view of the underside of the batt as it comes of the drum carder.

The finished batt is just shy of 2 ounces and only a small fraction of what I washed. The drum carder wasn’t cleaned after my last carding projects so there’s bits of green wool and cinnamon alpaca in there. Still, it looks really good even if it does have more veggie matter in there than I’d like. I’m looking forward to spinning up a few samples of 2 and 3 ply yarns. It’ll certainly help me decide what to make with the finished yarn when I have a better idea of how much fiber I actually have.

The drum carder after removing the batt. The drums are still covered wool stuck down at the base of the cloth.

The drum carder after removing the batt. The drums are still covered wool stuck down at the base of the cloth.

Now I have to go pick all the stray fibers out of my drum carder before I can card the next batch.


This post contains an affiliate link which means, if you decide to buy through that link, I’ll get a small commission. My opinions are my own, and formed after multiple uses. I wouldn’t recommend this soap if I didn't think it worked. Thanks!

A Sock Duo

One adult and one toddler sized pair of hand knit socks laying on concrete.

One adult and one toddler sized pair of hand knit socks laying on concrete.

One of my crafty resolutions for last year, was to spend the year making socks. I’ve got plenty, but the Bearded One and the kiddo could definitely use a few more pairs. Add in a few more pairs here and there for friends and I’d be set for a year’s worth of portable knitting. So, how many pairs did I make in 2020? Three (2 of which were small kid socks) and 2 pairs in progress. Not exactly the year of socks I was hoping for. While I’m not bothering with resolutions this year, I still want to make socks. Now that 2021 is 5 months in, I’ve been able to add a few more pairs to a few different sock drawers.

Hand knit socks with a reverse stockinette toe and sole.

Hand knit socks with a reverse stockinette toe and sole.

The Bearded One has been asking for more house socks and I had 2 skeins of worsted weight yarn set aside that would do the job nicely. I was in the mood for a quick, simple project so these went fast. The pattern is my basic default sock pattern that I’ve figured out how to flip inside out to make a princess sole without the purling. He reports that the socks are warm and comfy, and that he would happily fill up his sock drawer with a few more pairs.

The Kiddo and the Bearded One wearing their socks. The toddler made a run for it shortly after this photo was taken.

The Kiddo and the Bearded One wearing their socks. The toddler made a run for it shortly after this photo was taken.

Since the cuffs on these socks were on the shorter side, I was going to have a decent chunk of yarn leftover. Enough to, say, make the kiddo a matching pair. She repeatedly wanted to try on the first pair, so I made her a pair too with plenty of room to grow. It makes me so happy to see her pick this pair to wear to bed or just sticking up past the tops of her yellow rain boots. It’s hard to withstand the onslaught of cuteness sometimes.

There wasn’t enough yarn to eek out anything close to a matching pair for me too. But that’s okay when I’m making socks for two people who absolutely love wearing them. Means I have yarn leftover to darn any holes that pop up. And that I can go dig out stash yarn to make matching socks for me and the kiddo. Hey, I didn’t say I wasn’t going to knit any socks for myself this year.

The Bearded One showing off the princess soles of his new socks.

The Bearded One showing off the princess soles of his new socks.

The Specs:

Yarn: 2 skeins Patons North America Classic Wool Worsted - Lotus

Needles: 3.25 mm circulars

Dates: Jan 7 - 21, 2021

The Mighty Raven Queen Mitts

Two grey and red fingerless mitts laying next to each other to show the front and back of the pattern.

“Ya know, the photos really didn’t do these mitts justice.”

That was the paraphrased text I got from my friend after she unwrapped these mitts, and I am inclined to agree. She knew that I making these for her so I kept her updated with progress pics. A finished cuff there, half a raven over here, and so on. I didn’t send her any photos after I blocked the mitts though so I wouldn’t spoil the final reveal. Still, they are so great to see in person and wear too. I had to try them on, of course, and make sure my floats weren’t too tight. Yeah, that’s the reason. :)

Two red fingerless mitts covered in grey raven color work.

I had a long list of Christmas knits that I wanted to make, but kept cutting it down as time ran out. I finally decided what was left would be Happy 2021 gifts instead since I’d have to put everything in the mail during massive shipping delays anyway. These mitts were one of the few projects that made the cut. Pretty sure the impressive and fun color work is the reason. I stayed up way too late many a night just to do one more row. Oh! And one extra bonus is that this pattern finally pushed me to understand how m1 increases work. Lifted increases are still my favorite, but I’ll keep the m1 in mind for color work.

Close-up of the inside of the Raven Queen mitts showing gray floats of yarn secured by red stitches. The other mitt right side out is behind.

And here are the floats since no post about finished color work is complete without a photo of the back side. There are a few sections where the floats are pretty long so I trapped them about every 8-10 stitches which worked really well. They didn’t catch my fingers when I tried on the mitts at all.

Looking at these photos makes me want to cast on for my own pair right now. I even have the yarn - a variegated charcoal and a golden yellow - wound and ready to go. Now if only I could find energy to start and the brain power to follow color work charts.

The Specs:

Pattern: Raven Queen by Jacquline Rivera (Ravelry Link)

Yarn: Knit Picks Hawthorne Fingering Kettle Dye - 75 yds slate and 147 yds Hood River

Needles: 2.25 mm circulars for ribbing and 2.5 mm circulars for color work

Dates: December 7 - 20, 2020

Ravelry Page

The Red Scarf

A red scarf with a rib and garter stitch motif knit following the Wheat pattern by Tin Can Knits.

This beautiful red scarf for the Foster Care to Success ended up being one of my last knitting projects of 2020 even though I started it during the summer. At first I couldn’t decide on a pattern so I decided to knit 2x2 rib. Simple, reversible, and easy to knit, right? Yes, but also a bit boring so I didn’t want to pick up after working the first couple of inches. This was rip number one.

My second attempt at knitting this scarf, got me to pick a pattern: The Wheat Scarf by Tin Can Knits. So I cast on once again. The contrast between the garter and the panel of ribbing was definitely more interesting to knit. Unfortunately, now I didn’t like the fabric and decided the needles were too small for this pattern. This was rip number 2.

A closeup of the rib and garter stitch pattern of this red scarf.

For the third try, I went up a needle size and skipped the garter edges at the end of the scarf. This time I liked what was on the needles, but it still took me awhile to make. My other mod to the pattern was making the scarf a few inches shorter than the Red Scarf Project guidelines to account for how much superwash scarves can grow during their first wash and block. This one grew 4 inches! So, the scarf was only a hair too long instead of way too long.

In the end, I managed to get it in the mail with a few days to spare even with the holiday shipping delays. Here’s hoping it brings warmth and comfort to whoever wears it.

A rib and garter stitch red scarf hanging on a tree branch.

The Specs

Pattern: Wheat by TinCanKnits

Yarn: 338 yds Berroco Ultra Wool - Sour Cherry

Needles: US 6 - 4.0mm

Dates: August 5 - November 27, 2020

Ravelry Page: Red Scarf 2020

An Autumn Knits Round-Up

All-Pumpkins-3.jpg

After a summer spent doing pretty much anything other than knitting (besides from finishing a few pairs of socks), the urge to play with all the yarn came back strong this Fall. I made fun stuff to put around the house, whipped up gifts, and finished up the odd lingering project. It was cathartic to get my fingers on the needles again and go stash diving to find the perfect yarn.

A collection of small, medium, and large knit pumpkins sitting in the grass. The pumpkins are orange, white, black, and purple.

I’m pretty sure it was the Spice and Clove Pumpkin pattern that brought back my knitting drive. This pattern showed up on my radar last year, but I didn’t get the chance to knit it at the time. This year I dove into the stash and pulled out yarn to make all sorts of fun pumpkins. There are tiny pumpkins made from doubled up sock yarn and big, squishy pumpkins made with bulky yarn. It’s a pretty versatile pattern that way.

Some of these have stayed with me and taken up residence on random shelves all over the house. Kiddo likes totting them around so they get up to some off the wall adventures. The rest headed off to new homes as fun gourd surprises.

While I’ve mostly gotten knitting pumpkins out of my system for the time being, I’m thinking about making one more using this pattern. All the shaping is done with increases and decreases instead of wrapping with yarn. I don’t think I’ll be able to whip one up before Thanksgiving, but it’ll still be a fun project in December.

A knitted black cat and witch wearing a green dress and grey hat sitting at the base of a tree.

This adorable little witch duo (well, duos), is another pattern I came across last year, but didn’t get around to knitting until September and October. The green witch and cat were a gift. Then I couldn’t resist knitting a sunflower yellow witch for my own shelves. The pattern, Little Witch Charm Set by Susan B. Anderson, is a little fiddly at times and I made a few mods to avoid picking up as many stitches.

A speckled black cat and a witch with a broom, yellow dress, and brown hat sitting in front of a jack-o-lantern.

I couldn’t get gauge with the yarn I needed to use, so I used said fingering weight yarn doubled up. It was a great way to use up my sock yarn leftovers and gave the witches a nice size boost. Still small and cute, but not mini. Here’s a full list of all my mods on the Ravelry project page.

An orange cardigan with 3 blue buttons laying on a field of rocks and snow.

And a sweater for the kiddo! This is the In Threes sweater that I started and finished knitting in 2019. The problem was that is got packed up on a high shelf while I tackled other major projects. The lingering doubt of whether or not it would still fit said kiddo this winter finally made me pull it down. Then it took me a few more weeks to sew on three buttons. The good news is that the sweater fits and looks like it will still fit next winter. Whew! The even better news is that kiddo still likes the sweater and asks to wear it. That’s a win in my book any day.

A close-up of the yoke of the cardigan with short sleeves and three blue buttons.

What’s next on the knit list? The Red Scarf Project scarf is still on the needles, but I couldn’t resist casting on a for a sweater. A sweater for me, no less. Christmas gift knitting is also staring me in the face. There’s a whole pile of yarn waiting for me to wind it up. I’ve got plans for cute unicorns, color work mitts, socks, and ornaments. Here’s hoping I haven’t bitten off more than I can chew.

A Sock Restart

A partially knit yellow cabled sock sitting next to a yarn cake.

This is the beginning of a beautiful sock. It’s a combination of a good yarn, good cables, and good color. But...it’s too small. All those cable twists (sometimes six a round) really sucked up all the give and stretch usually present in knit fabric.

So, this sock is yarn again and has the potential to be a beautiful sock that actually fits.

Was it frustrating to rip out 20+ rows of a plaited cable knit with fingering weight yarn? Most definitely, but totally worth it to have a comfortable sock that gets worn instead of stuffed in the back of a drawer. Now that I’m starting over, I have a better idea of how I can add ribbing and extra stitches for a better fit. And having a little extra time to figure out how to work around a stiff cable that sucks up stitches doesn’t hurt either. Here’s hoping 80 stitches will be enough this time around.

Crinkled yellow yarn sitting on a table after ripping out a too small sock.

Halfway Finished With 100 Days Of Sock Knitting

A pair of blue striped toe-up socks on sock blockers with one sock flipped inside out.

Back in 2019, I wanted to spend 2020 knitting socks. Socks for me. Socks for the Bearded One. Socks for the kiddo. Socks for friends. Did I knit socks in Janaury? Nope. Did I knit socks in February? Kind of. I started a pair of kid socks, and then they sat untouched for months after my own kiddo pulled out a needle’s worth of stitches. Ugh. Then the 100 Day Project kicked off and I made yarn for 100 Days which didn’t leave much room for sock knitting, but did get me some lovely new handspun. When that project ended, I wasn’t sure what to do next. I’d given up on a year of socks or even six months of socks. 100 days of sock knitting, though? That I could do. I quietly kicked off the project on July 28th, 2020 and got back to work on the lingering kid socks. Those only took a week to finish at a few rounds every day. What was next on the list? These blue-striped beauties for the Bearded One, which thanks to daily knitting, were knit in just under a month.

Blue-striped socks on feet and showing off the princess sole.

While they weren’t unceremoniously removed from their needles by a curious kiddo, knitting these socks wasn’t without aggravation. I’m a stickler for making self-striping yarn match up on each sock. The first step is matching up the yarns and making sure both skeins are in the same point in the color sequence. It’s a good thing I bought this yarn at a discount and got two balls because both of them came with knots. The stripe sequence was completely reversed in the middle of one ball! Thankfully, the largest chunks from both balls were enough to knit matched socks. And I’ve got enough leftovers to make a smaller matching pair for the kiddo. So, pulling the yarn balls apart, cutting, detangling, and spreading them all over the room for a few days was totally worth it.

The other big aggravation was finding two dropped gusset stitches that somehow escaped being knitted together with the edge of the heel flap. That part was all me, and easy enough to sew up at the end.

A close-up of the heel flap surrounded by the reverse stockinette of a princess sole.

The pattern is my own much tweaked and refined default toe-up sock pattern. Tweaking continued with this pair because I had to figure out how to knit the socks so I could flip them inside out after binding off to get a princess sole without purling. Totally worked though it did feel odd to knit a heel flap with the right side inside the sock. The pair got the Bearded One’s seal of approval so they must have turned out great. :D

I’m aiming to get the pattern written up properly in a wide range of sizes as I knit them. Figured I’d start with the biggest size and work my way down. It’s going to be awhile before this particular pattern is anywhere close to finished, but I will keep you updated.

With these socks complete, I’ve knit 2 pairs during my 100 Days of Sock Knitting project. Pair three is on the needles and there are cables afoot with 50 days of dedicated sock knitting time left. More on those socks later though.

The Specs:

Pattern: My own default toe-up sock pattern

Yarn: 437 yds (390.3 m) of Wisdom Yarns Stanza - 703 Burns

Needles: US 1.5 - 2.5 mm circular needles

Dates: August 6 - September 4, 2020

Ravelry Page and more notes here

Adventures in Washing Alpaca Fiber

Graphic that says “Adventures in Washing Alpaca Fiber without a Washing Machine” over a bag of alpaca sitting in a red tub full of soapy water.

Thanks to the kindness and generosity of family and friends, I have accumulated a fair bit of alpaca fleece in a few different colors. The most recent addition was a 16” x 16” x 17” box from my Dad packed full of beautiful grey and black locks. It’s still sitting in the box too because it has a distinct aroma. Now that warmer temps are here to stay for a few more months, I’m ready to give washing and prepping alpaca fleece a try.

So far, the bulk of my fiber processing experience has been with wool and alpaca that’s already been washed and dyed. The lone exception was this alpaca handspun I made a few years ago. That yarn started as fiber that I turned into batts with a drum carder. But I didn’t wash the fiber before hand, because the general consensus from what I’d read was that you didn’t have too since alpaca don’t produce lanolin. Yeah…no. The finished yarn was wonderful but spinning it left dirt everywhere - my hands, the drum carder, my lap, kitchen table, etc. So all of this new stuff definitely needs a wash.

Unwashed cinnamon brown alpaca fiber

Before digging into that box and committing to a massive washing project, I’m starting small with 7 oz of cinnamon brown alpaca from a friend. It smells pretty clean, but there’s a lot of vegetable matter and my hands definitely feel a little grimy after digging around in the fiber. A lot of my researching and learning about how other people wash alpaca has shown me that there are a lot of different methods. What’s been the same is this:

  • don’t agitate the water - let the fiber soak

  • use warm to hot water

  • gentle dish soap works really well

  • mesh bags are a must

  • if you’re going to use a machine machine, it has to be a top loader

So, keeping all that stuff in mind, here’s what my set up involves:

  • A big flexible tub to soak and wash the fleece outside my washing machine is a front loader

  • Mild dish soap - I’m using Mrs Meyers dish soap which is sulfate free

  • Lots of mesh bags

  • An old towel

  • My patio table

One more important note before getting into the grit of it, I’m washing stuff outside because I don’t want to clean the tub more than I have too. Let’s get started.

Unwashed alpaca placed in bags to prepared for washing

The first step is shoving all the alpaca in bags. I ended up splitting the 7 oz into 2 bags so it’d have room to loose dirt. I also picked out a few bits of bigger veggie matter and removed any second cuts I happened to find.

Now for the tub. I filled it up with water from the hose which is definitely on the cooler side. To warm things up I used an electric kettle to boil some water. It didn’t get anywhere near as hot as I expected but it was warm. Then I added a few tablespoons of soap and smooshed the bags under the water until they stayed completely submerged.

Bags of alpaca fiber soaking in red tub of warm soapy water during the first round of washing.

This is what the water looked like after 20 minutes. I could not see the bottom of the tub even a little.

The dirty soapy water left over the alpaca fiber’s first wash.

I pulled the bags, rolled them up to squeeze out some water, and emptied the tub. Then I refilled the tub with the same amount of hot and cold water for a rinse without soap. The bags went back in and I set another timer.

Soapy water leftover after the alpaca fiber’s second wash.

The bags sat in this water for closer to 30 minutes because I had other stuff to do. This time I could almost see the bottom of the tub.

Decided to do one more soak in soapy water. I didn’t have to add any hot water this time because the hose sat in the sun long enough to heat things up.

After another 30 minutes (took a lunch break), the water was clear and I could see the bottom. Plus, the water I squeezed out of the fiber was only slightly cloudy. Looked good enough to me so I gave them one last soak in plain water to rinse out the soap. After taking the bags out of the tub, I rolled them up in a towel and gave them a good squeeze.

Still wet alpaca fiber in a mesh bag after 2 washes in soap water and a clean water rinse.

Here’s what the still very wet alpaca looks like. The larger VM is still there and I’ll probably have to pick it out by hand, but the dust and dirt is gone. Yay! One step closer to spinning this up.

Two bags of washed alpaca set out to dry on a mesh metal table.

I left the fiber in the bags so it wouldn’t blow away while it dries on the patio table. I did arrange it into a more even layer so it would dry faster. The day’s weather was hot and arid, but it still took the rest of the night inside to dry.

The alpaca fiber after washing and drying. Still full of veggie matter, but dust free.

What did I end up with after a morning’s worth of work and a day’s drying time? Much cleaner fiber. The larger bits of VM are still there, but the dust and grit are gone. Doesn’t feel like I stuck my hand in a bucket of dust after touching the stuff. The fiber isn’t felted and I was able to pull apart some of the locks to get a better look at what I have to work with.

A washed and cleaned cinnamon brown alpaca lock.

It’s definitely going to be work getting the rest of the fiber to this point, but I’m looking forward to getting this on the drum carder.

On the whole, washing this batch of alpaca fiber went pretty well. There’s not much I’d do differently. Hotter water will probably be a requirement for dirtier fleece so I’ll add 2 kettles worth of hot water for the big batch. Gloves might also have to be a thing for the really dirty stuff. I also wish the bags I have were a bigger mesh to let larger chunks out, but these still work fine. There’s still a few more things I want to try before digging into that massive box - like picking out more of the veggie matter and sending this fiber through the drum carder - but that shouldn’t hold me up too long.

References

This video from Jillian Eve gave me a good idea of what needed to be picked out before stuffing the fiber into mesh bags for cleaning. Might help you too if you’re using a washing machine to wash the alpaca.

This video focuses on tumbling and hand washing alpaca. Really makes me wish I had a double basin utility sink.

A short and to the point list about how to wash alpaca.

New Pattern: Morticia's Surprise

The three-legged romper, titled Morticia’s Surprise, hanging on the wall above a large metal "A” and small Cthulu sculpture.

Last year, a cosplayer friend of mine commissioned me to make the three-legged baby romper from the end of 1991’s Addams Family movie. I loved this movie when it came out and I still regularly watch it. So, of course I was all in when she asked me to make it. Designing a pattern to replicate something from a movie that I’ve enjoyed for so long made the process a fun challenge. This definitely wasn’t how I expected to learn how to knit and construct a set-in sleeve or write instructions for a short-row heel, but I’m so glad I did.

For most of the pattern writing and knitting, the plan was to knit the romper and mail it off. That’d be the end of it. The Bearded One had other ideas, and kept pushing me to release the pattern for this wonderful bit of geekery. He finally convinced me, and after a few more months of work and tech editing, Morticia’s Surprise is now ready for your knitting pleasure.

The three-legged romper from the Addams Family hanging on the wall above a large A and a handful of knick-knacks.

The romper starts with the feet, moves up the legs, then the body, and the shoulders are grafted together. From there you’ll pick up the stitches at the arm holes, work a short row sleeve cap, and knit the sleeves down to the cuffs. There are three different neck options and instructions for adding yarn and needles to match what’s shown in the film.

Close up view of the three feet and striped legs hanging on the wall next to a big metal “A”.

I’m releasing Morticia’s Surprise under the value-for-value model which means you can pay what it’s worth to you.

You can download the pattern and get all the details by clicking the button below. Then show your support for this pattern and future patterns by making a donation or becoming a monthly subscriber on Ko-Fi.

You can also get the pattern through Ravelry. Pay what you want using the coupon codes on the pattern page.

The neck and set-in sleeve of the Morticia’s Surprise romper hanging on the wall.

Finishing #the100DayProject 2020

And done! #the100DayProject ended on July 15th. I'm happy to say that I didn't skip a single day of spindle spinning and spun 3 skeins totaling 1,053 yards! It wasn't always easy, but sticking with the project was so worth it.

I’ve joined up with #the100DayProject this year with the goal of spinning every day. Writing down a daily log of my progress is an easy way for me to stay accountable, follow though, and plan what to spin next during this project.

If you’re just joining me:
Here’s how I prepped for the project and spent the first week.
During weeks 2 and 3 I finished the first single and started spinning the second.
Weeks 4 and 5 I embraced the slog of being in the middle of something.
Weeks 6 and 7 I finished spinning the singles and started plying.
Weeks 8 and 9 I finished my first skein of handspun and started the second.
Weeks 10 and 11 I finished the second skein and jumped into spinning the third.
Weeks 12 and 13 I worked my way though spinning the singles for yarn number 3.


Week 14

July 6 - 7 (Days 91-92): We’re in the last few days of this epic project now. I’m not feeling particularly retrospective at the moment or like I need to tack on a big goal to finish. Keeping it simple and just spinning everyday has served me well so far so I’m going to keep going to the end.

July 8 (Day 93): Had a couple of sections where the single just kept breaking. Turned out that the fix was pre-drafting more of the fiber. Spinning is a smooth process again. And in other good news, I’ve started on the last ounce of the fiber!

July 9 (Day 94):
The bulk of today’s spinning happened outside while my spinning buddy ran off some energy. There were a few breaks to procure a snack and clean up spilled bubble solution, but lots of new yarn went on the spindle. I even managed to get past the section of fiber where the roving had split into two parts. Holding those together to spin and preserve the color sequence was a pain.

July 10 (Day 95):
Got a good chunk of spinning in this afternoon. Maybe I’ll finish the single this weekend.

July 11 (Day 96): Yes! I finished spinning the second single for yarn number 3! I’m giving the twist some time to rest so I can wrap the plying ball tomorrow.

A partially wound plying ball sitting next to a spindle and 2 turtles of blue, red, and green singles.

July 12 (Day 97): I wrapped up the plying ball this morning and it looks good. My very rough plan was to make a 2-ply yarn and generally have the colors match up between the two plies. I was reasonably successful. There’s going to be a lot of marling, but there are big chunks where the colors line up just right. At least that’s what the grapefruit-sized plying ball showed me.

A mostly wound plying ball sitting next to two piles of singles.

Got a start on the plying in the afternoon. The yarn is a little fuzzier than I’m used to spinning, but still really fun. I can’t help but think that this would make a good Christmas stocking or wall art.

Week 15

July 13 (Day 98): I wasn’t able to get as much plying done yesterday because holding the fiber and twisting single up above my head has definitely irritated by arm. So, today I’m switching things up and working with my other arm. It’s awkward, but I’m still plying.

The plying ball is shrinking much faster than I expected. This morning the ball was the size of a grapefruit. By lunch, the ball was smaller than a peach. I might not even have to push myself to finish plying tonight.

A mini-skein sitting next to a swift winding yarn and a spindle suspended in a basket for easy winding.

July 14 (Day 99): Yes! I finished plying the yarn this morning! It feels so awesome to finish this last yarn with one day left to spare. Of course, this success didn’t come without a little irritation. As I got to the last few yards on the plying ball, the singles just kept snapping under the weight of the full spindle. I joined the plies back together once, but didn’t do it when the plies snapped again. Instead, I pulled out another spindle and plied the remaining singles to make a mini-skein. Works for me.

The main and mini skeins sitting next to each other in front of a yarn swift.

Broke out the swift and wound the yarn into skeins. Ended up with about 300 yds between the two. I was aiming for a sport weight yarn and there are definitely sport weight sections. It’s looking a little closer to a worsted weight though which is totally good too. Won’t know for sure until after the yarn is washed and dried.

Now that I got a good look at on the swift, the colors blend together beautifully. Even when there’s a barber pole effect, the colors share a similar value so they don’t jar the eye.

Blue and purple handspun yarn soaking in a sink.

July 15 (Day 100): It seems fitting to end the project with finishing the yarn. I followed my standard method washing for each skein. First step is filling my too small bathroom sink with cool water and a squirt of Eucalan (<- affiliate link) then putting the skein in the bath for 20-ish minutes. Then I squeezed out the water and rolled them up in a towel so the yarn was damp instead of soaked. Before hanging them up to dry, I snapped the skeins around my arms to help even out the twist. That’s it. Good thing too because my shoulders definitely need a break from holding stuff above my head for long stretches of time.

Five skeins of yarn arranged next to each other on a table.

Now we’re in the after. It took a few more days than I expected, but the yarn is finally dry. Every skein has absolutely exceeded my expectations. They’re plump and soft and wonderful. I’m not sure how much the yardage shrunk since setting the twist, but the weight definitely changed. The third yarn had the most dramatic transformation of the bunch. It seemed limp and fuzzy when it came off the spindle. A bath helped it perk up to a balanced and plump worsted weight yarn that I really want to knit. Not sure into what but I’ll come up with something.

4 skeins of yarn twisted and sitting next to each other on a table.

Which bring up the question of what am I going to do with the rest of this lovely new handspun. No clue. The light blue superwash will probably become something for my spinning buddy. A new hat and mitts for winter will probably be a thing come September. As for the rest, I’m not sure. Gifts? Maybe. Something fun and off the wall? Also a possibility. Until I figure it out, I’m perfectly happy keeping them on a shelf where I can see them and give them a little pat from time to time.

Now the numbers and the TL:DR. 100 days of daily spinning turned 13 oz of fiber into 3 skeins totaling an estimated 1,053 yards (963 m). I didn’t spin the purple yarn during this project but I did take this opportunity to to wind it up. So it gets to be a buddy skein. I also put together this quick video that covers 99 days of spinning (would have been 100 days, but I accidentally deleted one). Here’s the last 3+ months in action:

What’s next? I’m trying to work that out. My shoulders need a break from spindle spinning. I do miss having something easy and accessible to reach for during the day that isn’t my phone so that might be the deciding factor. Maybe 100 days of sock knitting will be the next thing. Or I could tackle a few other short projects that last a month. Still thinking but I have no shortage of fiber and projects to choose from.

Thank you for following #the100DayProject along with me! I started with the goals of getting back to my spinning, making yarn, and showing the kiddo how yarn is made. The past 100 Days accomplished all those things and I’m happy I followed through. Pretty sure I’ll do another 100 Day project again next year. Or sooner.

*This post contains an affiliate link which means, if you decide to buy through that link, I’ll get a small commission. Thanks!

#the100DayProject Weeks 12 and 13

These last 2 weeks have seen me in the middle of spinning a third skein of yarn for #the100DayProject. I’m racing to finish the singles before Day 100, and I might actually pull it off! Graphic says “Spindle Spinning for #The100DayProject Weeks 12 a…

I’ve joined up with #the100DayProject this year with the goal of spinning every day. Writing down a daily log of my progress is an easy way for me to stay accountable, follow though, and plan what to spin next during this project.

If you’re just joining me:
Here’s how I prepped for the project and spent the first week.
During weeks 2 and 3 I finished the first single and started spinning the second.
Weeks 4 and 5 I embraced the slog of being in the middle of something.
Weeks 6 and 7 I finished spinning the singles and started plying.
Weeks 8 and 9 I finished my first skein of handspun and started the second.
Weeks 10 and 11 I finished the second skein and jumped into spinning the third.


Week 12


June 22 (Day 77): Added another yard or two to the spindle. Wasn’t able to get much in the way of spinning time today but a few minutes is better than nothing at all.

June 23 (Day 78): Today I finally reached the point in the current spin where it seems like I’m actually making progress. Until now, I’ve been spinning yarn but the piece of fiber never seemed to be getting any shorter. I know that’s not true but the illusion of it definitely contributed to feeling like the past few days of spinning have been a slog. Glad I stuck with it.

June 24 (Day 79):
It’s nice to see the fiber turning into yarn and the spindle filling up one wrap at a time. I have no idea if I’ll finish plying by the end of this project or even finish the singles in the next 20 days. It’s good to be spinning though and I’m not going to add any extra rules to this project that’ll make it harder to keep the yardage coming. Just going to keep spinning.

Green and blue single wound onto a turkish spindle and sitting on a pile of fiber.

June 25 (Day 80): It’s day 80 of #the100DayProject and my 80th day of spinning yarn is a row! How cool is that? I've got the skeins I've spun these past 80 days as well as the two I got off the bobbins because of this project in a pile on the shelf. It is so great to look over and see them stacking up. Looking forward to adding the current yarn-in-progress to that stack.

June 26 (Day 81): One of my goals for this project was for the kiddo to see me spinning. As a result she has definitely become more interested in my fiber and spindle. That’s a great thing but I have to keep the pair on a top shelf now. Otherwise she’ll push a chair over to a shelf, climb up, grab the spindle, and mix it in with all her other toys. Thankfully, the current roving is hardy stuff or it would not have survived the excursions.

June 27 (Day 82):
Turns out that today is the start of Tour de Fleece. Glad it’s still happening even if the Tour de France isn’t. I’m not making any specific goals for Tour de Fleece or planning on joining in this year. I’m just going to keep spinning until I finish this latest skein of yarn.

June 28 (Day 83): Got a decent amount of spinning complete today. It’s nice to be able to see the colors change over the course of a day’s spinning vs. 4 days of spinning.

A blue and light blue single wrapped around a turkish spindle with unspun fiber sitting behind.

Week 13


June 29 (Day 84): Ran errands today so not much time or spare energy for making yarn. Did enough to cross it off the to-do list though.

June 30 (Day 85):
The single has been breaking a lot lately. I’m not sure if I’m not keeping the spindle spinning long enough or if the fiber I’m working with needs more prep. So I’m doing a little bit of both: paying more attention to the spindle and pre-drafting the fiber just a touch.

July 1 (Day 86): Taking it easy today with the spinning since my rotator cuff on the spindle holding arm is feeling irritated. Don’t want to push my luck and hurt myself so close to the end of this project.

Turkish spindle wedged into the freezer between frozen pizza and watermelon sorbet.

July 2 (Day 87): Yes! It took me a day’s spinning but I finished the first single for yarn number 3. It’s a little fuzzy and lumpy but the color changes are nice. Had to put the spindle in the freezer again to get it to pop apart.

Hmmm. The last single took me 15 days to spin and there are 13 days left. I could probably finish the last single in that time but probably not plying. I’m okay with that.

A finished single removed from the turkish spindle.

July 3 (Day 88): Started the second single! I didn’t get much spinning done today but it was good to start.

July 4 (Day 89): Trying something different with this half of the fiber. Because it got so squished in storage, pre-drafting is really helping to make a more consistent yarn. Spinning is also going faster too because of it. Just have to be careful not to pull things too far apart.

July 5 (Day 90): More spinning today. The turtle isn’t growing quickly, but it is growing.

A blue single wrapped around a turkish spindle with more fiber behind it.

With Wool is now Value-For-Value

With Wool is now value for value.

There’s been a project on my to-do list for a long, long time for With Wool. That big project was investigating other places to sell my knitting patterns and potentially also setting up my own dedicated shop on this site. The recent Ravelry redesign and the accessibility issues it created finally pushed additional online shops to the top of my list. After researching my options for different shop platforms and seeing the amount of work involved, I’m doing something completely different.

Instead of selling patterns, I’m offering them under the value-for-value model. If you enjoy a pattern and find value in it, you can pay what it’s worth to you. You can find all my knitting patterns right here. Previously paid patterns will still be available on Ravelry with coupon codes so you can pay what you want.

FYI, as part of this switch I’m also planning to update all of my patterns to fix errata, clarify details, answer questions, and improve layout. You can expect to see those updates over the coming months.

I’m also dipping my toes into subscriptions. If you enjoy and want to support my work, future patterns, and the With Wool Express newsletter, you can become a monthly supporter on my Ko-Fi.

Buy Me a Coffee at ko-fi.com

The decision to move to a value-for-value model didn’t happen out of the blue. It’s something I’ve been considering for a long time and the Ravelry redesign was the catalyst. It’s been 10 years since I published my first paid pattern in 2010. It wasn’t until 2019 that I made enough through sales and ko-fi donations to cover all the costs (hosting, email, domain, and payment processing) associated with running With Wool. After taxes, I had enough leftover to buy a single cup of coffee. So, changing things up to try something new isn’t a major risk.

To end this post want to say thank you to everyone who has ever bought a pattern or donated or wrote me note. Your support and kind words have been incredible encouragement to keep going.

#the100DayProject Weeks 10 and 11

A spindle, knitted ball, and yarn singles with a graphic that says, “Spindle Spinning for #the100DayProject Weeks 10 and 11”.

I’ve joined up with #the100DayProject this year with the goal of spinning every day. Writing down a daily log of my progress is an easy way for me to stay accountable, follow though, and plan what to spin next during this project.

If you’re just joining me:
Here’s how I prepped for the project and spent the first week.
During weeks 2 and 3 I finished the first single and started spinning the second.
Weeks 4 and 5 I embraced the slog of being in the middle of something.
Weeks 6 and 7 I finished spinning the singles and started plying.
Weeks 8 and 9 I finished my first skein of handspun and started the second.


Week 10

June 9 (Day 64): I left the finished single on the table after taking photos and my spinning buddy did a little inspection. The good news is that only some of the wraps pulled up from the turtle and the beginning of the single didn’t snap. Whew.

The rest of the day’s spinning went just fine.

A finished turtle of a yarn single sitting next to an in-progress single still on the spindle.

June 10 (Day 65): Joined the last bit of fiber to the single! It’s looking so good and I can not wait to get to the next step of making this yarn.

I’m trying to spend less time on my phone because playing the random match-three game should be a fun break instead of what I do when I’m too tired for anything else. Endless scrolling isn’t helping me either. So I’m trying to keep my spindle and books close at hand. There’s been a noticeable uptick in my spinning the last few days because of it too.

June 11 (Day 66): There was a good bit of spinning time today. So much in fact that I was able to reach the end of my last bit of fiber! Well, close to it. There was only an inch or two of roving left, but the single just kept breaking. I called it done and good after the single broke for the fourth time. So, yeah, tomorrow I’m winding a plying ball.

June 12 (Day 67): Didn’t have any trouble taking the spindle apart today. Once I knew I’d have a chunk of time to wind stuff up, I got to work wrapping. The singles only broke apart once but one did tangle badly enough that I had to break it to remove the knot. Still, not bad at all. The plying ball ended up about the size of a large onion and took about 25 minutes to wrap. One of the singles was longer, of course, so I found the end and finished wrapping with it as the other ply.

A top-whorl spindle and blue plying ball in a basket.

June 13 (Day 68): I started plying!

June 14 (Day 69): More plying. There are a few more lumps and bumps than I’m used to working with in my handspun thanks to my unfamiliarity with superwash wool, but I am loving what I’m seeing so far.

A small plying ball sitting next to a spindle of plied yarn.

June 15 (Day 70): Still plying but now the plying ball is about the size of a peach instead of a giant onion. I don’t want to get ahead of myself and say I’ll be done plying tomorrow though it isn’t unlikely.

Today is the 70th day of #the100DayProject which means there’s just a month left of daily spinning. I’m not sure if I’ll keep the spinning going afterwards or transition to a different daily project. There’s an appeal to both of those ideas. In the meantime I think I can manage most of another skein of handspun.

Week 11


June 16 (Day 71): I finished plying the yarn today! Really pleased with how it turned out too. The thickness varies between sport and worsted and the colors still remind me a fun watercolor.

I tried a different tack when wrapping the spindle this time. Instead of covering all the shaft, my goal was to fill up the top section and leave myself some room to twist the spindle at the bottom. Worked pretty well since I was working with 4 oz of yarn instead of 5 oz.

Plied yarn being wound onto a swift from a spindle propped up in a basket.

June 17 (Day 71): Set up the swift today and got to work winding yarn. This time I put the spindle between the handles of a basket which worked really well. The spindle was able to turn freely and I only had to pop it back into a place a few times. In the end I ended up with about 259 yds of sport to worsted weight yarn. It’s so pretty.

A skein of blue, white, and purple yarn draped over a swift.
A hand holding a skein of blue, purple, and white yarn with a swift in the background.

Since I’m not one to let some perfectly good spinning time go to waste, I prepped my next project. The bump of Greenwood Fiber weathered BFL was right next to me, so that’s what I picked. The fiber had a pretty clear repeat that I wasn’t sure what I wanted to do with. Eventually I split in half for a 2-ply yarn and split it again along it’s length. Then I wound up each piece into a nest with the colors running in the same direction. There’s no way the colors will match up perfectly but I’ll still get a cool marled effect.

A turkish spindle sitting on 4 oz of heathered BFL roving.

June 18 (Day 72): After working with the fibers for a bit I decided to aim for a sport weight yarn. Aiming for a weight on the finer side of things means I might not finish it before the end of the #the100DayProject but that is totally okay.

Roving laid out to show the clear color repeats of blue, green, blue, and red.

June 19 (Day 73): I keep trying different methods of wrapping the spindle. This time I tried 2 under, 1 over - basically the reverse of 2 over, 1 under. Not a fan. Went back to my usual wrap. The search continues.

June 20 - 21 (Day 74 - 75):
A little bit of spinning on both days. I’m finding it harder to drum up the same enthusiasm I had for this project as I did in the beginning. The slog is definitely creeping up on me.

The roving divided into 4 equal pieces and rolled into nests.

#the100DayProject Weeks 8 and 9

Handspun yarn wound on a swift with a graphic that says “Spindle Spinning for #the100DayProject Weeks 8 and 9”.

I’ve joined up with #the100DayProject this year with the goal of spinning every day. Writing down a daily log of my progress is an easy way for me to stay accountable, follow though, and plan what to spin next during this project.

If you’re just joining me:
Here’s how I prepped for the project and spent the first week.
During weeks 2 and 3 I finished the first single and started spinning the second.
Weeks 4 and 5 I embraced the slog of being in the middle of something.
Weeks 6 and 7 I finished spinning the singles and started plying.


Handspun yarn being wound onto a swift from a spindle.

Week 8

May 26 (Day 50): Today was the day, the yarn came off the spindle! Looks good too.

I set up my swift and put the spindle in a big bowl to roll around in while I skeined the yarn. Didn’t work as well as I wanted it too though. One, the bowl wasn’t heavy so it fell over a lot and spindle made a break for freedom under the table. Two, my spinning buddy requisitioned the bowl to fill up with rubber salad. Oh well. I ended up pulling off lengths of yarn and winding it onto the swift one section at a time. Finicky? Yes, but doable. I’ll rig up a more reliable solution for next time.

A hand holding a skein of handspun yarn.

Now for the details. I skeined the yarn at a circumference of 72” and got 247 wraps. So, I have a very rough estimate of 494 yards, that’s about 452 m. It ranges in diameter from a fingering weight to sport to worsted. I’m sure that measurements will change after washing, but it’ll be enough to make my spinning buddy something cute to wear this winter.

May 27 (Day 51): While I had my swift set up, I skeined up yarn I had sitting on the bobbin from 2018! The yarn snapped in the middle so I ended up with 2 skeins totaling about 224 yards of worsted/aran weight yarn. We’ll see how it changes after soaking the twist. My spinning buddy really loved this yarn. I’m probably going to set it aside to make something fun for her. A new hat and mitts?

Superwash wool roving on a table to show of its speckled colors.

At the beginning on this project, I picked out 2 bumps of hand dyed fiber. The one I saved for later was dark and muted. Pretty, but not what I’m in the mood to spin now. So, I went digging through the stash and found a fun speckle dyed bump of from Hummingbird Moon. Spinning her fiber always seems like magic which is just what I want right now. There’s no discernible repeat, so I split the length of fiber in half for a 2-ply yarn. Then I split each piece into thirds along it’s length because that’s the fiber wanted to do. I’m still very much at the beginning of this new spin, but the fiber is a pleasure to work with.

The speckled roving divided into 6 nests waiting to be spun into yarn.

May 28 (Day 52): The new fiber I’m working with is definitely taking some adjustment. The color is wonderful, the feel silky, and the wool superwash. I haven’t spun much superwash wool and it’s taking some adjustment. The fibers just don’t hold onto each other like a non-superwash wool does which means my spindle is dropping way more. I need way, way more twist.

Hmm. I was attempting to spin this fiber into a fingering or sport weight yarn, but a worsted weight might be a more achievable goal with this fiber and spindle combo. Maybe I can try spinning a fingering weight superwash on my wheel later.

May 29 (Day 53): It was long day and I didn’t get to my spindle until after my spinning buddy had gone to bed. I spent several aggravating minutes with a single that kept falling apart every time I tried to wind more yarn onto the spindle. I’d fix the break, spin more yarn, try to wind it up, and it would break all over again. After the fifth time everything fell apart, I called it quits for the night.

May 30 (Day 54): Had better luck spinning this morning than I did last night. I’m sure some of it had to do with getting a few hours of sleep, but here’s what else I switched up. One, I’m very definitely making sure that I’m twisting the spindle counter-clockwise. A week’s worth of plying clockwise was apparently enough to reset my fingers and now I need to do it again. Two, I’m aiming to make a thicker yarn than my default. The goal is a worsted weight 2-ply and I’m seeing some success already. Three, I’m spinning shorter lengths before winding the single onto the spindle. By keeping things short I can catch the spindle before it starts slowing down or hitting the ground.

May 31 (Day 55):
I seem to finally be finding my groove with this fiber. The yarn turtle is growing and the spindle is dropping much less.

June 1 (Day 56): Finished spinning the first section of fiber today which means I am a third of the way finished with this first single. Feels like this spin might be moving a little faster than the first.

Week 9

June 2 (Day 57): Managed to spin a decent bit this morning and a little in the afternoon. My spinning buddy still thinks it’s really fun to poke the spindle and make it stop moving. Silly kiddo.

June 3 (Day 58):
Got in a lot of spinning time this morning which was great. I finished spinning the second section of fiber and joined the third and last piece needed for this ply!

A finished handspun single on a spindle sitting in front of the rest of the fiber.

June 4 (Day 59): I wasn’t planning on finishing the first single today, but I did! This yarn is definitely on the lumpy and bumpy side of things and that’s okay. I don’t have much experience spinning superwash fiber so I’m just happy to have figured out enough to make something that holds together.

The color of this yarn is wonderful. There’s some barber-polling in spots, but the speckles and flecks of color have generally combined into a flowing spectrum. The wound up turtle on the spindle reminds me so much of a watercolor.

It is taking all my self control not to pop the spindle apart right now and get started on the next single. Having to put the spindle in the freezer again to take it apart definitely slowed me down a little.

The bottom of the spindle and yarn turtle with the leader tail sticking out.

June 5 (Day 60): Started the second ply today! The first order of business was tying a new leader with a long tail. The long tail is important because it’s easier to keep out of the way while wrapping the spindle and easier to grab when searching for the hidden end of the single.

June 6 (Day 61): I’m more used to spinning superwash wool now than I was a week ago, so my fingers are trying to spin a fine yarn which is not the plan for this handspun. Making myself spin this single for a worsted weight 2-ply.

June 7 (Day 62): Only got a little bit of spinning done this morning before getting out of the house. All my afternoon plans went out the window when I hurt my back bending over to pick up a toy. I’m too young for this.

June 8 (Day 63): Spinning continues today so long as I’m standing or sitting up straight. Slouching is a no go. With that in mind, I’ve made decent progress. The first piece of fiber for the second ply is spun and the second joined. It’s looking good.

An in-progress single on the spindle sitting next to a finished single and more fiber.

#the100DayProject Weeks 6 and 7

Two singles ready to be plied into yarn, and the blog post title “Spindle Spinning for #the100dayproject Weeks 6 and 7”.

I’ve joined up with #the100DayProject this year with the goal of spinning every day. Writing down a daily log of my progress is an easy way for me to stay accountable, follow though, and plan what to spin next during this project.

If you’re just joining me, here’s what I did to prep and the first week of spinning. Weeks 2 - 3 are here, and weeks 4 - 5 are here.


Week 6

May 12 (Day 36): Dropped the spindle a lot today, but joining the single back to the fiber wasn’t hard at all. I gave my spinning buddy the leftover bits and pieces which she had fun pulling and smooshing and balling up in her hands.

May 13 (Day 37): So often these past few days, when I stop spinning is decided not by having to do something else, but by how sweaty my hands are. Trying to spin a definitely damp lump of fiber is not fun, not easy, and not doable. So I get a few minutes here, a few minutes there, and call it good.

May 14 and 15 (Days 38 and 39): Spinning in bits and pieces these past few days. Those minutes added up too! I’m much closer to the end of this piece of fiber than I was at the beginning of the week.

May 16 (Day 40): Got a lot of spinning time in today while my spinning buddy watched Frozen and the Muppets.

May 17 (Day 41): I’ve been able to practice drafting worsted when it’s cooler and my hands aren’t so sweaty. The difference between the worsted style drafting I can do with dry hands and the woolen style required when my hands are sweaty is massive. The yarn is way less fuzzy and doesn’t need the same amount of twist. Wish I could spin like this more often, but that requires more environmental management than I care to do throughout the day.

May 18 (Day 42): I finished spinning the second single! Feels so good to be finished with this part of the project, and I am so looking forward to starting the plying process tomorrow.

A turkish spindle wrapped in a red, blue, and purple single.

Week 7

May 19 (Day 43): I was so excited to take the single off the spindle that I started right after breakfast. The only problem was that I couldn’t remove the center shaft. Putting the whole thing in the freezer for 20 minutes helped loosen up the joint. Seems like all those times it fell during the spinning jammed the pieces together a little too tightly.

A turkish spindle sitting in the freezer to get the wood to contract enough to slip apart.
A hand holding a turtle of yarn, removed from the spindle to prep for plying.

I’ve been thinking about how I wanted to ply these singles for a few weeks. I considered spinning them directly from the turtle, but didn’t want to have to fix breaks on a seconds notice or untangle knots. Also on the list was winding them both to bobbin from my wheel, putting said bobbin on a kate, then plying on a spindle. I didn’t want to have to deal with moving even that much of a setup. Eventually I decided to fall back to old favorite, the plying ball.

The bottom of the two turtles removed from the spindle and ready to prep for plying.
A hand holding up a small ball, with singles wrapped around it, that will form the core of the plying ball.

I wound both singles together onto a ball which was accompanied by most of the major plot points in Frozen. The final ball ended up about the size of a softball or a grapefruit. The singles only broke in two spots at the my joins which I’m calling a win. I was also reminded of one of the reasons I love working with a plying ball. You get a lovely sneak peak of how the colors are going to mashup in the finished yarn. There are some really beautiful sections waiting in there.

The second single was much longer than the first so I cheated and held the end of the second single together with the end of the first and kept wrapping. No leftovers here. I don’t always fake a ply like this, but it’s a good trick to have.

A hand holding a fully wrapped plying ball that is ready to be used.

May 20 (Day 44): Plying continues! It is so fun seeing the yarn finally come together after 43 days of work. There has been one hiccup though. It is taking conscious effort to make the spindle spin clockwise for plying. Feels so weird making my hands move in a slightly different direction that I have to double check it’s twisting correctly. Thankfully, it’s very evident in the yarn when I’m twisting the plies in the wrong direction.

A top whorl spindle filling up with yarn and the plying ball sitting next to a large onion for scale.

May 21 (Day 45): The ball is about the size of a medium onion. Of course I had to take a photo for scale. My spinning buddy has been way more interested in the plying ball than the unspun fiber. She’ll pick up the ball and carry it around the house while I’m trying to ply which somehow has worked out without any hiccups or breaks.

May 22 (Day 46): Today’s adventures in plying saw my spinning buddy leading me around again , not by the nose, but by the plying ball. Whenever I put the ball and basket on a low table, she’s going to grab the ball and take me on a merry chase down the hall and back. No yarn was harmed in the process. It was pretty fun chasing after her while keeping the spindle spinning. :)

May 23 (Day 47): Day 5 of plying and my old tricks are coming back to me. The reason I like a top whorl spindle for plying is that I can use my feet to give the spindle a kick start when the yarn needs more twist or a restart. This has been especially handy because my spinning buddy thinks it’s funny to poke the spindle until it stops moving. I like hearing her giggle which means I’m not complaining in the least.

May 24 (Day 48): Not much spinning today, but I did get in a few minutes here and there while my spinning buddy was playing outside.

May 25 (Day 49):
I broke my own rule tonight - the one about not spinning after my spinning buddy goes to bed. This thing is that I really, really wanted to finish plying this yarn before the halfway mark, day 50. So that’s what I did. It took about an hour to get the last of the singles plied and on the spindle, and it was a trying process. The spindle was much heavier, absolutely packed, and there wasn’t much of a spot to grab to get things moving. I did it though. Here’s the spindle with my next 4 oz of fiber for scale.

A top whorl spindle full of plied yarn and sitting on a chain of un-spun fiber.

There’s still the finishing work to do - skeining, washing, drying, and measuring - but I can do that in between spinning up the next yarn. While this first yarn isn’t technically complete, it still feels good to have bulk of the work done so I can start fresh for the second half of #the100DayProject.

#the100DayProject Weeks 4 and 5

A turkish spindle holding purple singles and sitting on a section of hand dyed polworth fiber.

I’ve joined up with #the100DayProject this year with the goal of spinning every day. Writing down a daily log of my progress is an easy way for me to stay accountable, follow though, and plan what to spin next during this project.

If you’re just joining me, here’s what I did to prep and the first week of spinning. Weeks 2 and 3 are here.


Week 4

April 28 (Day 22): Usually the videos I take of the day’s spinning capture just a second of what I do. Today’s video caught just about everything. The only part it missed was the single breaking and the spindle hitting the floor. The first chance I had to pick up the spindle was after the day’s chores were done and my spinning buddy was in bed. My reserves were gone and I didn’t have the energy to try again when the single broke in the first 20 seconds of spinning.

I tried, that’s good enough for today.

April 29 (Day 23):
While I’m enjoying the fiber I’m working with, I don’t want to spend all of May spinning it. So, I’m aiming to spin more than I have the in the last few days. Shouldn’t be too hard considering I only spun for 5 - 10 minutes at a time. Today’s spinning time probably clocked in at around half an hour, and the spindle looked much different when I was done. Feels good.

April 30 (Day 24): Got a nice chunk of yarn on the spindle while my spinning buddy enjoyed the daily showing of Frozen and Frozen II.

May 1 (Day 25): Long day today running errands. Spinning was almost an afterthought, but I got in a few minutes before calling it a day.

Hand dyed spinning fiber, a turkish spindle wrapped in a yarn single, and the wound single sitting in a grey basket.

May 2 (Day 26): Spinning was an afternoon activity when I realized I hadn’t spun during the morning. I squeezed in a few minutes while my spinning buddy rearranged the living room.

May 3 (Day 27): I got to spin outside today while my spinning buddy dug holes and covered the patio with chalk. It was a nice change of pace. Had to cut my spinning time short though to add my own chalk scribbles. :)

May 4 (Day 28):
Surprisingly, I got a lot of spinning done today. My spinning buddy wanted to snuggle up and watch Frozen so that’s what she did. At the same time, I got to make yarn. A lot of yarn.

A turkish spindle covered in a white and blue single.

Week 5

May 5 (Day 29): I am so close to joining the last piece of roving! Probably could have done so today if my afternoon time hadn’t been eaten up my other things. Definitely tomorrow.

May 6 (Day 30): Okay, so I haven’t started on the last section of fiber yet, but I’m getting close. There’s just a few inches left. Definitely tomorrow, for real this time.

May 7 (Day 31): Yay! I finally made it to the last length of fiber for this single! Getting to this point has been a bit of slog at times, but I’m still making yarn a few yards at a time.

I wasn’t sure when I started how much yarn I would end up making at the end of the 100 days, but I did have the rough idea of a skein a month. Here I am, a month in to 3.3 month project, and I’m not even plying the first yarn yet. I’ve never been the fastest spindle spinner though. Ah well. My goal was never to spin all the yarn or clear out my fiber stash (that’s the work of years at the rate I’m going). The goal is to spin yarn and get back to doing something I love that got lost in the shuffle of motherhood. Even if this yarn turns out to be the only skein I finish, #the100DayProject will still be a success.

A turkish spindle sitting on hand dyed fiber and wrapped in purple, red, and brown yarn.

May 8 (Day 32): More spinning today during the daily showing of Frozen, and in random bits here and there.

May 9 and 10 (Days 33 and 34): Not so much spinning this weekend, but I still turned more fiber into yarn.

May 11 (Day 35):
The only real rule I’ve been sticking to for #the100DayProject is doing it every day. I don't set a 15 minute timer. I don't do daily updates on Instagram. I don't take photos every day.

What I have done is make this project work for me. I keep my spindle and fiber out where I can see them. When I have a free moment, I make yarn. Some days that means I spin just a minute or two and some days I get 45 minutes. Instead of daily photos and Instagram posts, I take a quick video and compile them with the 1 Second Everyday app. The video isn’t even a minute long and covers over a month of spinning, but it’s something that I can come back to easily. And I keep this log, more or less daily, with no pressure to care about how an algorithm might share it. That’s the most freeing part.

A turkish spindle sitting on hand dyed fiber and wrapped with a yarn single.