The Jenkins Turkish Swan Spindle

I’m not going to lie. Once I decided that turkish drop spindles were amazing things and, having repeatedly heard good things about Jenkins Spindles, I frequented yarntools.com. Once I decided I wanted one for my birthday, I stalked that site. I compared the different models, weights, and woods. There was always a tab open in my browser. I was constantly refreshing the page whenever there was the slightest chance of an update. So, when a spindle popped up that met all my requirements, I wasted no time clicking “Buy Now”.

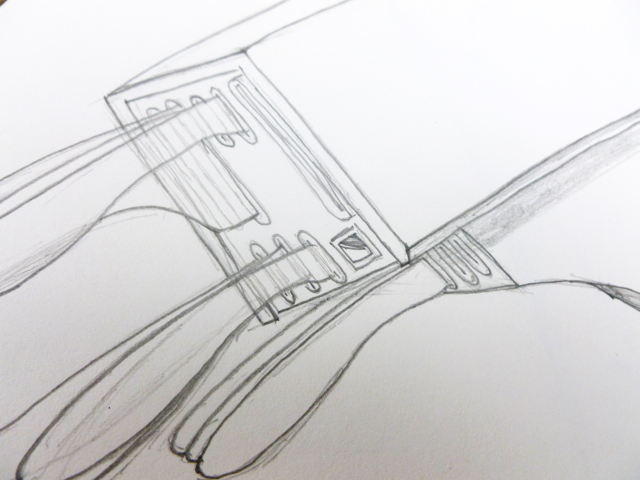
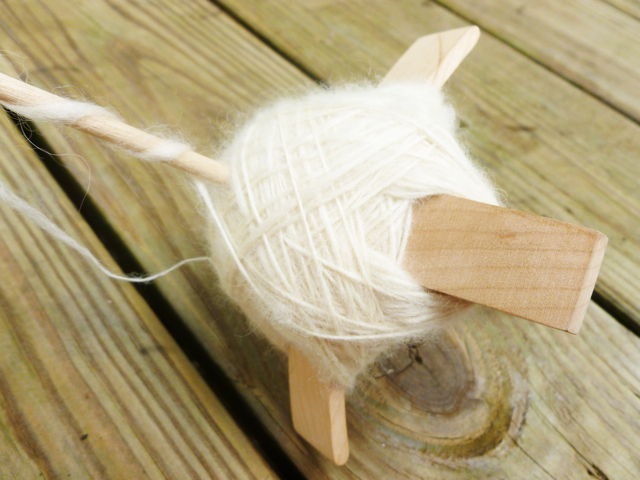
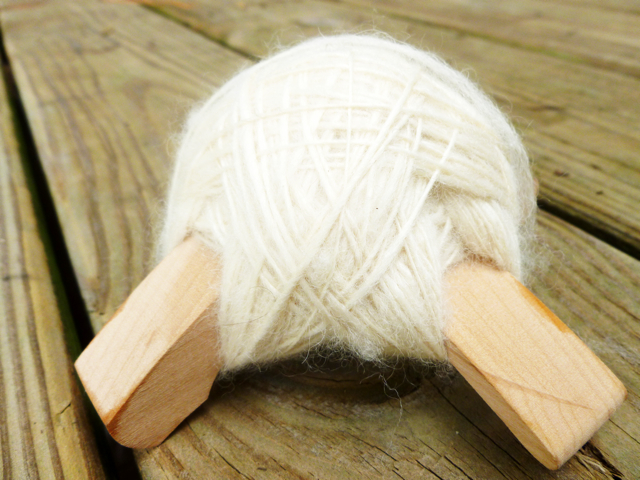
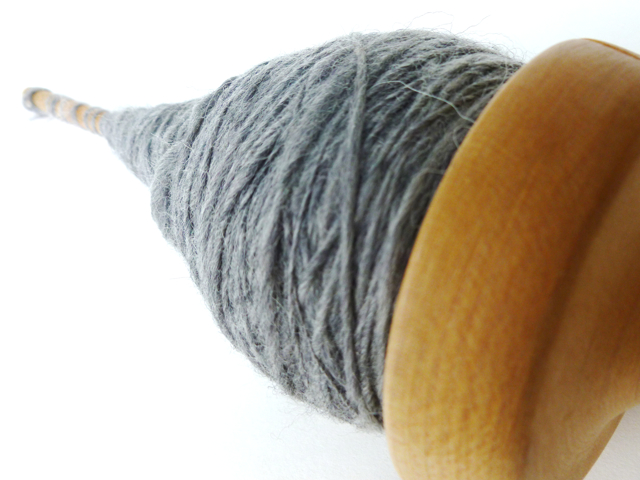
Check out what arrived in the mail yesterday: a Jenkins Swan Spindle made from cherry and weighing in at 33g. When I first got a look at the pieces, I could tell the spindle was something special.  It was obvious that everything was made my skilled hands. The spindle had spirit and energy and power. Sounds silly, I know, but it’s true.

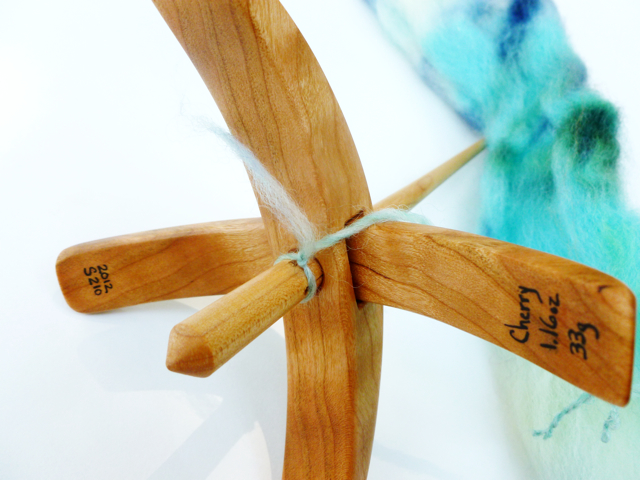
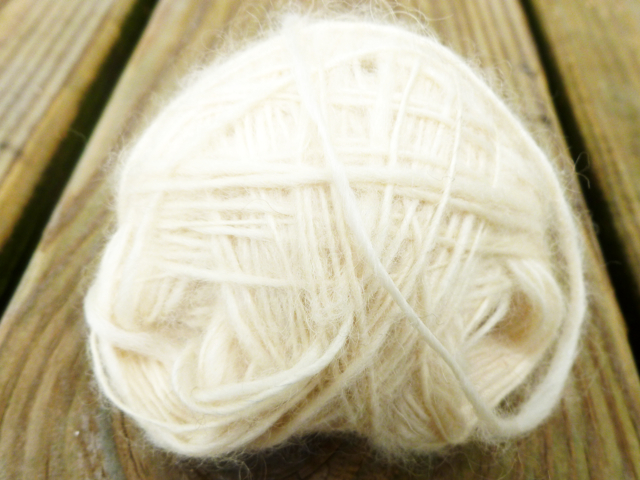
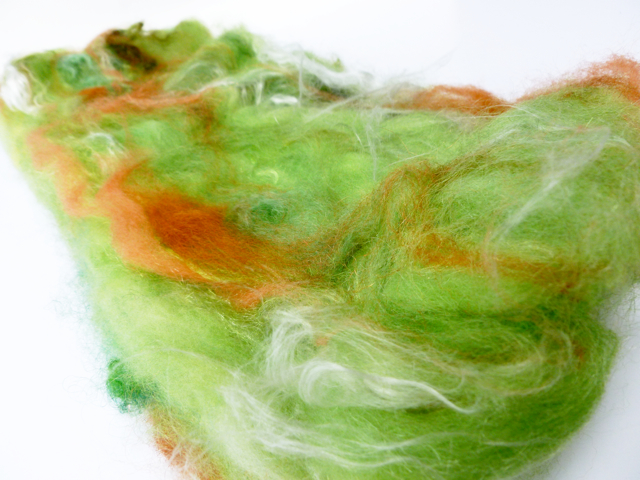
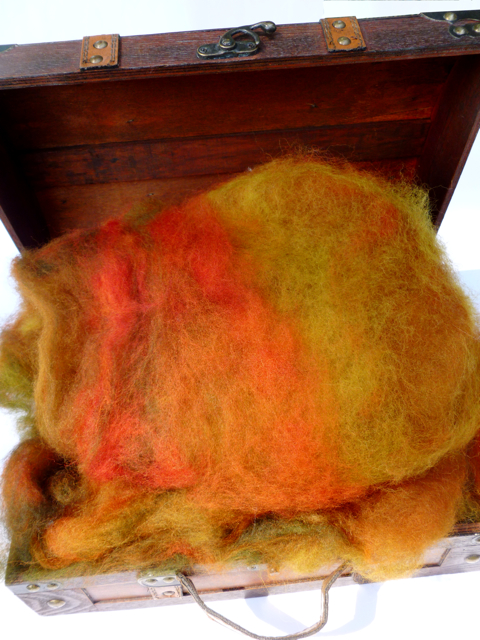
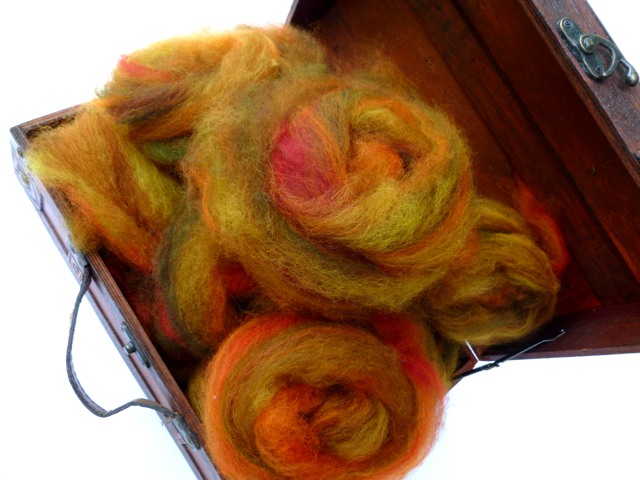
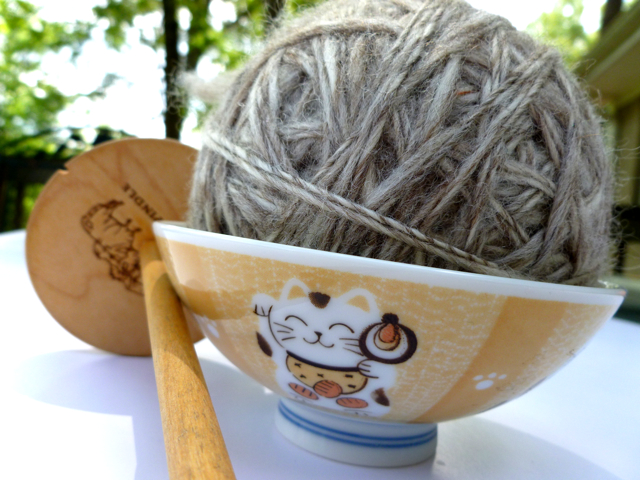
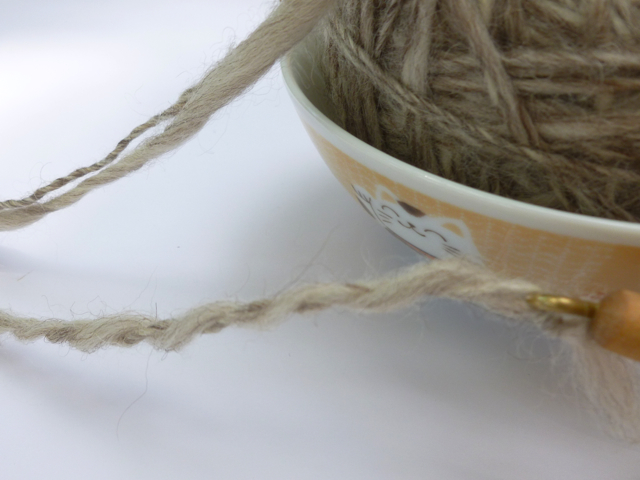
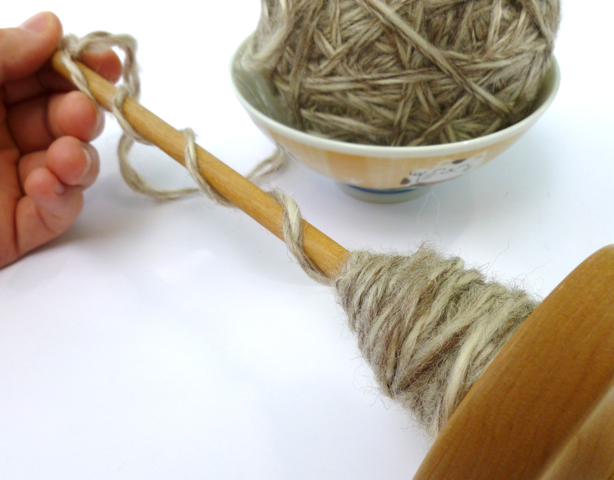
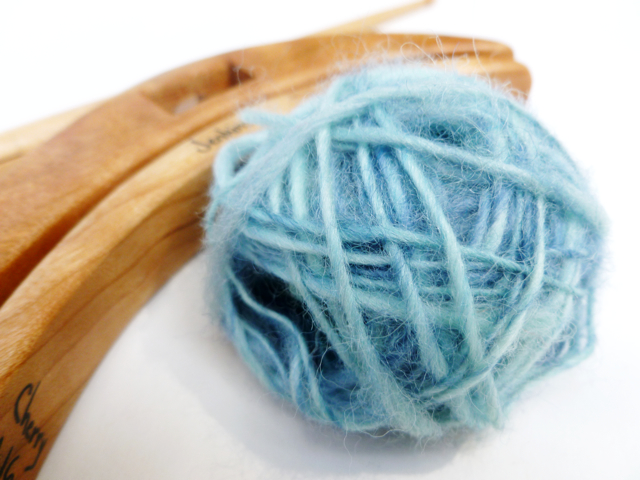
I was content to wait until I crossed a few things off my to-do list and finished another spinning project before settling down try this handsome devil out; however, included in the package was a few grams of BFL and some already started yarn. Who am I to resist such an invitation? The yarn was just tied right to the shaft. Why have I never thought about tying a leader on to a turkish spindle like that? I’ve usually settled for making a big loop and setting it underneath two of the arms before making a half hitch at the top. Just tying a knot at the bottom seems so much simpler and balanced.

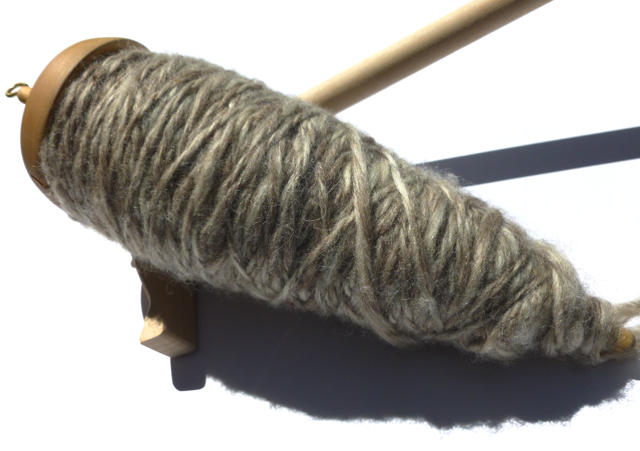
So, I paced back and forth across my back porch and spun up every last bit of fiber. The spindle was balanced, long spinning, and acted as a single unit instead of three. It spun like a pro.

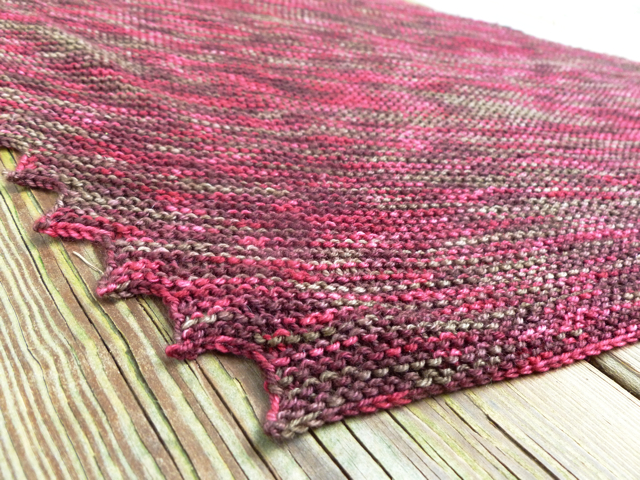
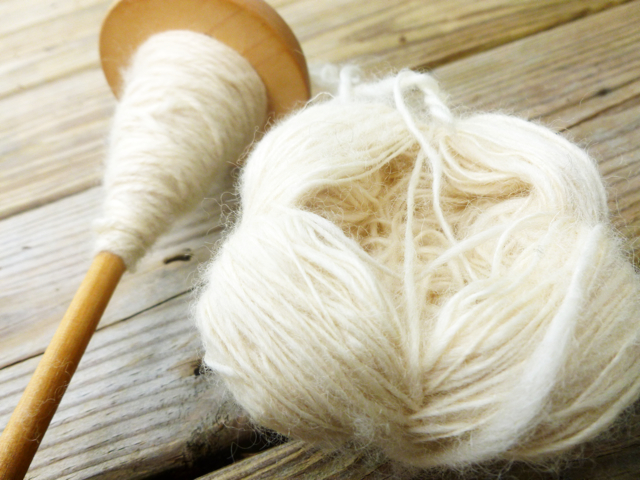
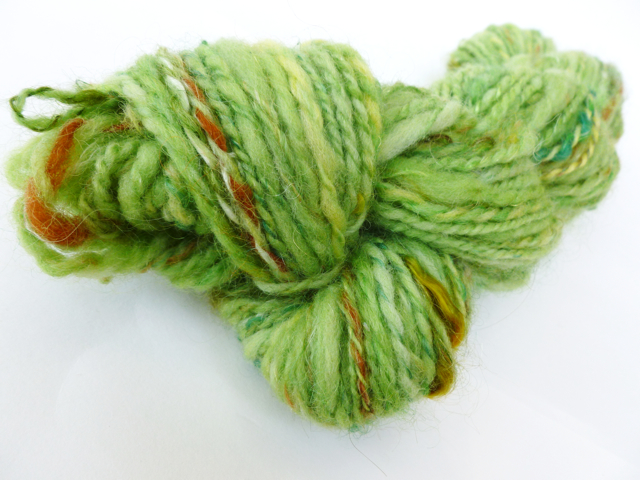
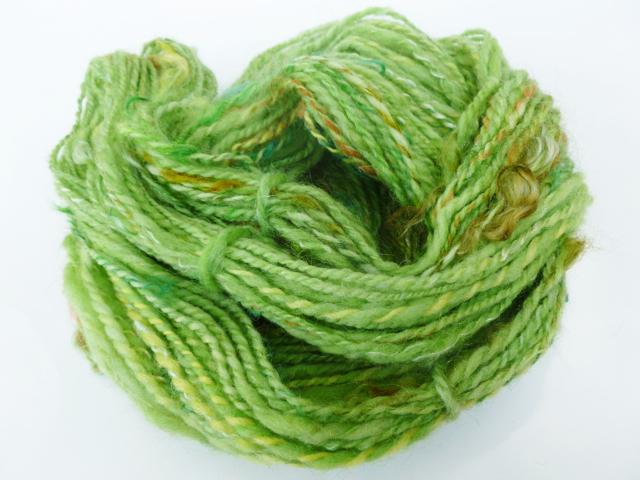
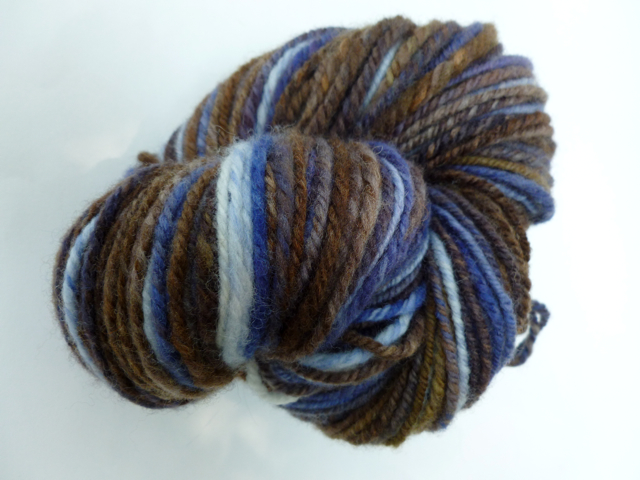
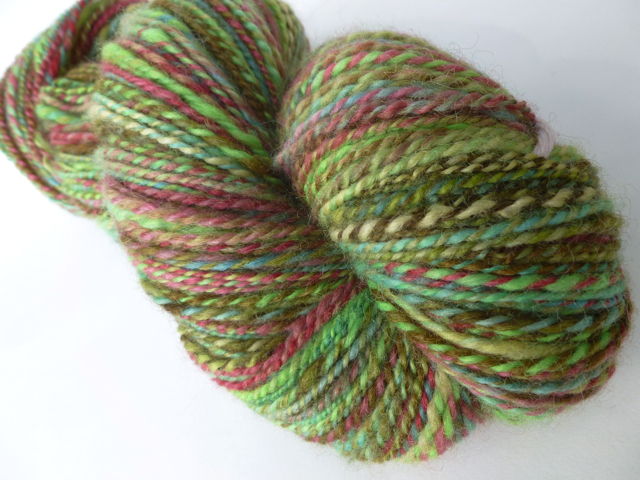
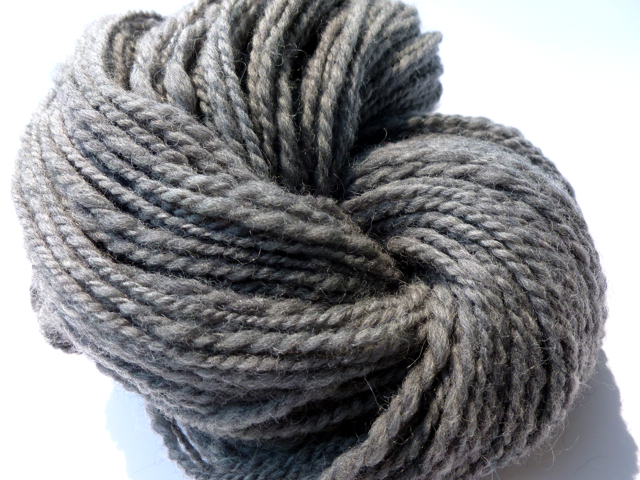
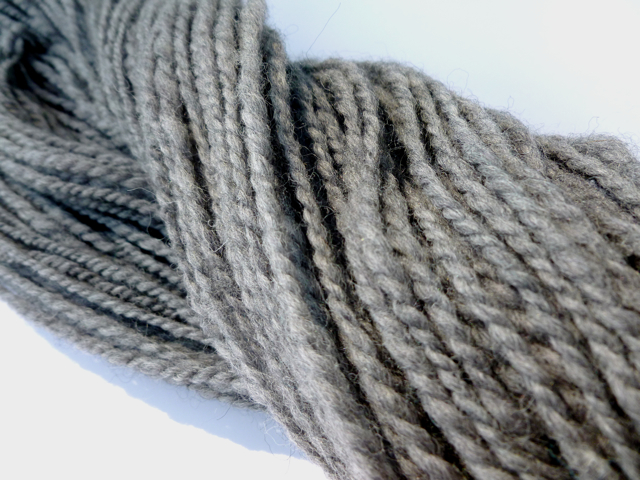
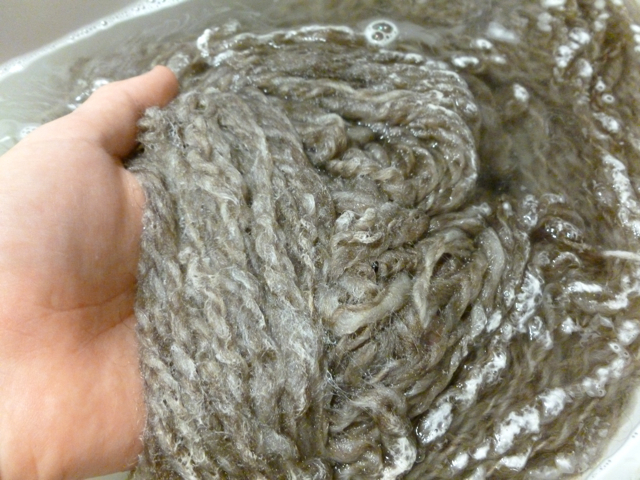
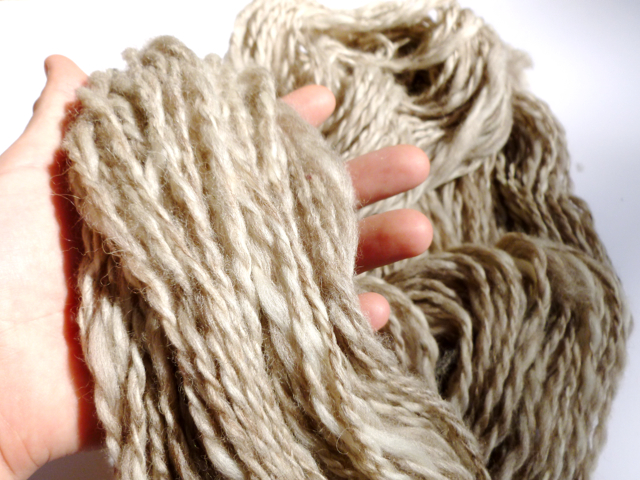
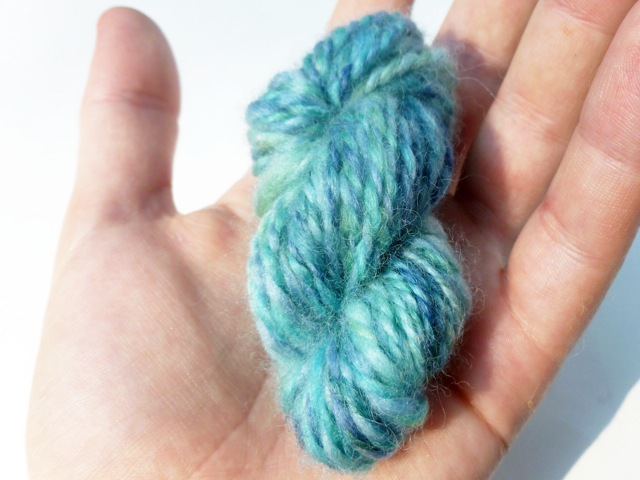
When the fiber was yarn, I pulled out the shaft and the arms. I didn’t have to push or pull to free the single which is a massive improvement over my last turkish spindle. Then there was plying after I let the twist set and briefly got back to my to-do list.  12 yard mini skeins are insufferably cute. I’ll knit you up one day. 

I could sum up everything I’ve written and do a formal conclusion but I’m going to keep things simple. Never before have I used a tool, spindle or otherwise, that felt like it was made just for me and me alone. Looking forward to spinning lots of yarn together. 

Hitchhiker

How can I resist a pattern that’s a giant, geeky sci-fi reference? Long story short, I can’t. Hitchhiker had been in my queue for the longest time but, once I decided to cast on, there was no stopping me. I grabbed my needles, wound 2 skeins of Malabrigo Sock, and got started. Once the setup rows clicked in my head, the knitting was smooth sailing. I stuck the shawl in my purse and brought it along on car trips, running errands, and out to lunch. Hitchhiking indeed. Unfortunately, those days came to end when I had to wrap the shawl twice around my arm so I could walk around the mall and knit it at the same time. 

Once freed my purse, Hitchhiker was relegated to movie knitting, hanging out at parties, and occasional trips to knit night. I put it down for a month or two because the row after row after row of garter stitch and the occasional bind off just wasn’t holding my interest. Our intrepid wooly hero was saved when I was overcome by the urge to empty out my WIP bin. After too many movies and tv shows to count, Hitchhiker was finished and ready to answer the question about the universe and everything else. 

Sci-fi reference aside, another reason I cast on for Hitchhiker was because I wanted a pattern that would use up 2 skeins of Malabrigo sock and that could easily be made larger. Check and double check. Since I wanted to get the most out of the yarn and spare myself from ripping out, I started measuring how many grams of yarn were used per tooth. From the 48th to the 54th tooth, the teeth used 6g each with the 55th, 56th, and 57th teeth using 7g each. There were 2g left after binding off the last tooth. The kitchen scale has turned out to be one the best knitting tools I’ve ever bought. Full technical details on Ravelry.

All finished, the Hitchhiker has turned out to be exactly what I wanted. It’s cushy, warm, and big enough to wrap around my shoulders several times. Draped over my shoulders, the tails hang down past my knees. Can’t wait to bring this out during the Fall and Winter. Oh, and its 57 teeth aside, Hitchhiker knows that the answer to the universe and everything else is definitely 42.

Drawing Incrementally: Week 3

Every month I’m picking one skill to practice everyday for a month and updating my progress every Monday. I call it Project Incremental. Read up on how it all got started. 

| - | - | - |

How many weeks do you have to do something for it to become a habit? I’m voting for 3 since, at 2, this would become the day I’d have to fess up for not making my daily goals. Last week, I owned up to doing all my sketches at the last moment. I waited because I wanted to learn something and get better instead of just filling up my sketchbook. In 14 drawings, there was no progress but I wanted to keep going. So, what happened last week? Nothing. Didn’t even flip open my sketchpad or sharpen a pencil, however, I did do some research and added something new to my toolkit.

It’s not new pencils or a kneaded eraser even though I did buy both of those things. It’s a workbook called Drawing on the Right Side of the Brain by Betty Edwards. The reviews were good, the results look amazing, and the book is in its second edition. What convinced me to try this book though was how straightforward the author was about learning to draw:

“Drawing is always the same task, requiring the same five perceptual skills that, with practice, become integrated into the whole skill - called a “global skill - drawing.” - Betty Edwards

I’ve always had “the practice.” I’d sit down in front of an object with my pencils and paper and start sketching. The finished drawing looked like what was in front of me but wasn’t quite right. The proportions were off or the shading blurred out the detail or the perspective was jumbled. I thought it I just practiced enough I could solve those problems. Learning to draw isn’t just practice, practice, practice but knowing what to practice and focus on. Seems simple but the simple things can easily be over looked.

So I’m starting at the beginning of the book with the 3 drawings meant to gauge future progress and skills. I managed an okay drawing of my hand and the corner of a room. Haven’t gotten to the self portrait yet but I will. It won’t be amazing and I’ll probably just embarrass myself but it’s a start.

Stash Enhancements

This year I used my birthday as an excuse to splurge on some hand dyed spinning fiber from a few choice Etsy shops. Up to this point, I only had 2 criteria for new fiber. Number One, the fiber had to be mostly wool or a natural fiber which I could spin some awesome yarn from. Number two, pretty colors. No further explanation required. 

During the Birthday Shopping Fiber Binge, I was prompted to add a third criterion - will I actually wear or use those colors (or will any of my friends)? - and it’s all this pattern’s fault: Unleaving by Lee Juvan. Okay, a hank of my handspun named Rhonda takes some of the credit too. I was cleaning up my Ravelry queue and came across Unleaving which is a scarf pattern knit with handspun. I looked at the materials list and I looked at my handspun. I look again and my brain reset. In my stash was the perfect skein of handspun and it even had enough yardage. I’d spun enough yarn to knit way more than a hat or a pair of fingerless gloves. I had enough for a lacy scarf. Honestly, after more than a month, I am still really excited about this. 

So, when I was shopping around, I had to ask myself what the fiber would eventually become which added a whole new level of excitement. This lovely bit of Blue Faced Leicester from Yarn Geek Fibers will probably turn into a slouchy hat. 

Also some BFL from Yarn Geek, this bright explosion of yellow and grey will potentially become a pair of long fingerless mitts. 

This lovely bit of superwash wool roving is from Dawning Dreams. Not too sure what this is going to become but it’ll be great.

Hitchhiking

I seem to be in the middle of a mad love affair with garter stitch lately. Garter is just so easy to love. It looks great without any of that playboy rolling stockinette is prone to. It’s easy to find a rhythm and put your mind somewhere else. Though what I’m loving most right now about garter is that I can knit it very easily on a dark summer night. I discovered this Saturday night when I brought my Hitchhiker Shawl with me to a party to keep my hands busy. Still, I had to keep reminding myself that I didn't have to look down at my knitting since I couldn't see it anyway.

Hitchhiker also served double duty keeping me warm since summer nights do get cold on occasion. Who knew? When I originally picked this pattern, I wanted something that would use 2 variegated skeins of Malabrigo Sock. That second skein has made Hitchhiker so large that I’m knitting on the 52th tooth when the pattern only calls for 42. I’ve got 39g left which my chart tells me is enough for 6 more repeats. 

Every time I finish another tooth, I weigh the yarn cake to see how much is left. Then the data goes into a handy dandy spreadsheet. I can track my progress and make an educated guess about when I’ll run out of yarn. I’m not the only one that does this, right?

Drawing Incrementally: Week 2

Every month I’m picking one skill to practice everyday for a month and updating my progress every Monday. I call it Project Incremental. Read up on how it all got started. 

| - | - | - |

What do a spaghetti fork, a fork, a bottle of italian seasoning, a straw dispenser, an olive oil pitcher, and a jar of preserves have in a common?

The answer, I drew all of them last night and at the last minute. So much for drawing everyday.

At least I managed to pick up the slack. The only sketch I managed to do close to on time was “Monday’s” sketch of a knife block that I actually drew on Tuesday afternoon. Why the shirking of daily drawings. I could caulk it up to waiting till the end of the night only to decide I’m too tired. What really happened was that I didn’t feel like I was learning anything or getting an better. Where’s the progress that’s supposed to keep me motived? I just wasn’t seeing it. So, I slacked off and drew 6 things at the last minute because I said I’d draw 7 things from my kitchen. Accountability, what would I do without you? 

Why keep drawing if I’m not seeing any progress? One, two weeks of sketching isn’t going to make me a master. I need time and I need practice. Lots and lots of practice. Two, I’ve got to start somewhere. Three, I’ve wanted to be able to sketch and render and doodle for as long as I can remember. I want to record what’s important, tell stories, and make art. Four, I’m inspired. In Reader, I have an Art folder which follows the blogs several artists. I see their work and want to develop my own style to tell my own stories. A few of my favorites in no particular order:

  • Yuko Ota - I’ve followed her work for a few years and her art manages to be both cute and badass at the same time. Also, Johnny Wander rocks.
  • Donovan Beeson - She posts regular sketches/journal combos to The Intangible Blog. The images are wonderful, almost daily snapshots of her interests and adventures.
  • Abigail Halpin - Cute, whimsical, and fun. Her work makes me smile.
  • Lucy Knisley - Comics! about food and travel and daily life. The occasional Harry Potter reference doesn’t hurt either. 
  • Marc Taro Holmes - His blog is a combination of watercolor and sketches that focuses on documenting the spirit of place.
  • Kate Bingaman Burt - Simple, biographical drawings of her daily purchases. I like to wonder at the stories behind her spending. 
  • Genine D. Zlatkis - Fun, colorful, and expressive watercolors, paintings, and sketches. Also, really awesome hand carved stamps.

Future Shawls

A few weeks ago at a Madelinetosh yarn tasting, all the yarn fumes went to my head and I ordered 3 luscious skeins of yarn. I have grand plans for these babies. The Merino Light (Antler) will be pair up with some Plucky Knitter Primo Fingering to become a Stripe Study Shawl. The 2 skeins of Tosh Sport (Grey Garden) might become a Secret of Change Shawl. Nevermind that both of these shawls involve garter stitch, “short rows”, and are by Veera Valimaki. I might be obsessed.

I’ll get started on that Stripe Study right after I finish my giant, 2 skeins of Malabrigo Sock, 49 teeth and counting Hitchhiker. I’ve only got 53g of yarn left. Shouldn’t be too much longer, I hope.

3 Years

Doesn’t seem like it to me but today is this blog’s 3rd anniversary! It’s also my birthday and I have yarn waiting for me at ye olde local yarn shop. Today is just plain awesome for so many reasons.

Have I really been keeping a blog for 3 years? Yes. Some of those early posts are a bit cringe worthy now but they’re all still there for your reading pleasure. Just don’t have too much of a laugh at my expense. Many things have changed for the better over the years and I’ve got more bits of goodness coming down the pipe soon. 

I’ve had a great time keeping this blog over the years and have really enjoyed “meeting” and making digital friends. Don’t be afraid to introduce yourselves! And while we’re at it, is there anything you’d like to see here in the future? Or how did you find StudioStrategos in the first place? Thanks!

I’m off to spend the day with tasty food, great yarn, and even better company. Maybe I’ll even get a little work done too. 

Drawing Incrementally: Week 1

Every month I’m picking one skill to practice everyday for a month and updating my progress every Monday. I call it Project Incremental.Read up on how it all got started.

| - | - | - |

It’s officially Monday and I have sketched 5 different objects. On Day 1, I waited until there were 8 minutes left in the day before finally putting pencil to paper. I kept putting it off because it had been so long since I’d tried to draw anything and I was pretty sure I’d screw it up. Plus, what in the whole wide world was I going to draw. In those last few minutes, I just picked something on my desk and got started. If it was horrible, it would just have to be horrible. Half an hour later, I finished. Did it suck? Well, it wasn’t great.

Here’s the thing I have grudgingly come to terms with, nothing I do will ever be perfect the first time or after a long bit of inactivity. Constant practice and refinement is absolutely required. I will not be amazingly talented and skilled at every single little thing I try my hand at. Doesn’t matter how much I wish it were true. The truth is that I will make mistakes and I will have to practice and both of those things are totally okay. It’s fine to make mistakes in the beginning so long as you learn and improve because of them. Don't give up because the first attempt wasn't everything you thought it would be. 

And that whole question of what to draw? I picked a theme. Last week the theme was: Stuff On My Desk. I know, original, but it got the job done. I drew my glass of water, then my mouse, my favorite pen, my hard drive, and my phone charger. This week’s theme: Stuff In The Kitchen. Maybe I’ll start with the knife block or the pots I use most. Drawing a whisk sounds fun too. I’ll probably still wait until the last minute but one problem at a time. I’ll let you know how it goes next Monday. 

A Turkish Spindle

Thanks in part to an enthusiasm to try out new spinning tools during Tour de Fleece* and a healthy bit of curiosity, I bought a Turkish Drop Spindle. What makes a Turkish Drop Spindle special is that the yarn is wrapped around the “arms” instead of spindle’s shaft. Once the spinning is done, the shaft and arms are removed which leaves a handy center pull ball. A few days ago, I got to try this out. 

Here we have a bit practice wool I started spinning right after Tour de Fleece.

Just the arms now.

Look, Ma! No hands!

Besides from wrapping the single around the arms, spinning on a Turkish Drop Spindle isn’t much different than spinning with a typical drop spindle. Just have to remember the “2 over, 1 under” wrapping rule and you’re good to go. 

As soon as the arms were out and I found the other end, I started chain plying the single without having to make a plying ball or any other prep work. I could really get used to that.

I only had one real difficulty using a Turkish spindle over the usual, whorled spindle. Since the turkish spindle acts as two pieces - the shaft and the crossed arms -   the spindle didn’t always start spinning all at once. As I would set the spindle spinning, I could feel the arms slipping around the shaft and unbalance the spin. Since the wobble got really annoying after the nth time, I would wrap the singles tighter and closer to the center. I’m not sure that did anything other than making the arms harder to remove. Since I’ve only tried this one turkish spindle, I’m not sure how widespread the phenomenon is. Guess I’ll just have to try out a few more spindles to check.

*This is the last time I’m going to start off a post by mentioning Tour de Fleece. For now.

The Incremental Project

Tour de Fleece got me thinking about the small things, about daily effort, and about progress. How one small thing done everyday can lead to big things. For those not in the know, Tour de Fleece is an annual event that runs alongside the Tour de France. Everyday that the Tour rides over the course of three weeks, people spin and make yarn. Since I was a new spinner (does four months still count as new?) and up for a challenge, I decided to join in. By the end of the Tour I had gained/refined skills, played with a lot of great fiber, made 5 skeins, and spun 1,040 yards. 1,040 yards! That number still makes me happy since I never dreamed or dared to set such a grandiose goal for myself.

After I stopped squeeing for happiness, I wondered how I managed this great thing I didn’t think I could do in the beginning. The answer is simple: incremental progress. Every day of the tour, I practiced, I researched, and I just spun yarn. Some days I only managed a couple minutes and other days a few hours but it all added up to something good that I wanted but couldn’t imagine doing. One would think years of knitting one stitch after another and making hundreds of items would have taught me the true meaning of incremental. The light bulb just didn’t turn on until the last few days.

So, here’s the plan for something I’m calling The Incremental Project

  1. Pick some skill/goal that I’ve been meaning to improve but just haven’t gotten around to yet. 
  2. Every day for a month, take the time to practice, practice, practice even if it’s just for five minutes at a time. Small steps add up after all. 
  3. To stay accountable, post about your progress once a week. Maybe on Monday?
  4. Rinse and repeat next month.

Who's with me? 

This month I’m focusing on getting back my drawing fingers. Drawing is something that I’ve always wanted to do and have done from time to time. Time to get doing again and clean up my rusty skills. My goal is to finish one drawing or sketch a day. I’ll let you know how it’s going in a week. 

After the Tour

For my last Tour de Fleece skein, I decided to give spinning from batts another try. This batt, thankfully doesn’t look like upchucked bodily fluids or any other bodily fluid I know of. The stats: 1.9 ounces of Something Wicked This Way Wanders... by The Madd Batter. It’s a combination of Falkland, Firestar Sparkle, Merino, Mohair and Romney locks, and a bit of silk just because.

I managed to finish this skein with a day to spare but the spinning was a mixed bag of easy-peasy and challenging. There were locks that disrupted my drafting, clumps of wool that wanted to do their own thing, as well as silk and sparkle that were more interested in floating around the room than becoming yarn. After spinning one long single, I plied it back on itself to make 90 yards of 2-ply which is part-art yarn. Some parts of crazy with sparkle and wild locks. Other parts are humble and unassuming. All around, the skein is a strong ending to Tour de Fleece. 

The Stats

5 skeins finished  |  18.9 ounces of fiber spun  |  1,040 total yards

1,040 total yards? I just boggled my own mind and that’s awesome! I never dreamed I’d spin more than 1,000 yards during the Tour with makes the whole thing a success in my book. The added bonus is that I actually met most of my goals. I learned new skills - spinning from a batt and the butterfly wrap - and refined others. I spun new fibers and found a new favorite, Falkland. Didn’t get to around to the silk mawatas though. I expanded my tools with a WPI gauge from Girl on the Rocks, a 22 gram drop spindle, and a turkish spindle. I spun the good, special stuff and didn’t ruin it. I did not manage to SPIN ALL THE THINGS! but I did try. 

Goals and yardage aside, Tour de Fleece taught me to lose the complacency with my own skills and keep learning, keep trying, and keep pushing forward. I’m a better spinner than I was a month ago and there is still so much more to practice. The thought isn’t depressing, it’s inspiring not just for my spinning but also in the rest of my life. There’s so much I can do if I just put my mind and passion to work.

Keep learning and keep pushing forward, my friends.

On Tour

Another day, another skein for Tour de Fleece. This skein counts as number four on the Tour and, while it’s just a simple 2-ply, there’s something special about it. When I start spinning a new project I’m usually at home with a collection of books for reference and the internet to come to my rescue if I need it. This time was different since last Thursday night, I packed up a spindle and some fiber with my usual luggage for a road trip to visit friends. We talked, baked brownies, watched an Italian horror film from the 60’s that was so bad it was good, and generally had a good time. I also started spinning  this yarn. It was just me and the fiber. No books. No open laptop. Just me. You know what happened? I made yarn with my own hands and my head and no frenetic last minute questions. Feels good even though the spindle did keep dropping. I didn’t finish the spinning and start plying until after I got back home but it’s still road trip yarn and a nice milestone. 

Spunky Eclectic Tan Corriedale Top - 4 oz. - Coxstand

Mostly Aran Weight 2-ply

264 yards

The Beast that is Tour de Fleece

Chez Strategos has been taken over by spinning. If I’m watching episodes of Psych via Netflix, I’m spinning. Taking a break between random chores, I’m spinning. Waiting on water boil, you guessed right, I’m spinning. I even packed a spindle and a few ounces of fiber to take with me on a road trip. Still don’t have around town spinning though so knitting still reigns supreme in my purse.  All the same, Tour de Fleece is the 800 pound gorilla in the room that keeps handing me spindles and great fiber. Can’t say that I mind.

CosyMakes Falkland Roving - 4 oz. - Flabbergast

Blue Dog Fibers Bluefaced Leicester Top - 5.3 oz. - Rhonda

It’s really great having him around since I can take these lovely clumps of fiber and create actual yarn. Why, no, the novelty of the whole process hasn’t worn off. 

Flabbergast became the second skein of Tour de Fleece. I’ve had this roving in my stash for so long that it became this great precious thing that I couldn’t bear to mess up. Goal 4 for the Tour - Understand? Good. Play - is all about pulling out the good stuff and making yarn in spite of myself. When I unchained the roving, I noticed it had been dyed in a repeating pattern. I tore it lengthwise down the middle to preserve the repeat and set to spinning one long single to chain ply. The result is 150 yards of self-striping, aran-ish weight yarn. The Bearded One has already laid claim to it. 

Chain plying, aka Navajo plying, is great and definitely not as hard or scary as people seem to think it is. Just takes practice like everything else. I like this written, sans photo article and this video (done on a wheel but the process is still the same for a spindle).

Hello, Rhonda. This recent addition to my fiber stash became 368 yards of sport weight 2-ply yarn and my third Tour de Fleece skein. I really underestimated how long it would take to ply this yarn. The upside is that it gave me the chance to refine my plying process towards maximum efficiency. It involves rolling the spindle with my feet. Not as awkward as it sounds.

So far, Tour de Fleece is going quite well even though I probably won’t meet all of my goals during the Tour’s last week. I’m going to miss that gorilla.

Spinning Batts

Once I pulled this batt out of the envelope and decided it was good, my second thought was that it was larger than my head. Then, how am I supposed to make this into yarn? For all I knew it might as well have been a monster waiting for my to let down my guard so it could eat me. 

Since Tour de Fleece waits for no spinner, I went looking for tutorials on spinning from batts and the internet came to my rescue. 

How to Spin from Batts by Vampy

The post lists five different ways to prep batts for spinning with clear photos and written instructions.

How to Spin a Batt from the Knit Girllls

This video covers four ways to spin from a batt. The yarn is being made on a spinning wheel but the prep still applies for a spindle. 

A Batt? What’s that? by St Seraphina Knits

Another informative video but this covers how to open the packaged batt and focuses on tearing the batt into strips for easy spinning.

Eventually, I decided to tear the batt into strips and pre-drafted the fibers down to a manageable size. After all the uncertainty, this seemed like cheating since the prep work was so easy and nothing to fear. Now I want to get more batts and experiment with different prep methods. 

Now that the monster had been tamed, it was time to spin and it was no harder than working from roving. If only the single didn’t look like upchucked bodily fluids.  Any suggestions for what to do with 3.5 oz of fiber that you don’t want to spin anymore?

The First Skein

It was Friday afternoon and my latest skein of yarn was dry and sitting pretty. All my spindles were empty which was something I could no longer abide. So I sifted through my fiber stash - it’s not big enough for me to dig through, yet - and found some lovely grey top. Once it was split into eighths, I got started. Then Tour de Fleece happened. I set my goals, found Le Tour de France on television, and kept spinning.

Signing up for the tour flipped a switch in my head. I joined because I wanted expand my skills and challenge my complacency. First on the list, how I wind my singles/yarn on the spindle. Lately, I’ve fallen into a cone shape because my attempts at a beehive always fell short. Not this time. This cop was one of the most voluptuous I’ve ever made. The trick is too start wrapping next to the whorl and build out the diameter of the cop faster than the length.  

Besides from being pretty, I was surprised how much of a difference the beehive cop made to my spinning. Not only was I able to store more yarn on the spindle, but the singles didn’t shift up the shaft    and into the working, twisting section above the hook. The larger the cop’s diameter became, the larger the moment of inertia, and the longer the spindle would spin. I could focus more on my drafting and less on keeping things moving.

The result is a single 336 yards long that I plied back on itself to make 168 yards of worsted-ish weight 2-ply yarn. It’s already whispering that it wants to be a pair of socks when it grows up. It’ll need a buddy though for the heels and toes.

The Numbers thus far:

1 Skein

168 yards

As far as goals go, I’ve figured out to wind better cops/learn new skills,started spinning all the things, and made some new yarn. Tour de Fleece is off to a strong start.

Tour de Fleece 2012

Tour de Fleece, the annual spin - along to the Tour de France, has been in the back of my head for a couple of months. I kept hearing about it every few weeks and kept not deciding whether or not to join. Turns out, today, June 30th, is the first day of Tour de France and the Tour de Fleece. I thought I was out of the running this year until I checked the mail.

Waiting for me was a 4 oz. Spinner’s Hill Batt aptly named Garden Vegetable. I’ve never spun or even bought a batt before, so I wasn’t sure what to expect. Honestly, I was thrown for a complete loop. What am I supposed to do with this thing?

It’s huge and fluffy, and almost the size of my cat. (He’s also very fluffy by the way.) I’ve never tried to spin from anything like this before. Since the Tour de Fleece is all about challenging yourself and spinning yarn, I’m in. 

I might be going a bit overboard on my goals/challenges the first time around but why not? Whether I meet them all or not, I still be better than when I started.

  1. Learn new skills. I still pretty new to the whole spinning yarn thing and there is so much to learn and experiment with, and refine. This means that some days I might just watch tutorials and read articles. Then, the next day is all practice, practice, practice.
  2. Try new fibers. Till now, I’ve been spinning with nondescript wool, Bluefaced Leicester, and a little bit of Polworth. In my stash, there’s Corriedale, Faulkland, Alpaca Blends, and Silk Mawatas. It’s time to branch out.
  3. Expand my toolset. I’ve got a few heavier spindles, a niddy-noddy, a knitted plying ball, and a few dowels I’m using as bobbins. Turns out, I’m actually serious about this whole spinning thing,  so it’s time for a few more tools - a WPI gauge and a lighter spindle, for example. Any suggestions?
  4. Understand? Good. Play! I’ve spun a lot of the past few months and I’m light years ahead of where I was in March but I’m still afraid to pull out the good, hand dyed stuff because I might mess it up. Time to nip that in the bud, pull out the good stuff, and make some yarn.

How To Ply Yarn

...or Process Part 5 of Spinning Yarn on a Spindle. Part 1. Part 2. Part 3. Part 4.

| - | - | - | - |

After how much time it took my hands to learn how to draft fiber and flick a spindle, plying yarn seemed like such a simple thing. Put two or more singles together (or one single that’s been doubled or tripled) and spin them together counter-clockwise to make one intertwined strand. That’s it. The only thing I had to think about was how much twist to add. It seemed so much simpler than spinning up the singles but I knew there was more to it. At the same, I wasn’t worried about the details because I knew I’d figure them out eventually.

So, if you’re worried about ruining your singles, just jump in and go for it. As long as you ply opposite the singles and add enough twist, you’re golden.  

A spindle, 2-ply plying ball, and a bowl for wrangling.

Tie the singles together in a knot. If you’re using a top whorl spindle, slip the hook between the plies. For a bottom whorl, tie the singles around the shaft.

Flick the spindle counter-clockwise to add twist since singles are typically spun clockwise.

Once there’s at least an arm’s length of yarn and you’re happy with the amount of twist, wrap the yarn around the shaft. Bring the yarn back around to the hook or tie a slip knot and leave just yarn enough free to get the spindle going again. 

Repeat until you have one very full spindle and all the singles are plied. Woot!

To get your new yarn off the spindle and into a skein, you can wrap the yarn around your arm from palm to wrist or use a niddy noddy. Add a few ties around the skein to keep it from tangling.

Wash the skein to set the twist (I like Eucalan for this part) and hang it up to dry after a few good thwacks.  In this case, a thwack is pulling at both ends of the skein to make the fibers bloom and even out the twist. You don’t have to be about it gentle either. 

Ready to knit.

Now that I’ve gotten a little more practice under my belt, I’m beginning to see more of the nuances of plying. I’m refining my technique and experimenting with different methods (chain plying, anyone?). I’m making yarn that I love and can’t wait to knit with once I find that perfect pattern. This never would have happened I hadn’t thrown caution to the wind, and just tried in the first place. The first skein isn’t perfect but it’s still yarn and a first step.

Afternoon Swim, Afternoon Snack

This is Bob. He’s going for a swim in his brand new blue bikini.

This is not Bob’s lucky day.

This is Meg. She’s in the mood for an afternoon snack. 

Meg, meet Bob.

He’s tasty! Now Meg’s off to watch whales before dinner.

| - | - | - | - |

I made Bob and Meg for my Dad as a Father’s Day gift. The pair was a big hit and Dad’s reaction definitely kept him on the knit-worthy list.

Bob is a modified Groom from Teeny-Tiny Mochimochi by Anna Hrachovec. He’s knit from Knit Pick Palette and Paton’s Kroy Sock on 2.25 mm needles. I stuffed him entirely with his own yarn ends and a magnet. Bob’s magnet is in his back and Meg’s magnet is in her mouth. It’s never really isn’t Bob’s day since he won’t escape. Ever. The magnets make sure he’s always sucked into Meg’s mouth.

Meg is Clare Doornbos’ Shark. She’s knit from Knit Picks Wool of the Andes on 3.5 mm needles, has 10 mm safety eyes, and is stuffed with poly-fill. The pattern was very well written and I especially like how she solved pectoral fin placement. No guess work required. Full mods and details @Ravelry

The part of the sea is played by my own 3-ply handspun.

I had no idea how Bob’s size would compare to Meg’s when I first cast on. Turns out that Bob fits perfectly in Meg’s mouth and I couldn’t have planned it better if I tried. So, if we assume that Bob is 6’ tall, then Meg isn’t a Great White Shark (20’). She’s a C. Megalodon which current estimates put at 52’ long. Scale is everything. Now I want to knit a sailboat for Meg to chomp on. 

The Sweet Tomato Heel

I could wax poetic about how I started these socks last December when it was cold and when I needed purse knitting. I could write about how much I wanted to knit this pattern and have a new pair of socks. I could write about how fun it was to knit them despite having to slog through the cuffs. I could write all of those things but the main reason I knit these socks was to knit another set of Cat Bordhi’s Sweet Tomato Heels.

Pattern: modified Willamette Socks by Sara Morris

Yarn: Cascade Heritage Paints - 9872

Needle: US 2.25 mm

December 14, 2011 - May 16, 2012

@Ravelry

Cat Bordhi, I like the way you think. 

The process for knitting this short row heel isn’t hidden away in a pattern and you don’t have to be able to divine the mysteries of the universe to figure it out. The Quick Start Guide at the beginning of the book gives you everything needed to knit a a pair of socks this way and even a bit of troubleshooting help before diving into the patterns. Later in the ebook, she works out how to knit a padded, reinforced heel using this method. There are numerous diagrams, clear step-by-step instructions, and lots of helpful tips.  For example, instead of wrapping and turning when working the short rows, she uses a lifted increase to close the gap between stitches. Two versions of short row heels that can be knit from the cuff or the toe and numerous patterns aside, just that epiphany was worth the cost of this ebook to me. This video shows the technique off nicely. 

Reinforced heel flaps with a short row turn are still my favorite heel, but the Sweet Tomato is such a close second. It’s relatively easy to knit, uses less yarn, and - best of all - fits so well. The question of fit was the main reason I stayed away from short row heels to begin with but the tomato is so easy to modify on a foot by foot basis.

The first few pairs of Sweet Tomatoes that I knit taught me a few things. The first pair I made for myself and got the method in my brain. The second pair I knit for the Bearded One’s giant feet and they fit him just as well. The third pair - this pair - I knit in a fingering weight and decided to add a mini gusset to get a little more room in the gusset. The gusset made the fit all the better and saved the instep pattern from disruption since the heel is knit over more than 50% of the stitches. I also needed a fourth wedge instead of the three I needed in worsted weight socks. Such an easy change to make. 

I think I’ll be using this heel for a long time and for many, many pairs of socks.