
Kumihimo Tutorial: Part 1
/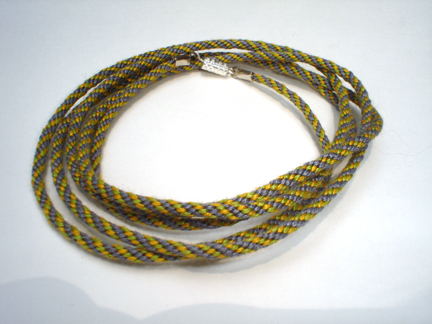
Seriously, I can’t stop wearing this thing. Everyday this past 2 weeks, I’ve found a way to wear it and make it work with my outfits. It’s so fun and practical that I can’t let it go. Now, if only I could come up with a name for it. Capital letters and “The” should definitely be involved. Lack of a proper name aside, I must make more. Kumihimo manages to keep my hands busy and give me something crafty to do when knitting isn’t an option but there’s still TV to watch. Rigorous testing has proved it to be a great companion to Buffy the Vampire Slayer.
I’ve fallen hard for Kumihimo and I want to share the love. So, I’m documenting the process with a tutorial and having a little giveaway. Included is almost everything you’ll need to make your own “thing.” The pliers, glue, and scrap thread are up to you. I’ve got two kits. So, just leave a comment - maybe suggest a name and which colors you want- and some way to contact you (email, ravelry ID) by July 30th.
There’s more than one type of braid. They can be round, flat, square, or hollow and, traditionally, they’re made on a round stand or marudai. In this post I’m going to focus on a particular kind of braid, an 8 strand round braid, that is made on a modern equivalent to the marudai - a foam disc. Let’s begin!
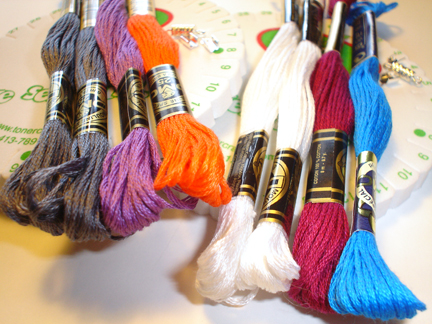
Supplies:
- A kumihimo loom
- 4 skeins embroidery floss (2 the same color)
- Scrap thread
- Yarn bobbins or clothes pins
- Scissors
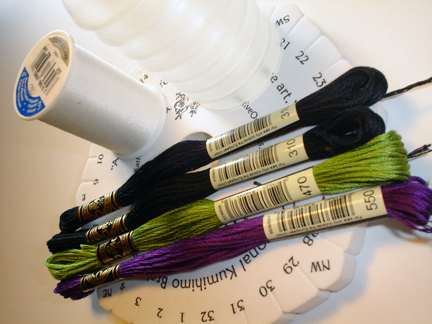
You won’t need these until after you’re finished braiding:
- Super glue
- 8mm crimps
- Small barrel clasp
- Pliers
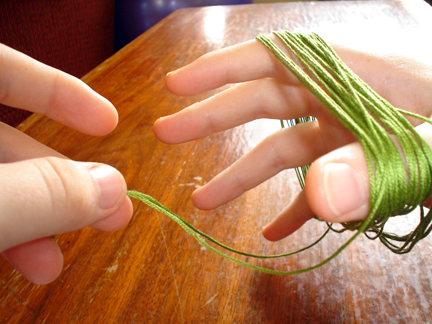
The first thing to do is prepping your floss for braiding. You won’t a full skein for this project just most of one. Open the skein and make sure the ends are free to grab later. Stretch it around your fingers like yarn on a swift and pull both of the ends at the same time. The floss should come off your fingers tangle free and and nicely doubled.
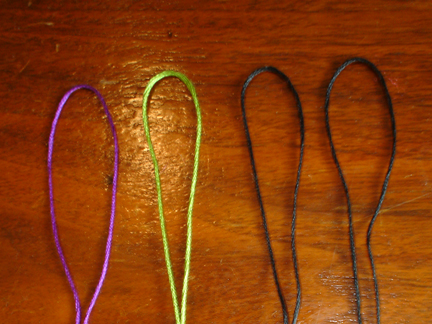
Cut a nice long piece of thread about 18” and pull it through the loops. Tie the thread in a double knot and you’re ready for the next step - winding.

Even doubled, the floss is way too long to braid without tangling. Separate the floss into 8 strands and wrap them around the bobbins or the clothes pins. As long as you tuck the working end of the floss into the tip of the clothes pin when you’re finished winding, it should hold itself in place while you braid.
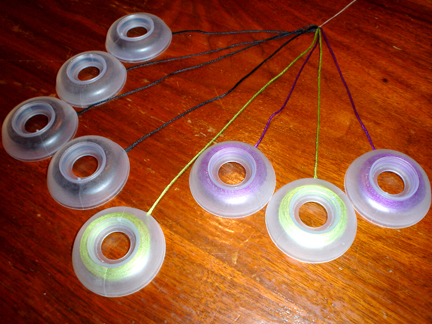
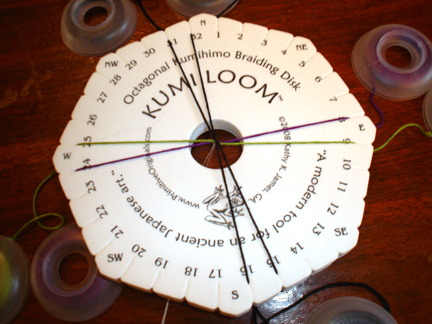
Kumihimo looms and marudai are set up around the 4 cardinal points with numbers marking the individual slots. Pull the scrap thread through the center hole and place the 4 same colored strands (black in this case) on the North South Axis (slots 32:1 and 16:17). Both contrast colors go East to West (8:24 and 9:25).
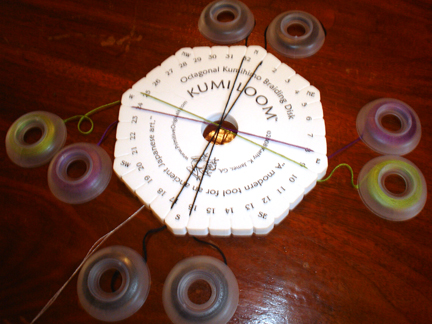
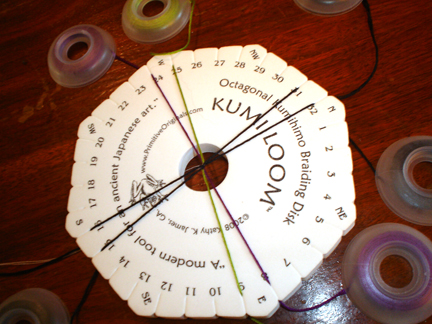
Now that the floss has been doubled, tied, wound, and arranged on the loom, the hard part is over and you’re ready to braid. In one hand, hold the loom and scrap thread from underneath. Make sure to keep a snug hold on the scrap thread since it’ll help keep the loom in your hand and make it easier to start working. With North at the top, move the North right strand (1) next to right South (15). There will be one strand at North and three at South.
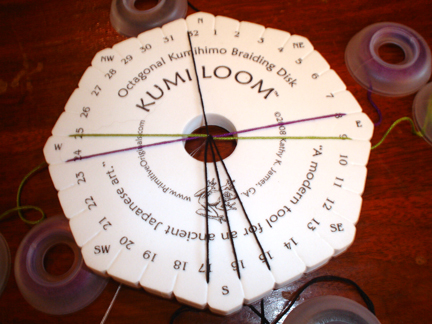
Next, move left South (17) to left North (31). The strands should be be at two and two again.
Rotate the loom clockwise or you can turn counter-clockwise. Just keep the direction consistent.
Just keep repeating these steps - Right down. Left up. Rotate. - until the braid is as long as you want it. For me, the magic number for a chocker/necklace/bracelet/anklet thing is 45”. To figure out your length, take a piece of string and wear it around your neck (or wrist or ankle) exactly how you want to wear the finished braid. Cut the string at that length and use it to measure as you work.
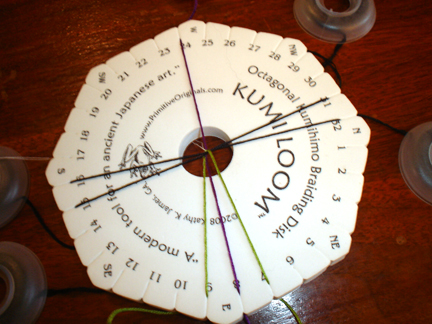
Unless you’re making a much shorter braid, you probably won’t finish in one sitting. So you know where to begin when you pick up the loom again, move the right strand down and stop. When you’re ready to start again, move the left strand up and keep going as usual.
Good luck, have fun, and I’ll catch up with you next week with how to finish it off and add a handy clasp. Let’s see how many episodes of Buffy I can watch in the mean time. Hope you’re having a nice weekend!

